Use the “New Controller” button to add a new entry in the registry or alternatively click on the “Find Ethernet
Controller” to have the software search for controllers connected to the network. When adding a new controller,
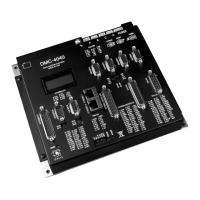
choose DMC-40x0 as the controller type. Enter the IP address obtained from your system administrator. Select the
button corresponding to the UDP or TCP protocol in which you wish to communicate with the controller. If the IP
address has not been already assigned to the controller, click on ASSIGN IP ADDRESS.
ASSIGN IP ADDRESS will check the controllers that are linked to the network to see which ones do not have an
IP address. The program will then ask you whether you would like to assign the IP address you entered to the
controller with the specified serial number. Click on YES to assign it, NO to move to next controller, or CANCEL
to not save the changes. If there are no controllers on the network that do not have an IP address assigned, the
program will state this.
When done registering, click on OK. If you do not wish to save the changes, click on CANCEL.
Once the controller has been registered, select the correct controller from the list and click on OK. If the software
successfully established communications with the controller, the registry entry will be displayed at the bottom of the
screen in the Status window.
NOTE: The controller must be registered via an Ethernet connection.
Communicating through the Main Serial Communications Port
Connect the DMC-40x0 MAIN serial port to your computer via the Galil CABLE-9PIN-D (RS-232 Cable). This is
a straight through serial cable – NOT a NULL modem.
Using GalilTools Software for Windows
Registering controllers in the Windows registry is no longer required when using the GalilTools software package.
A simple connection dialog box appears when the software is opened that shows all available controllers.
The serial ports are listed as COMn ‘communication speed’. (ex COM1 115200). The default serial communication
speed on the DMC-40x0 is 115200Bps.
For more information on establishing communication to the controller via the GalilTools software, see the
GalilTools user manual.
http://www.galilmc.com/support/manuals/galiltools/index.html
Using DMC-SmartTerminal or WSDK Software for Windows
NOTE: For new applications, Galil recommends using the GalilTools software package.
In order for the windows software to communicate with a Galil controller, the controller must be registered in the
Windows Registry. To register a controller, you must specify the model of the controller, the communication
parameters, and other information. The registry is accessed through the Galil software under the “File” menu in
WSDK or under the “Tools” menu in the Galil Smart Terminal.
Use the “New Controller” button to add a new entry to the Registry. You will need to supply the Galil Controller
model (eg: DMC-40x0). Pressing the down arrow to the right of this field will reveal a menu of valid controller
types. You then need to choose serial or Ethernet connection. The registry information will show a default Comm.
Port of 1 and a default Comm. Speed of 115200 appears. This information can be changed as necessary to reflect
the computers Comm. Port and the baud rate set by the jumpers found on the communications board. The registry
entry also displays timeout and delay information. These are advanced parameters which should only be modified
by advanced users (see software documentation for more information).
Once you have set the appropriate Registry information for your controller, Select OK and close the registry
window. You will now be able to communicate with the controller.
To establish communication to the controller, open up the Terminal and hit the “Enter” key. You should receive a
colon prompt. Communicating with the controller is described in later sections.
DMC-40x0 User Manual Chapter 2 Getting Started • 16