Use e Maintenance ENGLISH
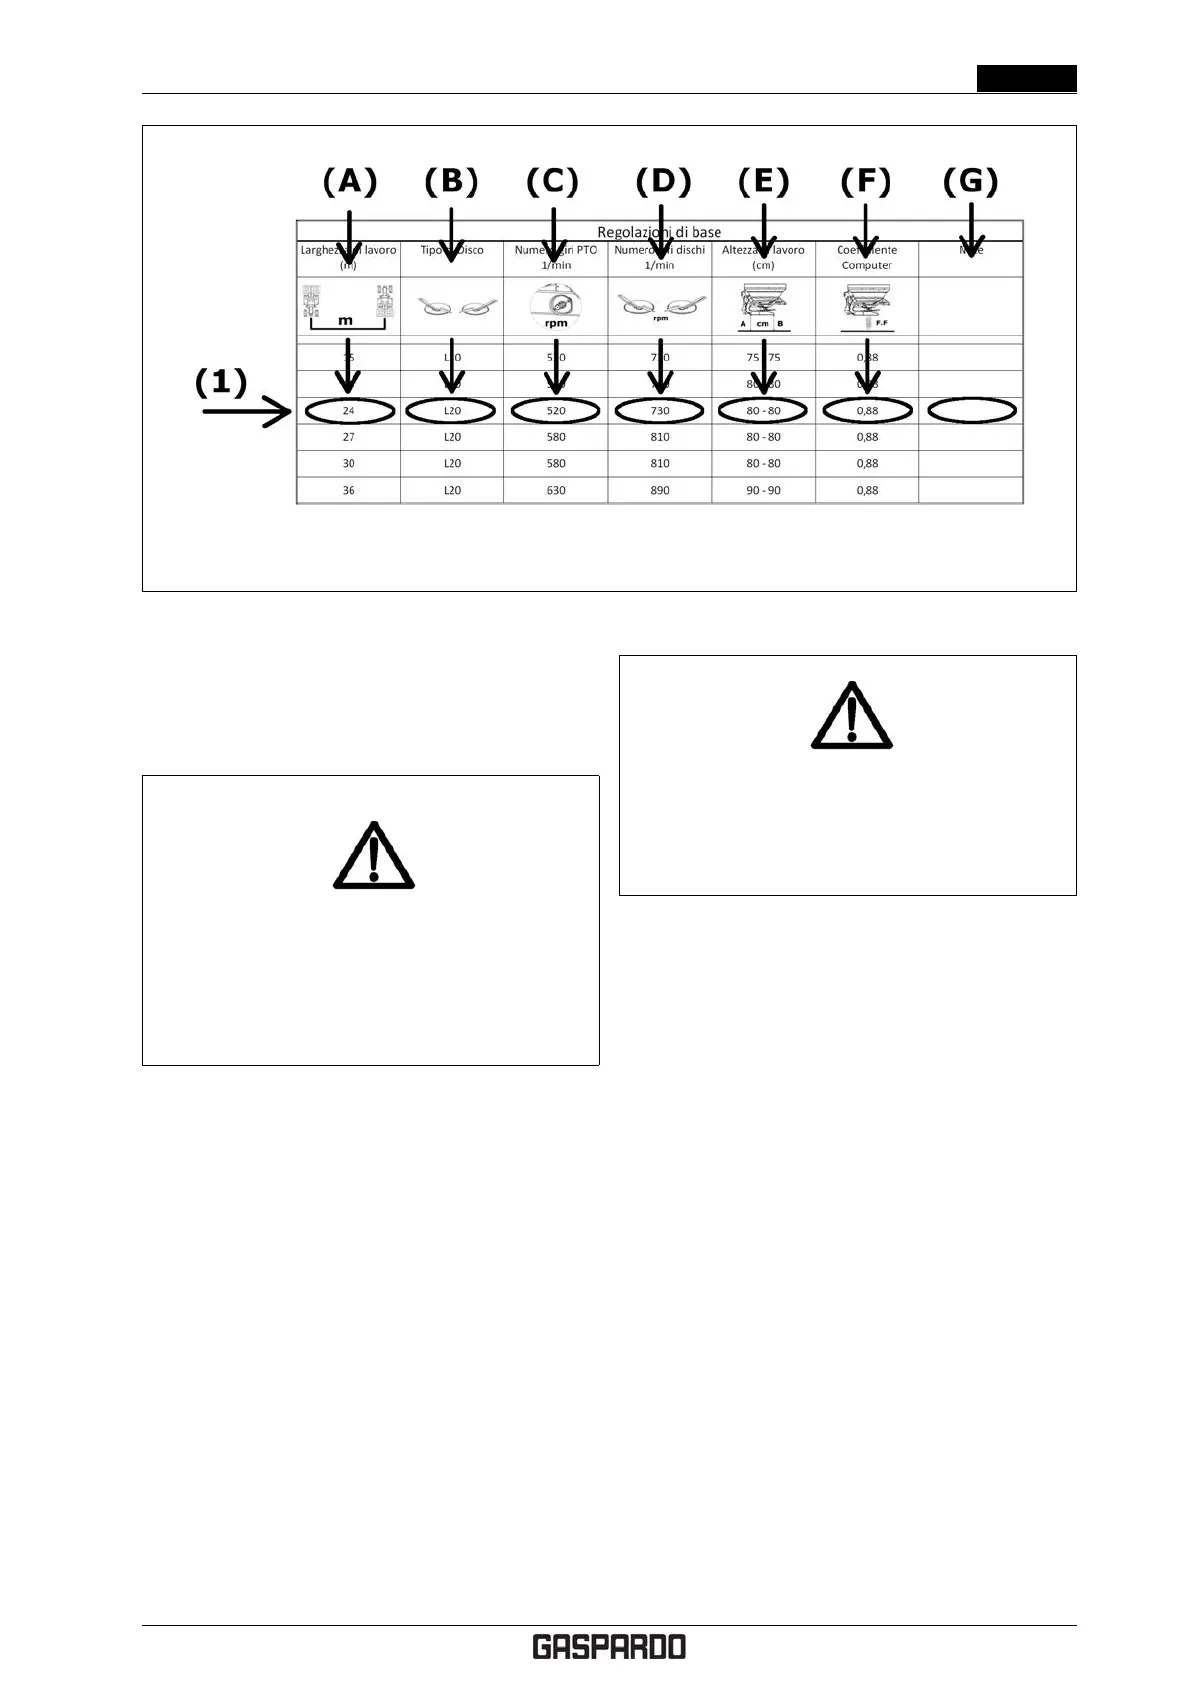
Figure 4.14: Spreading table: basic adjustments
3. Use the tractor hoist and adjust the upper third point
tie rod until you reach the height from the ground
shown in the table.
DANGER!
When adjusting the upper third point tie rod, DO
NOT exceed the maximum allowed extension.
The machine could detach and fall to the ground.
Choosing the spreading discs
To choose the spreading discs, proceed as follows.
1. Check the spreading tables for the fertiliser to spread.
If the fertiliser you are using is not shown in the ta-
bles, consult the spreading table for a fertiliser with
similar chemical and physical features (granulometry,
specific weight) for the preliminary adjustments.
2. Choose the working width from column (A) in figure
4.14 then find the type of disc to assemble on the
machine (B).
3. Follow the instructions in § 4.7.3 on page 30 to re-
place the spreading discs.
Adjusting the drop point on the disc
DANGER!
All operations must be done exclusively with the
tractor off, P.T.O. disengaged, parked with
parking brake and with the key removed.
To complete working height adjustment, you must adjust
the fertiliser drop point on the spreading disc. For the
selected fertiliser, refer to the "Shutter Position and Drop
Point on Disc" table. Then, following the example shown
in 4.15, proceed as follows.
1. Let’s suppose, for example, that we want to spread
a dose of 250 kg/ha for a working width of 24m at a
speed of 12 km/h.
2. Identify the rows regarding a 24m working width (A)
24m.
3. Intersect the 12km/h "Working speed" row (B) with
the 250 kg/ha "Dose" column (C) .
4. Of the two values shown in the box, the bottom value
(D) (19) refers to the optimal drop point to adjust
spreading in the selected working conditions. The top
value (398) refers to the position of the dosing shut-
ter and is only used for machines that do not have
electronic dosing control.
To adjust the fertiliser drop point on the disc, go to the
back of the fertiliser spreader and use the adjustment lever
(1) see figure 4.16 as follows:
1. loosen the locking handwheel (2)
2. turn the adjustment lever (1) until the indicator (3) is
positioned to the desired value
3. tighten the locking handwheel.
Cod. F07011577 EN - 29