3.2.3.3 Service
3.2.3.3.1 Calibration
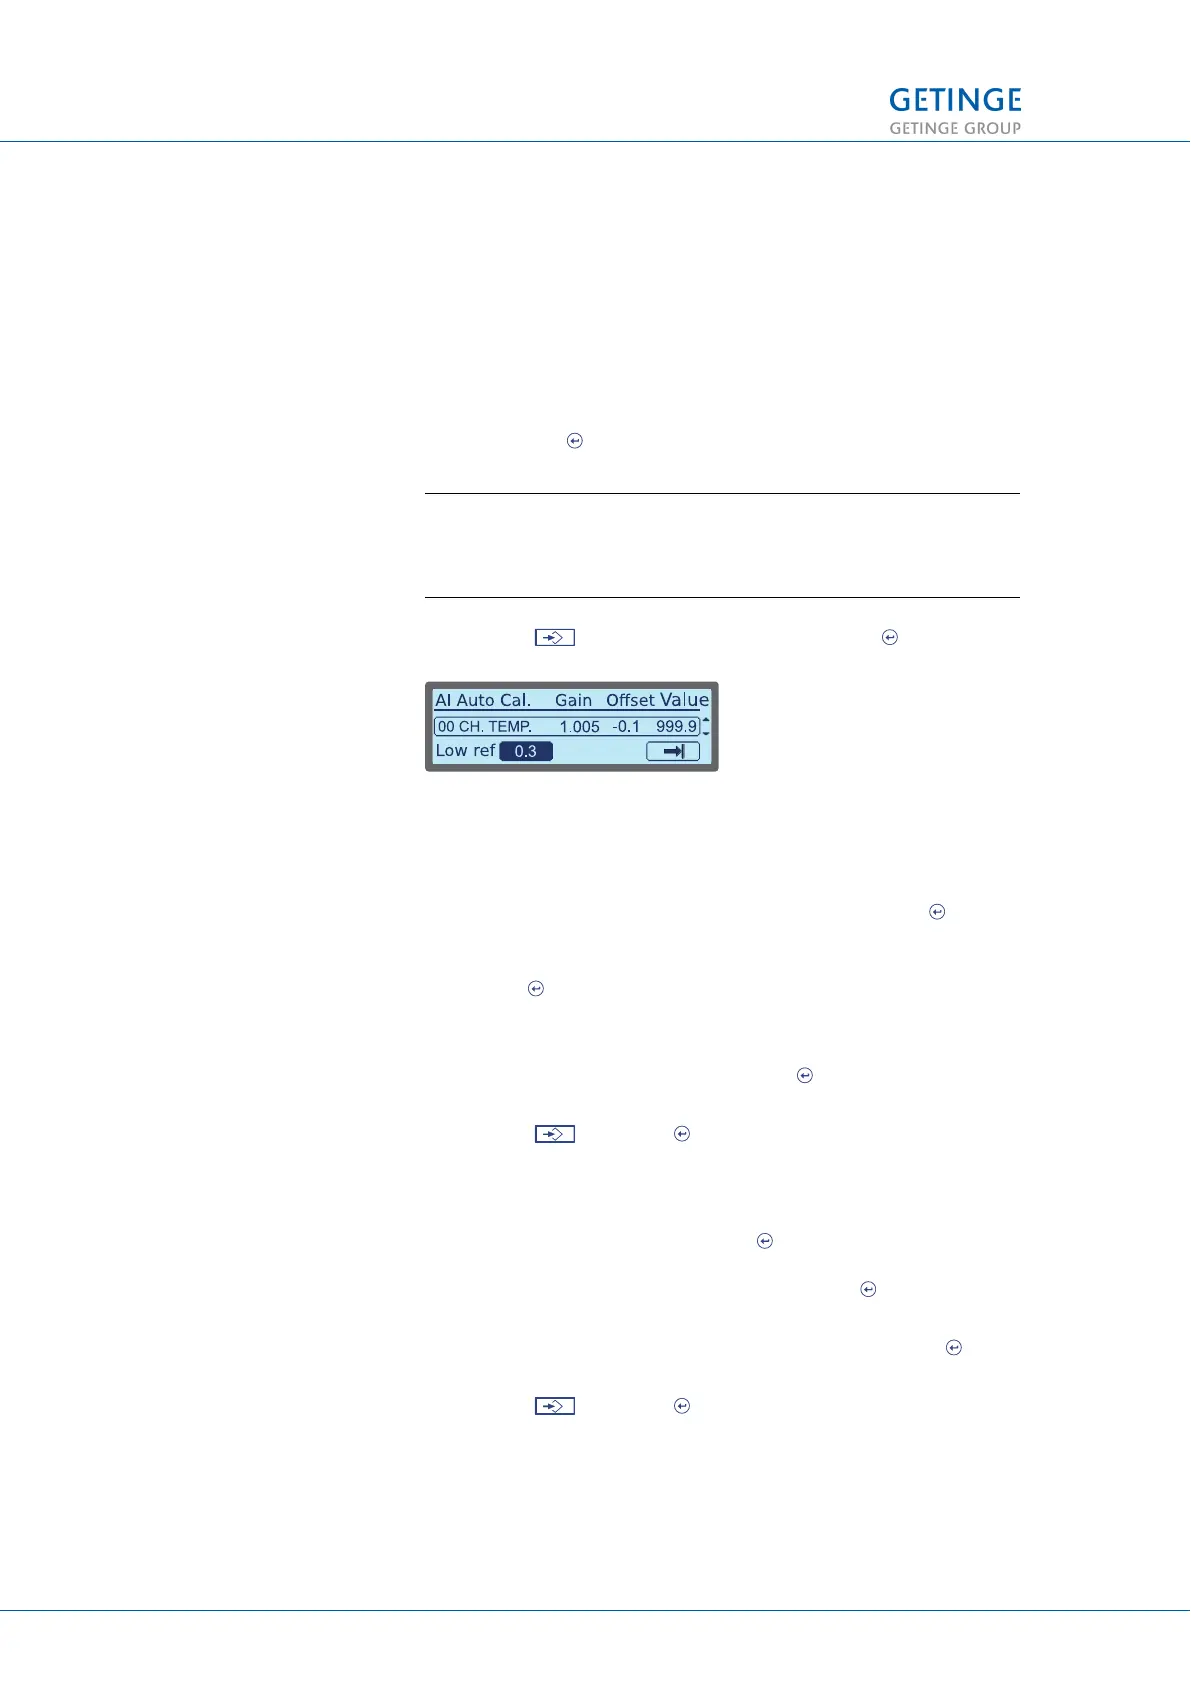
3.2.3.3.1.1 Analog Input Automatic
A list of analog inputs that can be calibrated is displayed. To
calibrate:
1. Select the status field for the input that you want to calibrate
and press to change the status.
Note: Only one type of input can have “Yes” status, i.e., if
a temperature sensor is selected, then no pressure sensor
can be selected, and vice versa.
2. Select at the bottom of the list and press to continue.
2. The display will show a window (providing the option of
editing the low reference value) and also a scroll list of
previously selected analog inputs and their calibration values.
To browse through the list, select the list and press . You
can now browse the list with the Up and Down keys.
In order to edit the low reference value, select the value and
press .
3. A window is displayed with an editable field for the low
reference value.
Edit by using the cursor keys. Press to save the low value.
The previous window is displayed again.
4. Select and press to continue.
5. A window is displayed with an editable field for the low
reference value, along with a scroll list of previously selected
analog inputs and their calibration values. To browse through
the list, select the list and press . You can now browse the
list with the Up and Down keys. In order to edit the high
reference value, select the value and press .
6. A window is displayed with an editable field for the high
reference value. Edit by using the cursor keys. Press to
save the low value. The previous window is displayed again.
7. Select
and press to continue.
8. A popup window is displayed when it is possible to print out a
calibration report.
3 MENU TREE
32 (128) TECHNICAL MANUAL GETINGE WD15 CLARO
<Doc_TEC><Doc_6001396902><Rev.I><Lang_en>