Chapter 3 System Installation with the Content-
Server 3000 Series
© 2017 Harmonic Inc. All rights reserved. 86 Harmonic MediaGrid Release 4.1
Connecting the Harmonic MediaGrid 3000 System Components
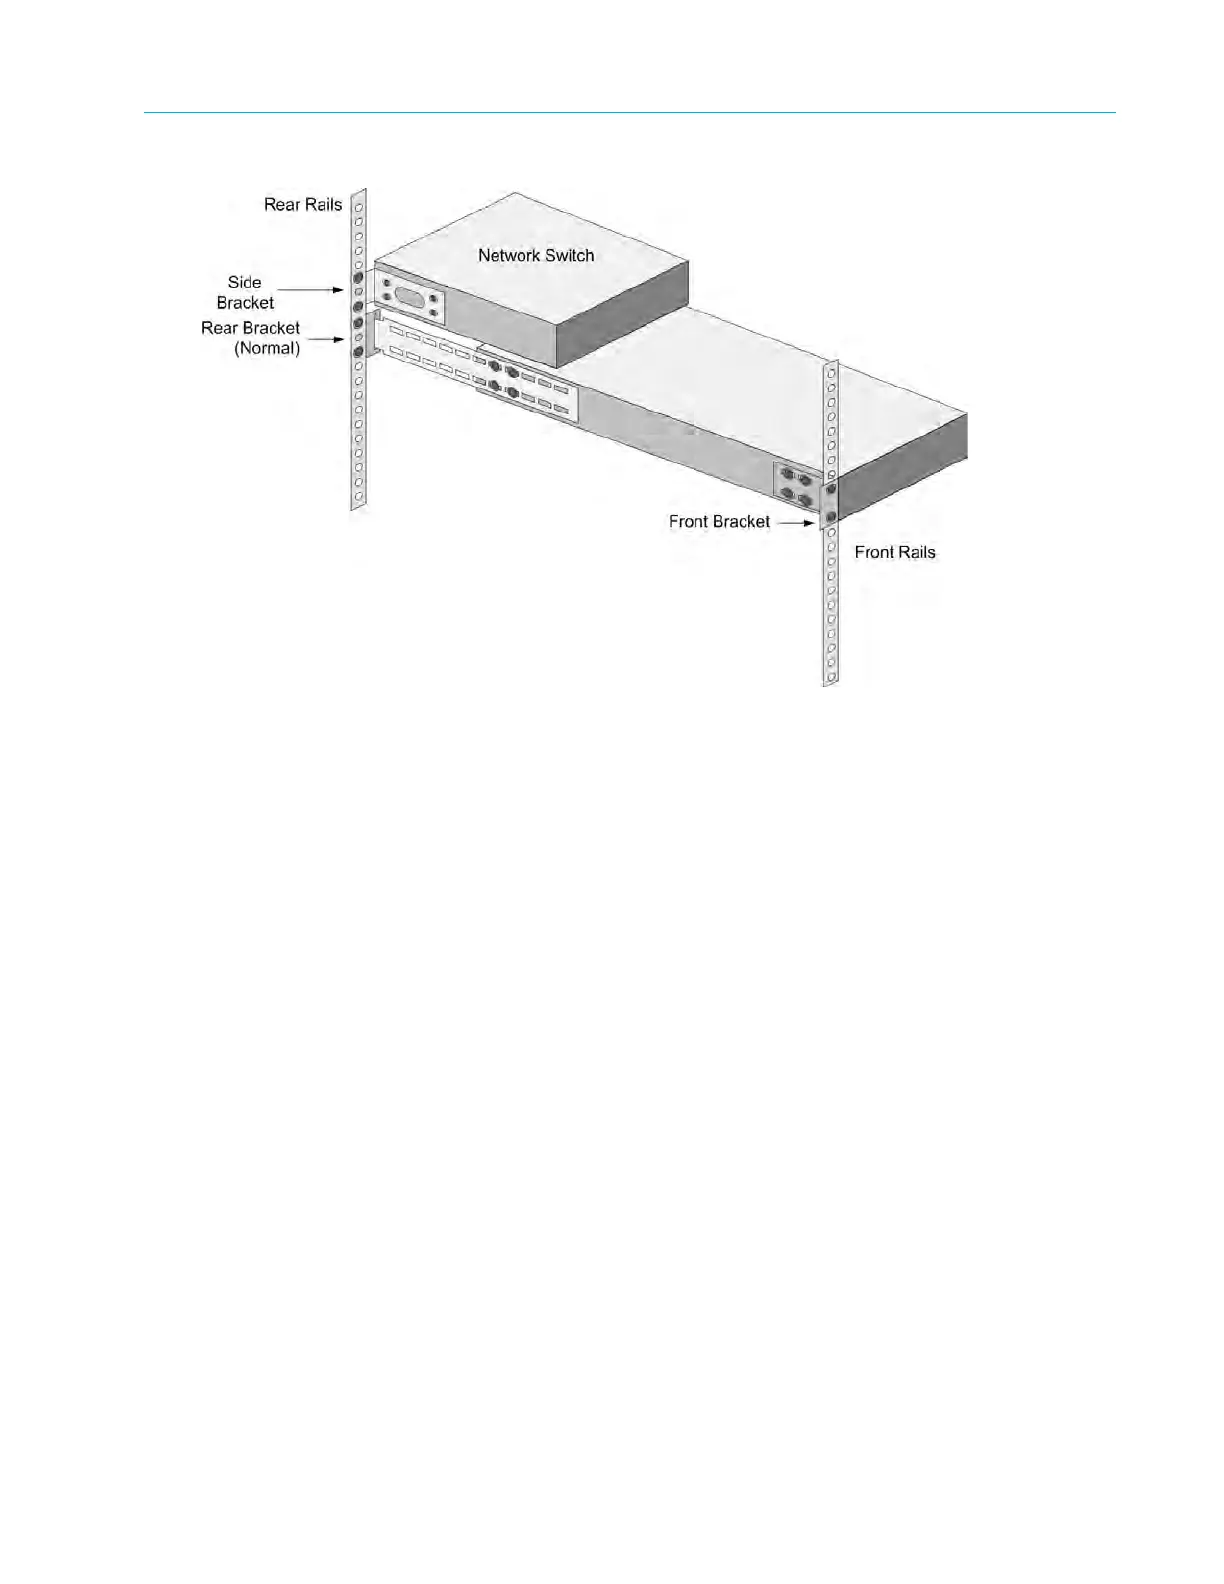
Figure 3–17: Network Switch Bracket and Rail Assembly
4. With the side brackets attached to the switch, attach the side brackets to the cabinet’s rear
rails.
5. R
epeat the previous steps to install the remaining network switches.
Refer to the network switch product manuals provided with the Harmonic MediaGrid system for
more information about rack mounting the switches.
Connecting the Harmonic MediaGrid 3000 System Components
The following section provides instructions for connecting the Harmonic MediaGrid storage
system components. The network cable colors used in the following sections are provided for
example only. Other colors can be used instead as long as the connections correspond to the
blue, white, and red network cables shown.
Connecting System Components: Overview
1. Connect Harmonic MediaGrid system components to the network switches in the following
order:
a. ContentDirectors
Refer to Connecting the ContentDirectors to a Network Switch. Or, if configuring a stretch
cluster, refer to Connecting ContentDirectors in a Stretch Cluster.
b. SystemManager
Refer to Connecting the SystemManager to the Network Switch.
c. ContentServers
Refer to Connecting the ContentServer 3000 to Network Switches.
d. ContentBridges (optional component)