Do you have a question about the HBM CANHEAD and is the answer not in the manual?
Defines the intended purpose and usage guidelines for the CANHEAD module, emphasizing safety and adherence to regulations.
Outlines environmental and site-specific conditions required for safe and proper operation of the CANHEAD system.
Details risks of improper installation/operation by untrained personnel, stressing manual comprehension and safety.
Provides instructions for cleaning the CANHEAD system, emphasizing disconnection and appropriate materials.
Discusses potential residual dangers in measurement technology and the need for planners/operators to minimize risks.
Specifies rules for installing leads to prevent EMI and ensure proper device functionality.
Prohibits unauthorized modifications, including repairs, and mandates the use of original HBM parts.
Defines qualified personnel and emphasizes device installation/use strictly according to specifications and safety regulations.
Continues the definition of qualified personnel, outlining requirements for installation and operation staff.
Explains the CE mark for EC directive compliance and provides a link for the declaration of conformity.
Details regulations for environmental protection and raw material recycling, requiring separate disposal of old equipment.
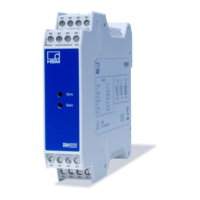
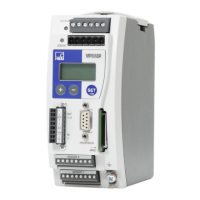
Lists the amplifier module part number and its function.
Details available base modules, their specifications, and compatibility with different strain gage configurations.
Outlines the items included in the scope of supply for the CANHEAD system.
Lists optional accessories for the CANHEAD system, such as cables, connectors, and mounting kits.
Describes the base module's function for wiring connection cables and its compatibility with various resistance values.
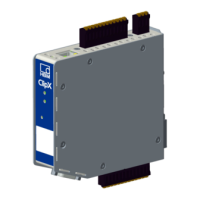
Explains the amplifier module's role for high-sensitivity measurements and its modular design.
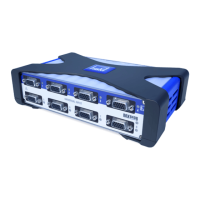
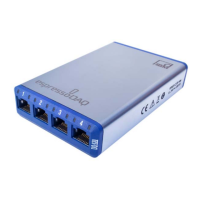
Introduces CANHEADdirect as a USB interface for connecting CANHEAD modules to a PC, detailing capabilities and limitations.
Provides a critical warning about electrostatic discharge and its potential impact on measurement accuracy.
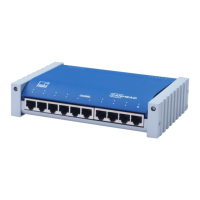
Explains configuring CANHEAD modules with MGCplus, including connection diagrams and software interaction.
Details the connection setup for CANHEAD modules with the MGCplus system, including specific connector types.
Describes configuring CANHEAD modules via CANHEADdirect USB interface, including power supply and software.
Advises on preferred CAN bus installation as a line bus, recommending T-connectors.
Provides information and references for detailed Device Net specifications, including bus topology and installation guidelines.
Specifies maximum CAN bus line lengths for different baud rates and drop line limitations.
Explains how to lock/unlock the base module housing for mechanical protection and EMC compliance.
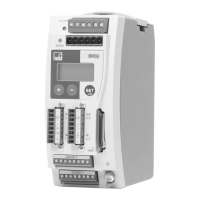
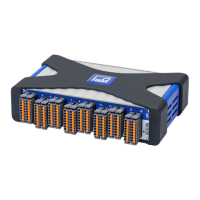
Details CB1014/CB1015 base modules, their pin assignments, and connection terminals for strain gages.
Continues Base module (CB1014/CB1015) description with details on temperature compensation.
Illustrates base module connections for strain gages and CAN bus, highlighting data storage capabilities.
Explains the incorporated shunt resistor, how to select internal/external shunts, and calculation formulas.
Describes CB1016 base module for quarter bridges in four-wire config and RJ45 connectors.
Details CB1010 base module for half/full bridges and DC sources, noting no temp compensation or bridge detuning.
Introduces CA1030 amplifier module as universal, compatible with all base modules, connected via 64-pin VG strip.
Provides step-by-step instructions for safely removing/installing amplifier module, emphasizing de-energization.
Describes various methods for attaching base modules, including using adapters or adhesive fasteners.
Details robust aluminum housing, protection against solids, and limits regarding water ingress.
Explains eleventh channel for thermal compensation with CB1014/CH1015 modules and cable bushing options.
Provides guidance on connecting shielded cables, emphasizing proper screen connection and wire preparation.
Details connecting cables to terminal block using cable support sleeves.
Illustrates connection layout for CB1014 base module in three-wire config, showing channels and terminals.
Depicts connection diagram for CB1015 base module in four-wire config with amplifier module.
Shows pin assignments for CB1014/1015 circuits, including status LEDs and CAN bus connections.
Presents pin assignment for CB1016 base module in four-wire circuit, including RJ45 pinouts and status LEDs.
Describes connecting CB1010 base module for half/full bridges and DC sources via RJ45 sockets.
Illustrates pin assignment for CB1010 base module, showing full bridge and DC connector configurations.
Explains TEDS support in CB1010 module for transducers, enabling automatic config and immediate measurement.
Details loading TEDS data into amplifier using MGCplus display, Assistant, or catman software.
States that CANHEADdirect does not support TEDS functionality.
Lists cables needed for connecting CANHEAD modules to MGCplus or CANHEADdirect systems.
Shows pin assignments for male/female CAN connectors, with wire color and pin designation.
Explains function of green/red LEDs on CANHEAD system, indicating status and error codes.
Shows diagram of connection between MGCplus AP74 and CANHEAD modules, including termination resistors.
Discusses limits on module quantity and cable length for MGCplus connections, referring to technical datasheet.
Introduces CANHEADdirect as USB interface for connecting CANHEAD modules to PC, noting functionality and TEDS limitation.
Depicts system setup for directly connecting CANHEAD modules to PC via CANHEADdirect.
Refers to section 8.1 for details on module quantity and cable length limitations.
Outlines steps for configuring CANHEAD modules within MGCplus, including module and channel assignment.
Illustrates ML74B channel assignment configuration screen within MGCplus Assistant software.
Shows ML74B channel assignment and connected CANHEADs, highlighting assignment status.
Illustrates error scenario in ML74B config where a CANHEAD is assigned but not found on bus.
Shows another error scenario in ML74B config where an assigned CANHEAD is not found on CAN bus.
Displays CANHEAD config window detailing settings for type, serial number, firmware, name, and shunt resistance.
Explains setting up cable length correction factors using MGCplus Assistant, including manual entry and auto determination.
Describes setting up temperature compensation for CB1014/CB1015 modules using MGCplus Assistant's 'Strain gage' tab.
Guides users through installing driver for CANHEADdirect interface and setting up PCAN network.
Shows Windows welcome screen for hardware driver installation, prompting for Windows Update connection.
Guides user to select installation method for PCAN-USB Device driver, automatic or path-based.
Instructs on entering path for CANHEADdirect module driver during installation.
Confirms successful installation of driver for CANHEADdirect module.
Explains PCAN network setup is automatic after installing catman Easy/AP or running setup.exe.
Provides manual installation steps for CANHEADdirect system, including running NETCREATOR.BAT.
Outlines two methods for checking CANHEAD system functionality: SystemCheck or catman Easy/AP.
Details starting SystemCheck program and carrying out a scan to verify functionality.
Explains SystemCheck program displays info on settings, modules, and channels.
Guides on entering settings, selecting channels, and starting measurement in CANHEADdirect test program.
Provides instructions for users not using catman Easy/AP, covering system connection, driver install, and checks.
Explains increasing CANHEAD baud rate to 500 kBaud and lists upgrade requirements.
Details activating '500 kBaud' setting in MGCplus Assistant and selecting baud rate.
Provides table of max data rates at 250 kBaud and 500 kBaud for different module counts.
Discusses setting minimum CANHEADs count, its impact on max data rate, and high baud rate issues.
Introduces new CANHEAD filters in ML74B, presenting table of filters for 250/500 kBaud.
Explains achieving comparable responses between CANHEADs/ML801B by selecting filters and activating delay compensation.
Details setting delay time compensation in ML801B for different baud rates and its dependency on filter type.