Tip:
• When Boot Support is
Disabled, change to Enabled and press
Save.
• Discover Boot Target via DHCP is not available.
5. Go back to the Controller Configuration setting menu by ESC
.
Network address setting
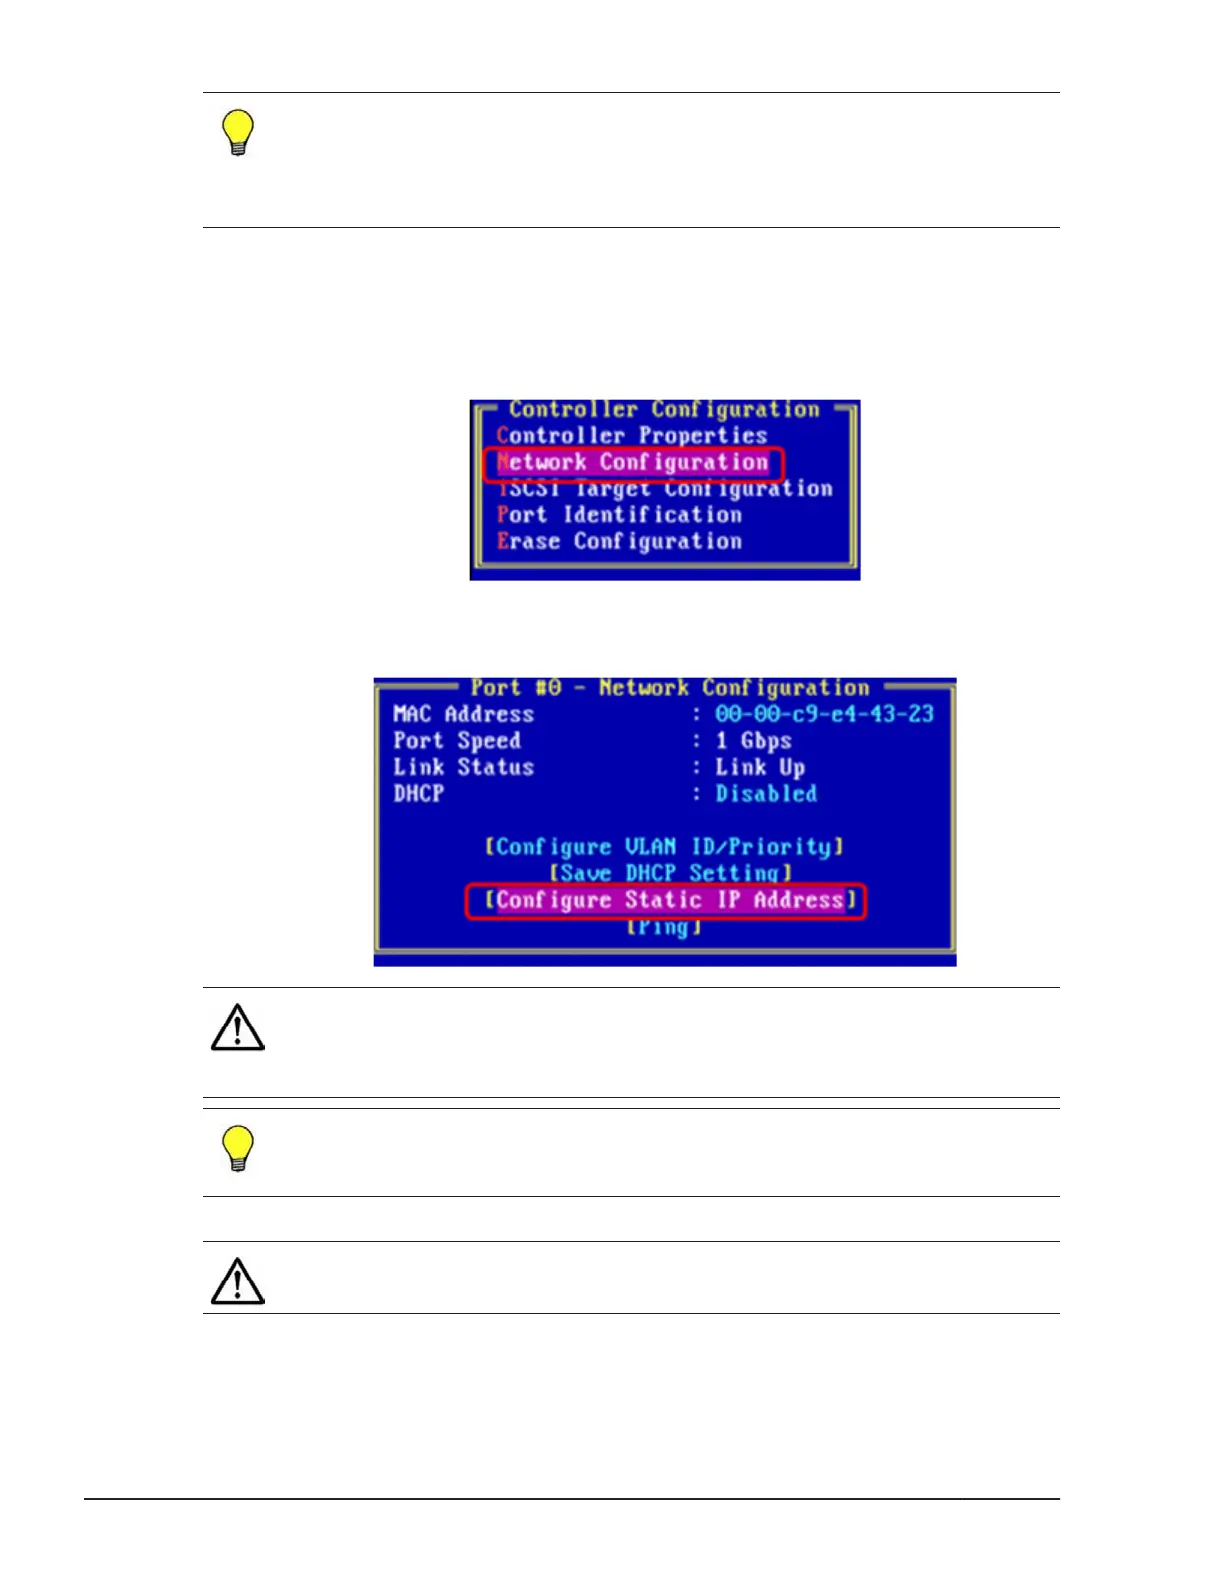
1. When the Controller Configuration setting menu is displayed, select
Network Configuration and press Enter.
2. When the Network Configuration
setting menu is displayed, confirm
that Link Status
is displayed Link Up. Select Configure Static IP
Address by Tab and press Enter.
Note:
• VLAN ID/Priority function is not available.
•
DHCP function is not available.
Tip: If Link Status
is displayed
Link Down, the CNA port does not have
links to the internal 10Gb LAN switch. Check the network configuration or
the setting of internal 10Gb LAN switch is correct or not.
3. Enter "IP Address" and "Subnet Mask".
Note: Do not set "Default Gateway".
Then, select Save and press Enter.
9-8
iSCSI settings
Hitachi Compute Blade 500 Series EFI User's Guide

 Loading...