3Dimensions System User Guide
Chapter 5: User Interface
MAN-05085-002 Revision 002 Page 57
DRAFT Preview Copy-Generated May 30, 2018
Table 15: The Procedure Screen
Item Description
1. Image Status
The view icon shows the current selected view.
Implant Present button—select when the patient has an implant.
Accept button—select to accept the image.
Reject button—select to reject the image.
Pend button—select to save the image for future review.
2. Tabs Select the Generator tab to adjust the exposure techniques for the procedure.
Select the Tools tab to review the images.
Select the Biopsy tab to create targets.
Select the Contrast tab to perform I-View™ 2D Contrast procedures.
3. Buttons
Many functions are accessed from this screen by selecting a particular button:
Add Procedure: Add a new patient.
Add View: Add a new view.
Edit View: Assign a different view to an image.
Archive/Export: Send images to an output.
Print: Print images.
Retrieve: Query the configured devices with the current patient information.
Paddle Shift: Bypass the default paddle position for the selected view.
Close Patient: Exit the patient and procedure.
Trash Can: Delete a view.
4. Thumbnails
Select a tab to show the thumbnail views or the thumbnail images for that procedure.
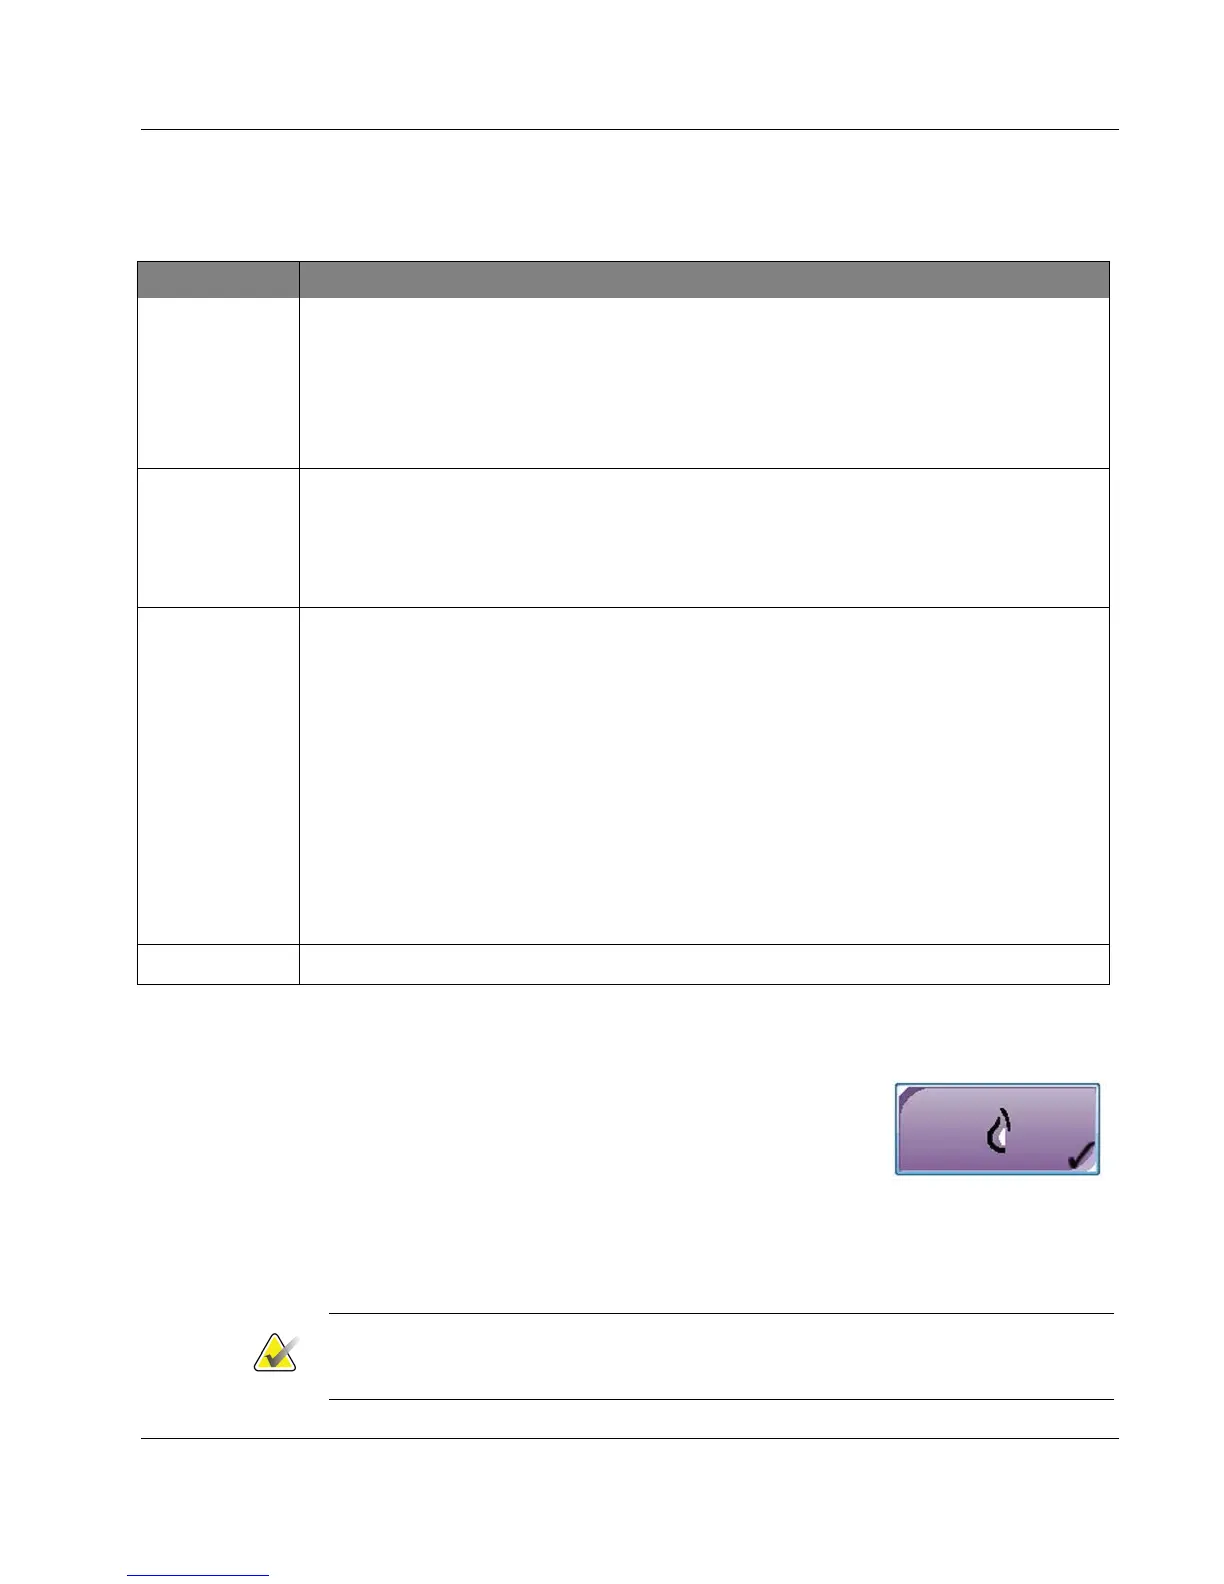
5.4.1 How to Use the Implant Present Button
The Implant Present button is above the Accept button on the
Procedure screen. This button applies special implant
processing to the implant and implant displaced views, and
changes the "Implant Present" DICOM tag in the image
header. When this button is selected, a check mark appears on
the button.
Select the Implant Present button for both implant and implant displaced views before
you acquire the image.
Note
The Implant Present button is automatically selected if any procedure tabs contain an
ID view.