3Dimensions System User Guide
Chapter 5: User Interface
MAN-05085-002 Revision 002 Page 67
DRAFT Preview Copy-Generated May 30, 2018
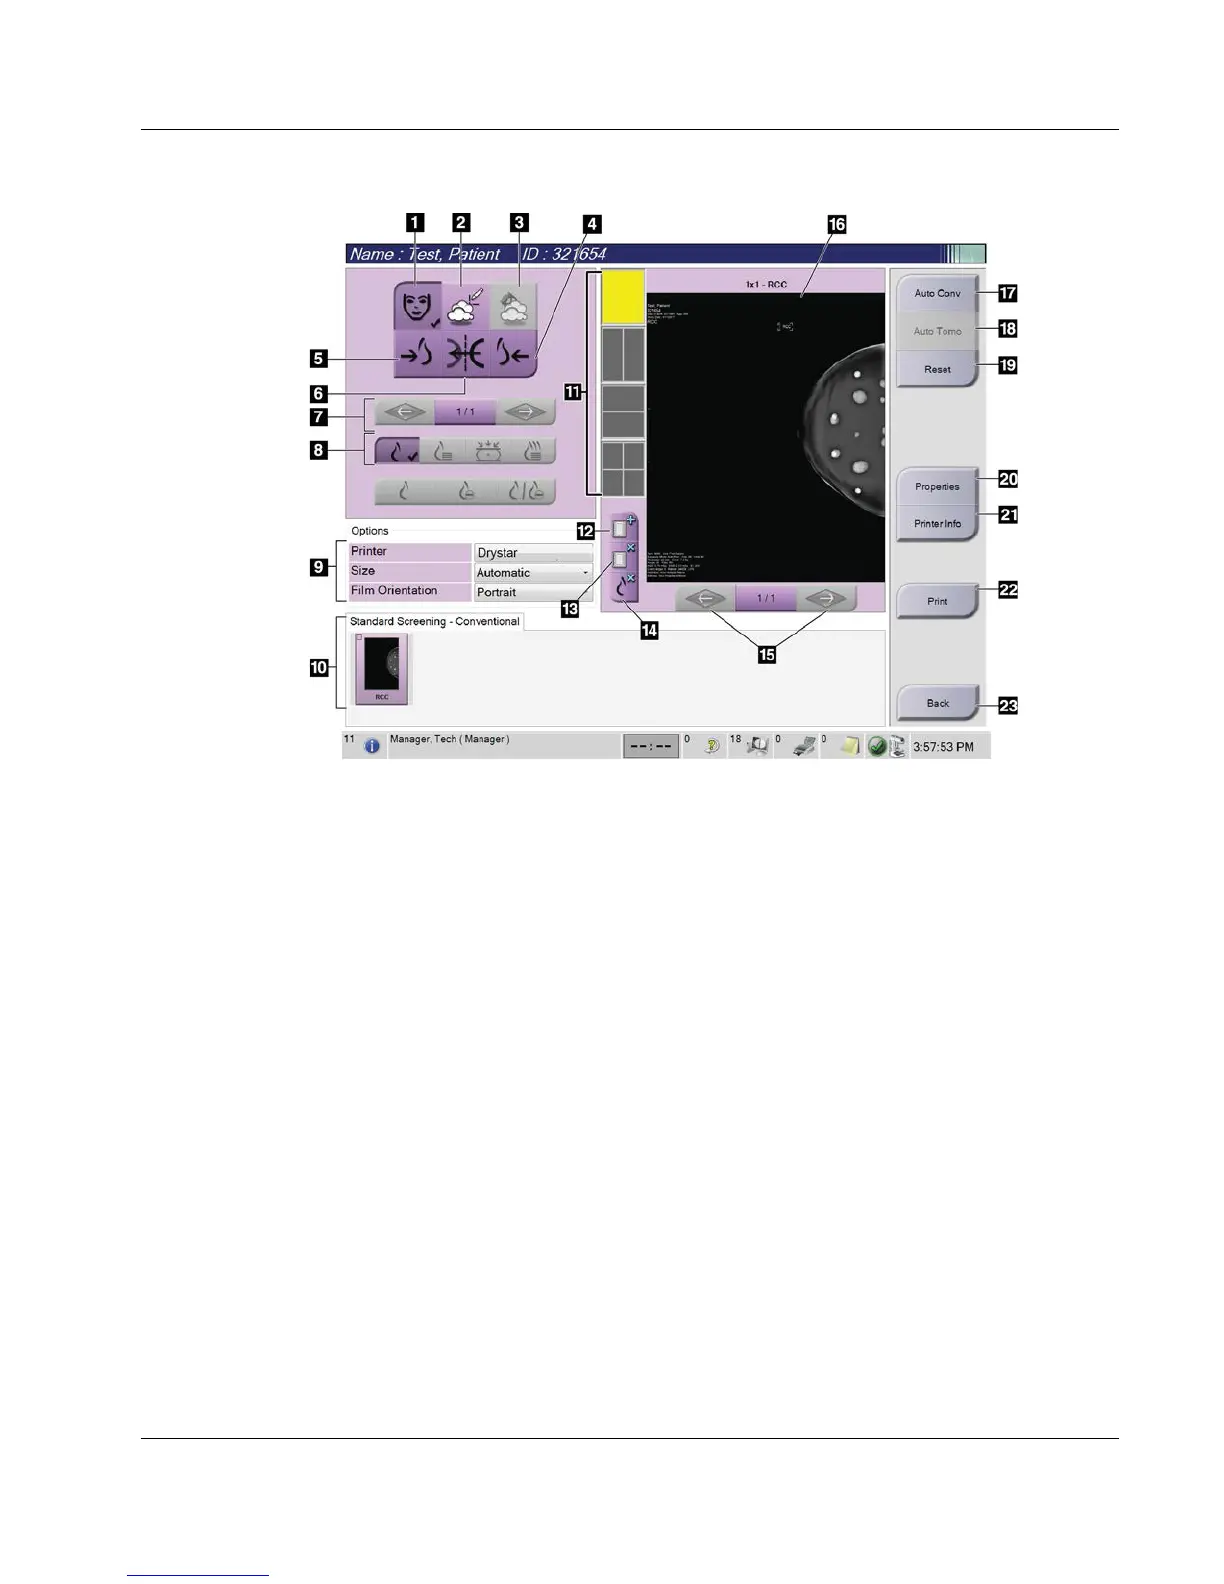
Figure 39: Print Screen
Figure Legend
1. Show or hide patient data.
2. Show or hide markings and annotations.
3. Show or hide targets in images from a biopsy.
4. Print the image from a dorsal perspective.
5. Print the image from a ventral perspective.
6. Reverse (mirror) the image.
7. Go to previous or next tomosynthesis slice or
projection (Tomosynthesis option).
8. Select Conventional, Projection, or
Reconstruction views (Tomosynthesis option).
The C-View button shows if the system is
licensed for C-View imaging.
9. Select the printer options.
10. View Thumbnail images.
11. Select the film format (number of tiles).
12. Create a new film.
13. Delete a film.
14. Delete an image from a film.
15. Step through the film pages.
16. Print preview area.
17. Print Conventional (and C-View images, if
system is licensed) with the default setup.
18. Print tomosynthesis images (slices or projections)
Tagged for Print (Tomosynthesis option).
19. Return the Print screen to default settings.
20. Open the Properties screen.
21. Show the printer IP address, AE Title, Port and
capability for True Size print.
22. Start the print process.
23. Return to the Procedure screen.