ThinPrep™ 5000 Processor with AutoLoader Operator’s Manual
6.53
USER INTERFACE
In addition to configuring the slide ID in the Configure Barcodes settings, the laser-etched label must
be designed in the Design Label setting.
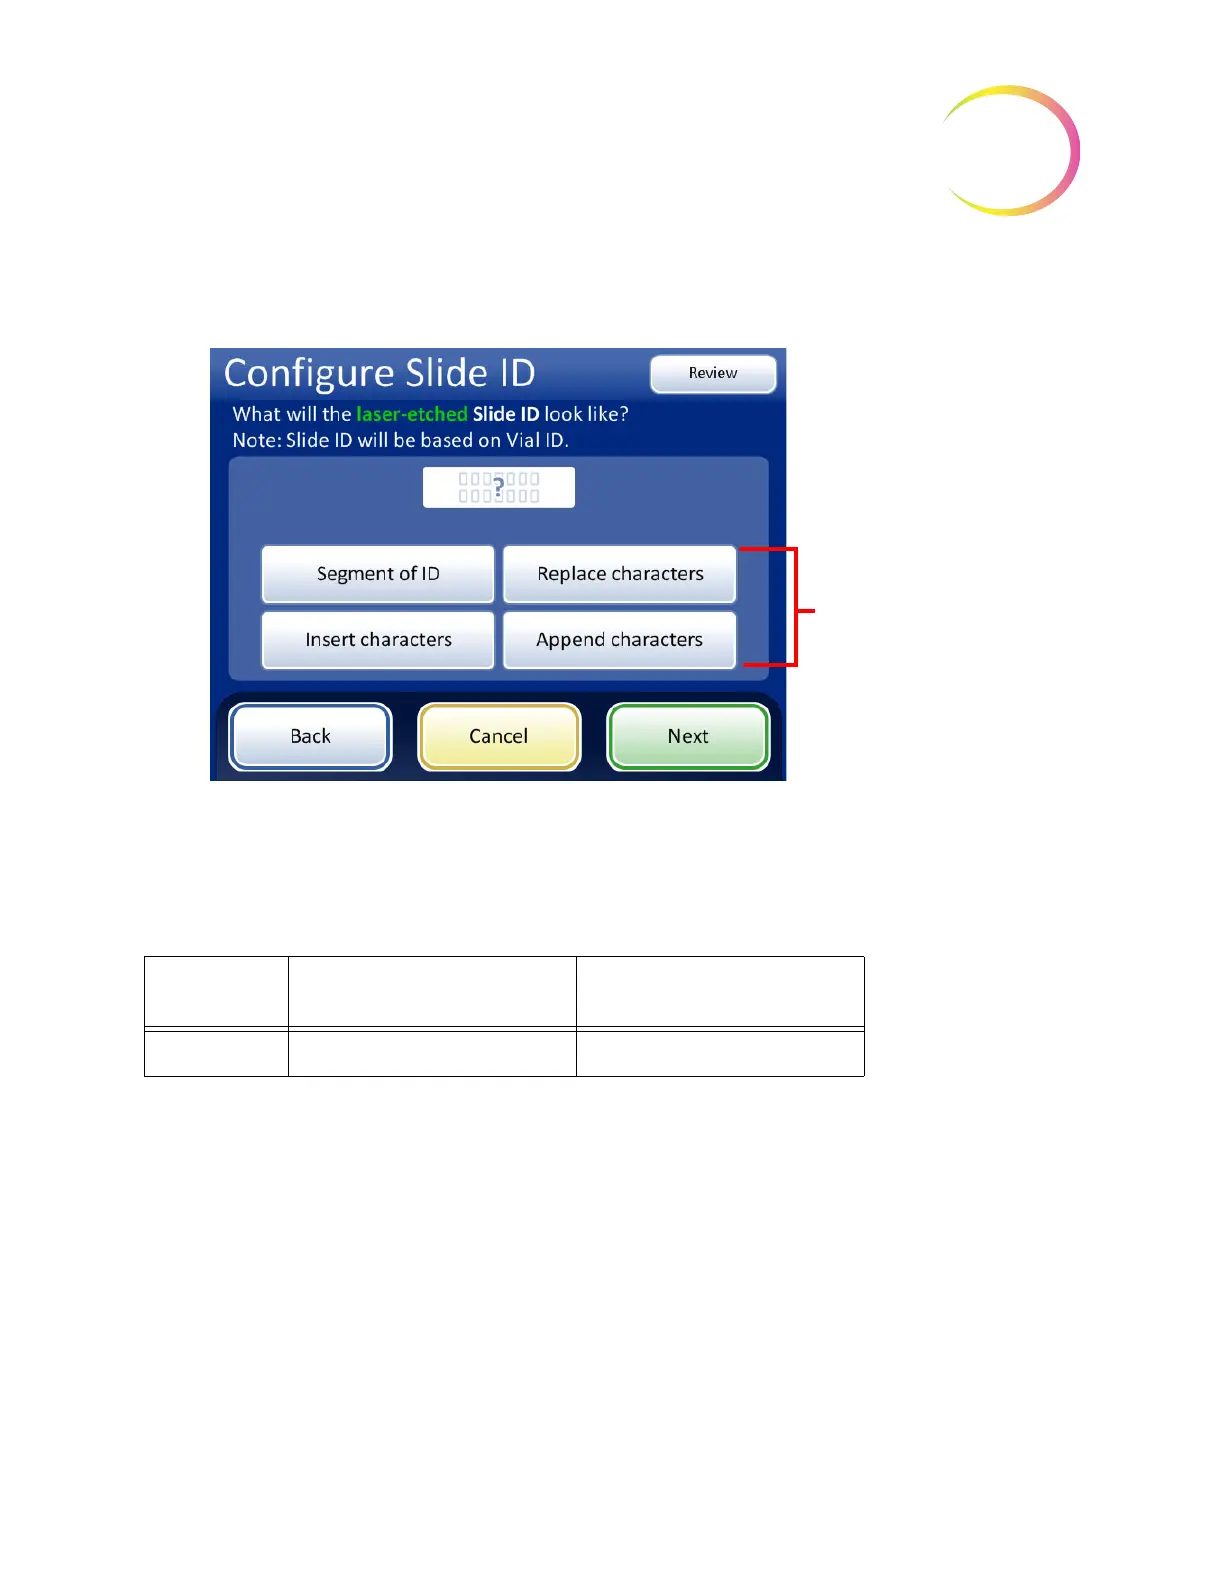
Figure 6-68 What will the laser-etched Slide ID look like?
Segment of ID
The ThinPrep 5000 processor with Autoloader can be configured to etch slide IDs that are always the
same segment of the vial IDs.
1. Touch the
Segment of ID
button.
2. Indicate where, in the vial ID, the segment that is used on the slide ID starts.
If the first character of the segment to use in the slide ID is the first character of the vial ID, leave
the “Start at position” field blank.
If the starting point is a certain position in the vial ID, such as the fifth character, use the “Start at
position” setting.
A. Touch the empty box to access the keypad.
B. Use the keypad to enter the number that represents the position of the character which is the
start of the segment of the vial ID used in the slide ID, such as “5” for the fifth character.
If the starting point of the segment of the vial ID used in the slide ID is a certain character, touch
the triangle next to “Start at position” to see the “Start at character” field.
Accession ID section
of the vial label
Slide ID
Example
ABC1234DEF 1234
Select and set one or more
of these options to describe
the slide ID’s relationship to
the accession ID portion of
the vial ID. If the slide ID
and vial ID are identical, do
not make a selection here.