ThinPrep™ 5000 Processor with AutoLoader Operator’s Manual
6.37
USER INTERFACE
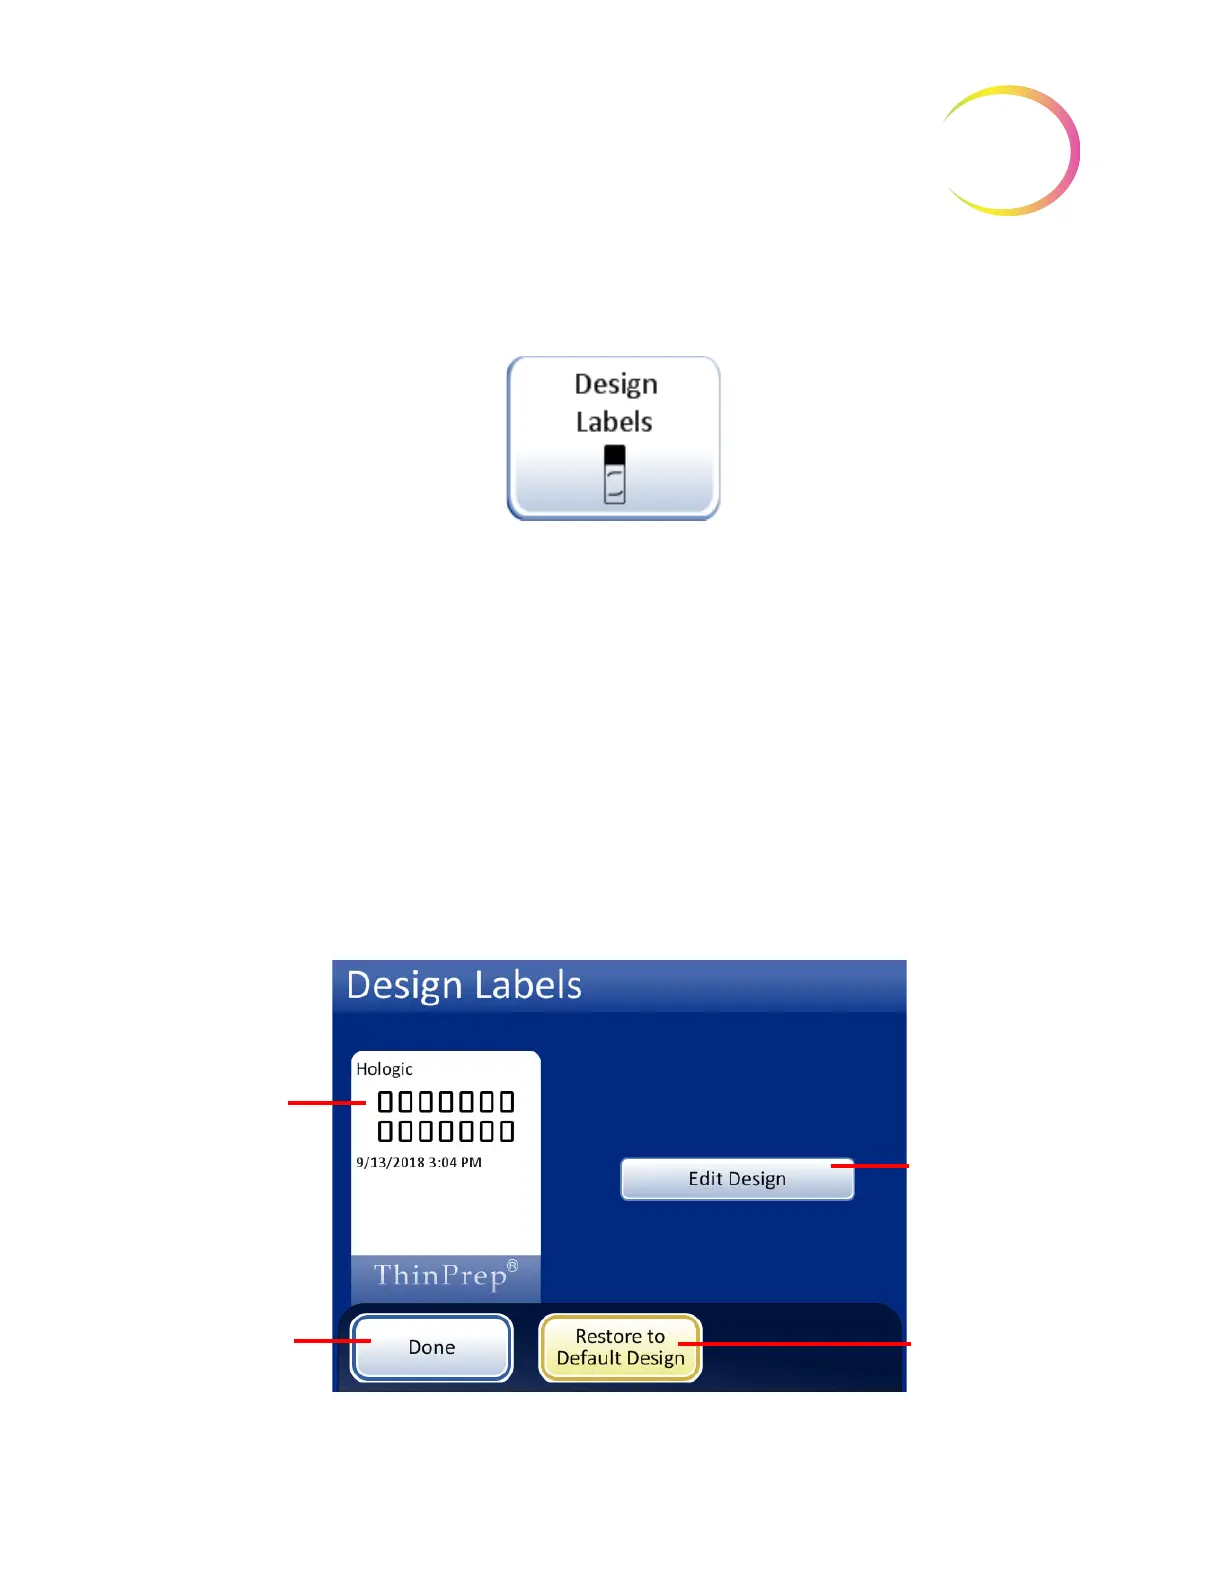
Design Labels
Figure 6-49 Design Labels Button
The information that is laser etched onto the microscope slide can be configured with the Design
Labels feature. It is a five-step process:
1. Select Slide ID format: OCR Imager, OCR Non-Imager, 1-D barcode or 2-D barcode
2. Select Data that will go on the label (choose: lab name, instrument name, date/time, vial/
slide ID, LIS Field 1, LIS Field 2, LIS Field 3, Vial Field 1, Vial Field 2,Vial Field 3 or do not
select any field.)
3. Add upper text (choose: lab name, instrument name, date/time, vial /slide ID, LIS Field 1,
LIS Field 2, LIS Field 3, Vial Field 1, Vial Field 2,Vial Field 3 or do not select any field.)
4. Add lower text (choose: lab name, instrument name, date/time, vial /slide ID, LIS Field 1,
LIS Field 2, LIS Field 3, Vial Field 1, Vial Field 2,Vial Field 3 or do not select any field.)
5. Review label design and then save it.
The label design persists until the operator makes any changes. There is a button to reset the design
to the default label design, shown in Figure 6-50.
Figure 6-50 Edit Label Design Screen
Display shows
current design in
use (default design
is shown)
Done button to
return to Admin
Options screen
Press
Edit
Design
button to
change label
design
Restore to
Default Design
button