N2000H V3 Appliance
User Guide
Huawei Proprietary and Confidential
Copyright © Huawei Technologies Co., Ltd.
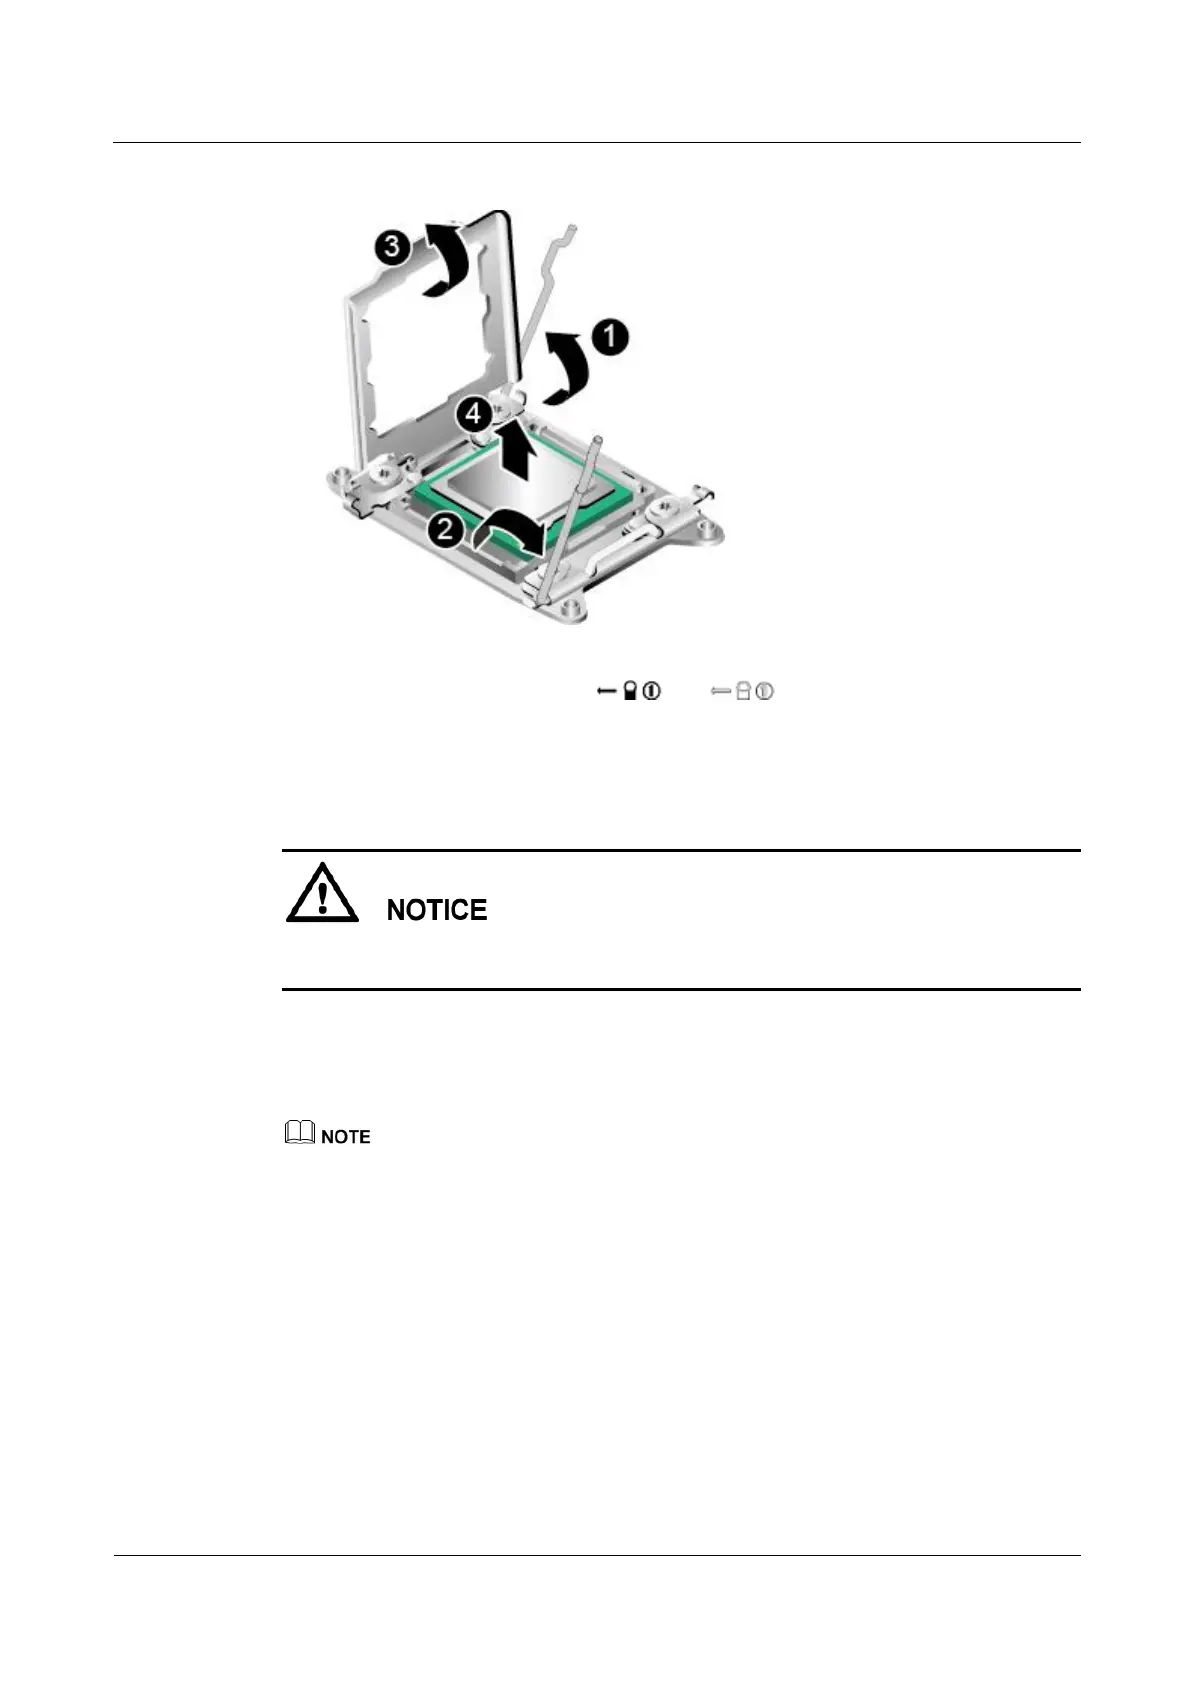
Figure 7-50 Removing the CPU
4. Raise the securing rod near the or label. See step (2) in Figure 5-50.
5. Open the lid that fixes the CPU, and remove the CPU from the socket. See steps (3) and
(4) in Figure 5-50.
6. Place the removed CPU in an ESD bag.
Ensure that CPU sockets are installed with CPUs or protective covers during transportation
and storage.
7. (Optional) Install a CPU protective cover.
a. Close the CPU cover. See step (1) in Figure 5-51.
8. Hold the CPU protective cover horizontally, aligning its edges with those of the CPU
socket, and fit the protective cover securely onto the socket. See step (2) in Figure 5-51.
An ill-positioned CPU protective cover may damage the pins in the corners of the CPU socket.
9. Close the securing rods. See steps (3) and (4) in Figure 5-51.

 Loading...