IDEC SmartRelay installation and wiring
IDEC SmartRelay Manual 29
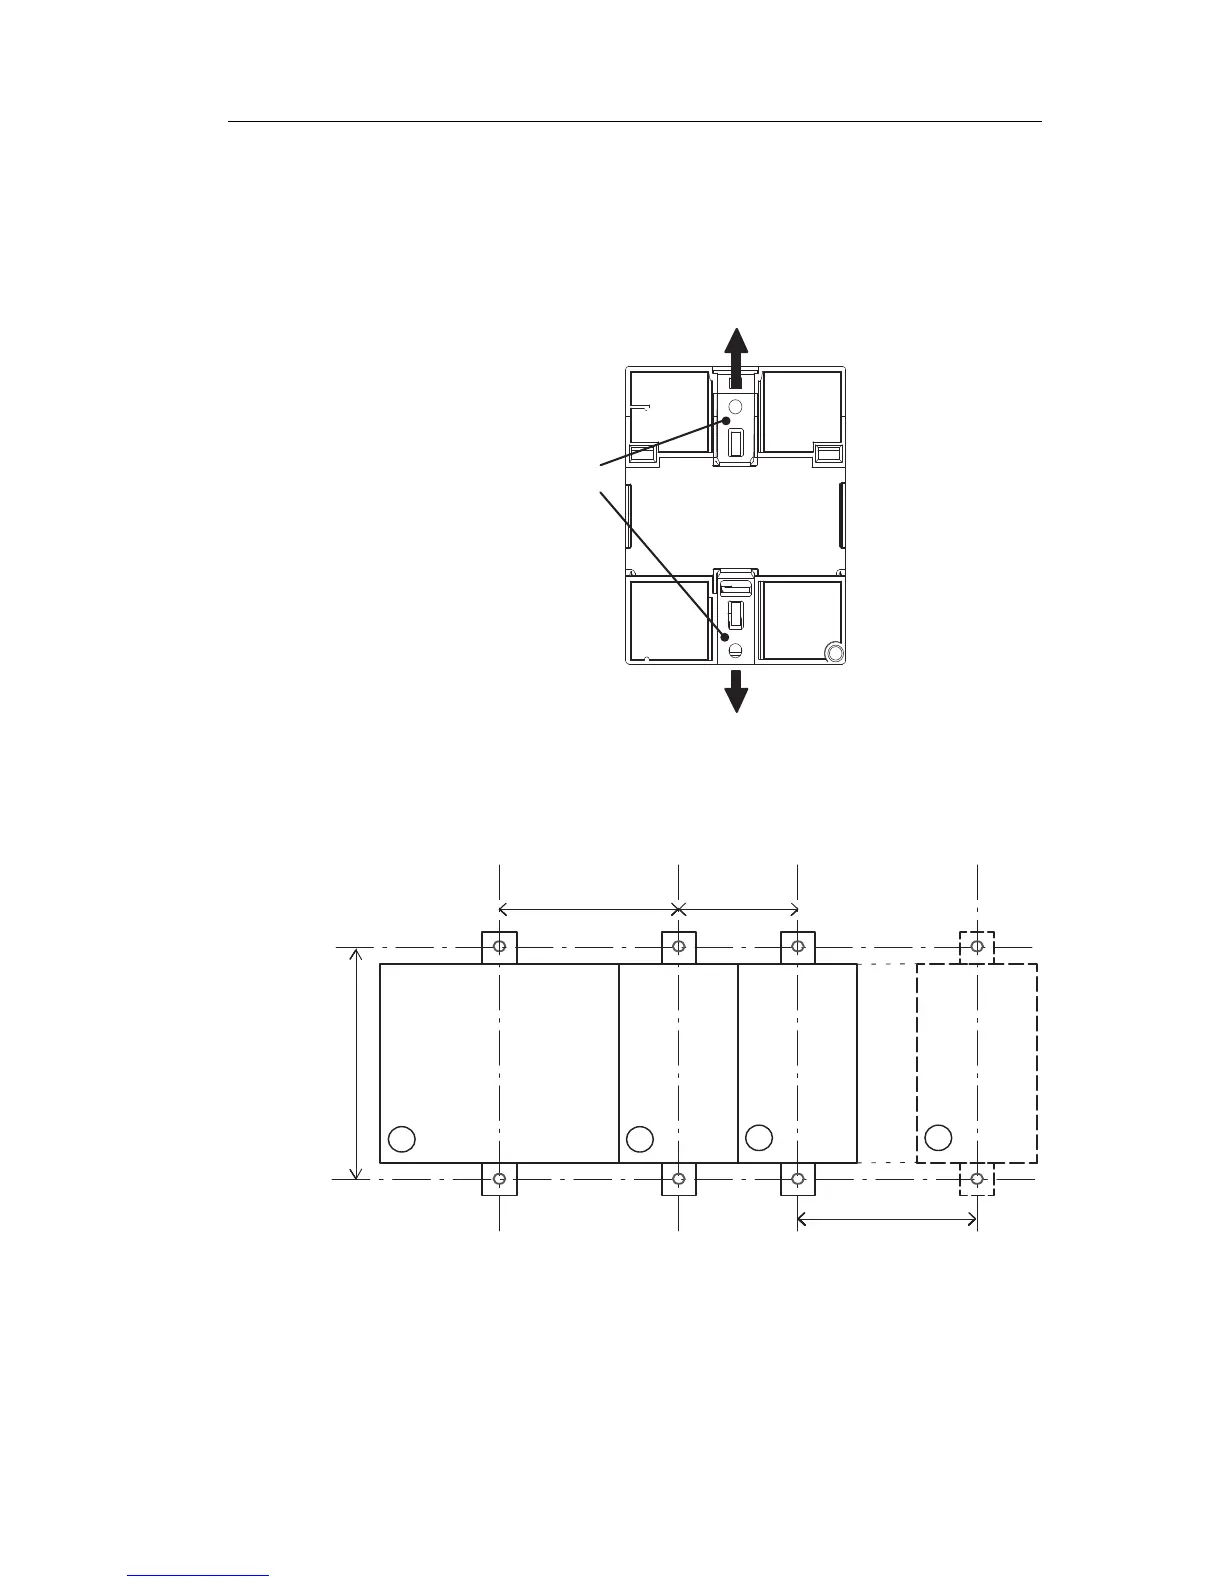
2.2.2 Wall-mounting
For wall-mounting, first slide the mounting slides on the rear
side of the devices towards the outside. You can now wall-
mount IDEC SmartRelay by means of two mounting slides
and two
M4 screws (tightening torque 0.8 to 1.2 Nm).
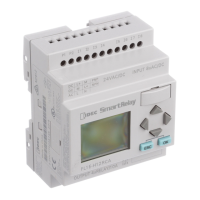
Drilling template for wall-mounting
Before you can wall-mount IDEC SmartRelay, you need to
drill holes using the template shown below.
98 +/– 0.3
1
2
2 2
+0.2
53.5–0.0
+0.2
35.5–0.0
+0.2
n x 35.5–0.0
All dimensions in mm
Bore hole for
M4 screw, tightening torque 0.8 to 1.2 Nm
1) IDEC SmartRelay base module
2) IDEC SmartRelay expansion modules
Phone: 800.894.0412 - Fax: 888.723.4773 - Web: www.clrwtr.com - Email: info@clrwtr.com