4. On the Output Files tab, assign the output directory and file name.
5. Select the output file type.
Select the following file types for AS x4 configuration mode:
•
Raw Programming File (.rpd)
6. Click the Edit… button and assign the Start address for the image in flash
memory.
7.
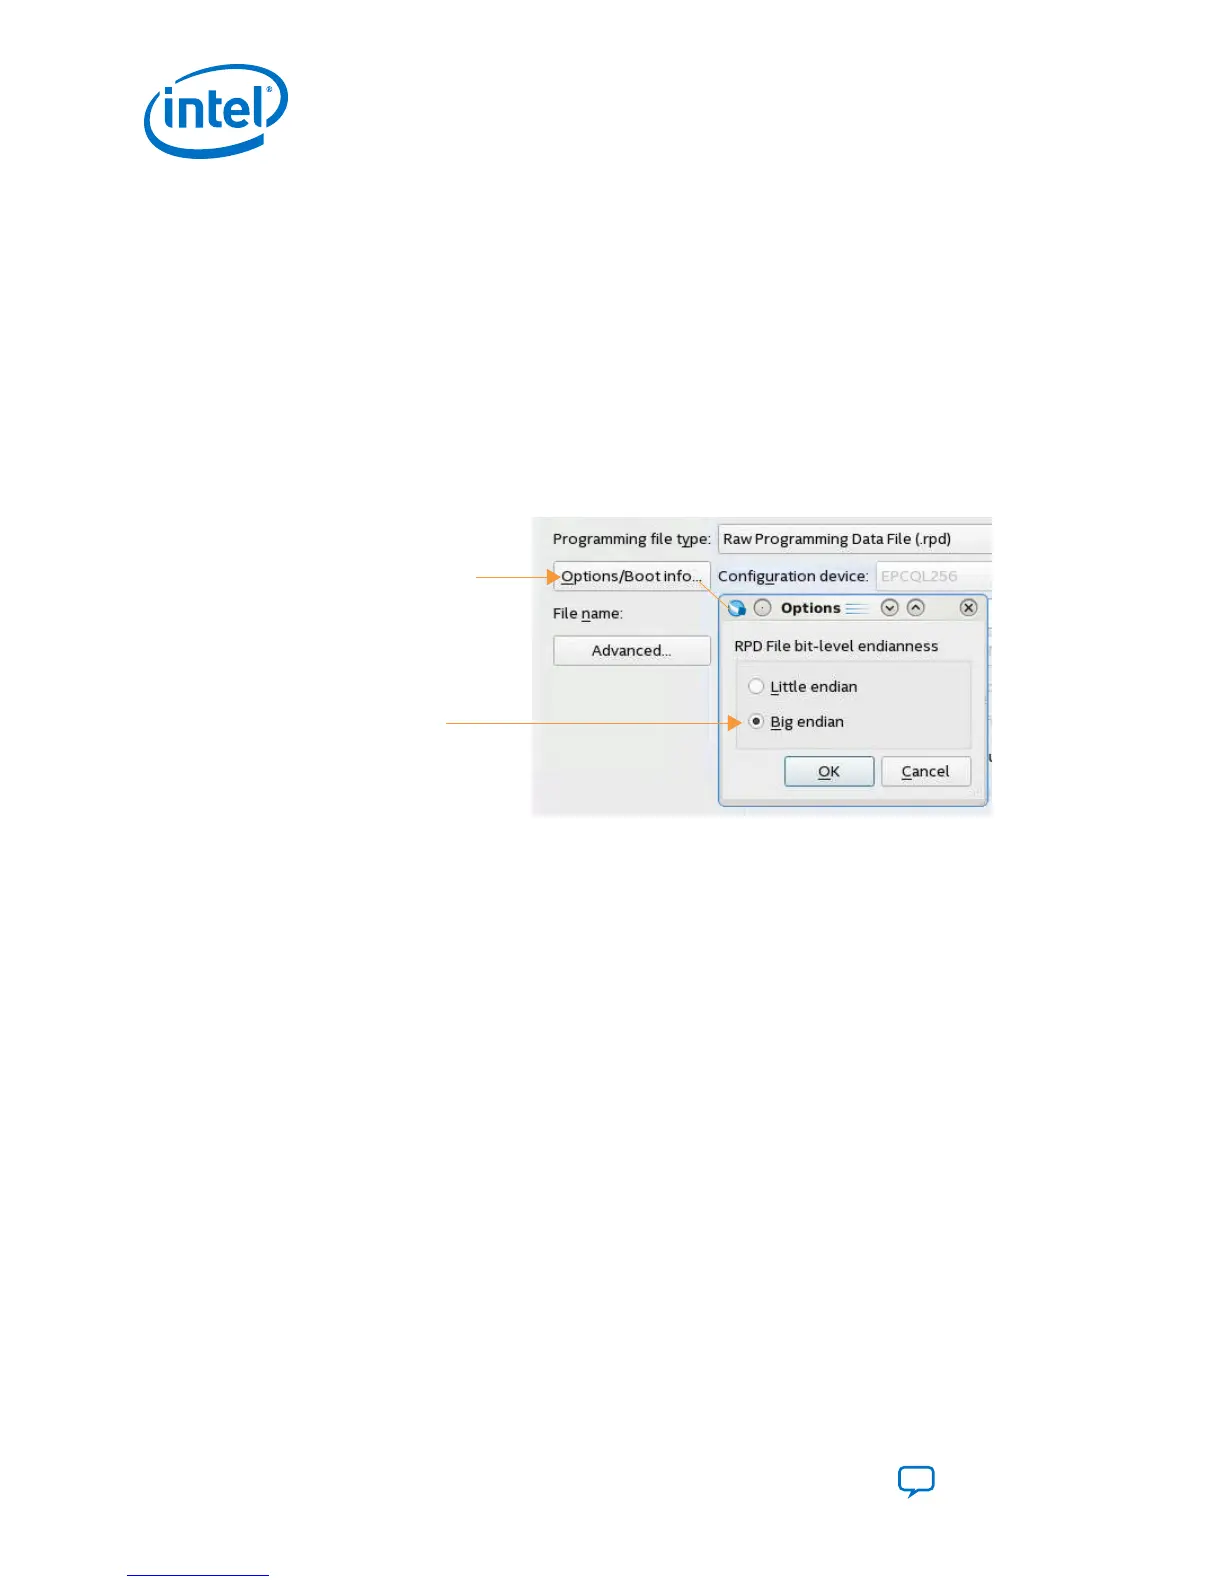
By default, the .rpd file type is little-endian, if you are using a third-party
programmer that does not support the little-endian format, click Option/Boot
Info button. In the Options dialog box, set the RPD File Endianness to Big
Endian.
Figure 41. Specifying RPD Bit-Level Endianness
Big endian
Options/Boot info
8. On the Input Files tab, click Add Bitstream. Change the Files of type to SRAM
Object File (*.sof). Then, select application image .sof file and click Open.
9. Click Generate to generate the remote system upgrade programming files. You
can now program the flash memory.
5.6. Remote System Upgrade from FPGA Core Example
This section presents a complete remote system update example, including the
following steps:
1.
Creating the initial remote system update image (.jic) containing the bitstreams
for the factory image and one application image.
2. Programming the flash memory with the initial remote system update image that
subsequently configures the device.
3. Reconfiguring the device with an application or factory image.
4.
Creating a single remote system update (.rpd) containing the bitstreams to add
an application image in user mode.
5. Adding an application image.
6. Removing an application image.
5. Remote System Upgrade
UG-S10CONFIG | 2018.11.02
Intel Stratix 10 Configuration User Guide
Send Feedback
86
 Loading...