Attachments
Quickhitch
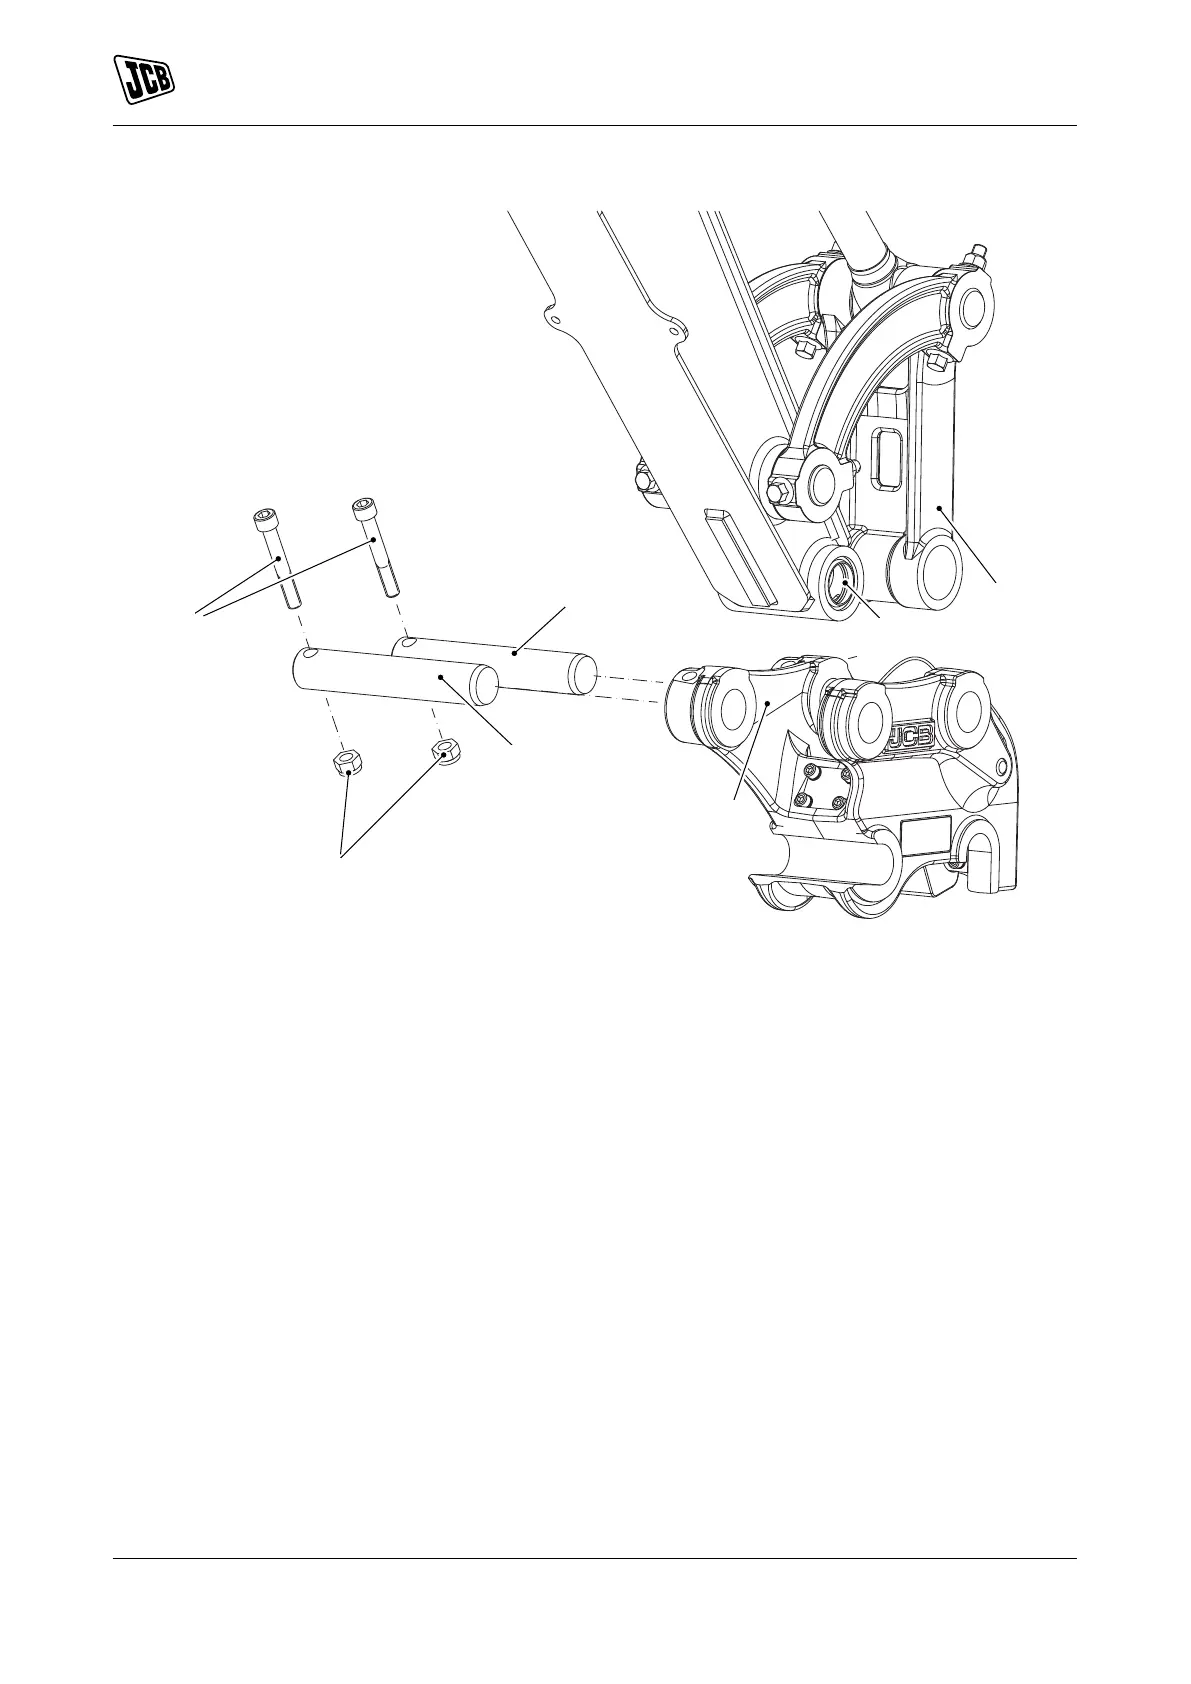
Figure 73.
A Hole (dipper arm) B Hole (bucket link)
C Hole (quickhitch) D Pivot pin (quickhitch to dipper arm)
E Pivot pin (quickhitch to bucket link) F Hex head bolt
G Lock nut
5.1. Operate the controls to line up the hole in the bucket link with the hole in Quickhitch.
5.2. Secure the bucket link and Quickhitch connection using hex head bolt and lock nut.
Quickhitch Removal
The removal of the Quickhitch is a reversal of the installation procedure. Pay particular attention to safety
notices.
Mechanical Quickhitch Attachment Installation
1. Set the attachment on firm level ground. Use safe and correct lifting equipment to move the attachment.
2. Position the machine so that the Quickhitch and attachment are correctly aligned for connection.
3. Use the excavator controls to engage the front pivot pin of the attachment with the front jaw of the
Quickhitch. Refer to Figure 74.
89 9831/8250-4 89
JCB © Admin Pimteam - 23/06/2021 05:32.