Removing the MX10003 Air Filter Unit
NOTE: Air filter assembly is designed to prevent dust from being drawn into the chassis. This
filter assembly must be installed for the product to be NEBS GR 63 compliant.
To remove the air filter unit:
1. Attach an electrostatic discharge (ESD) grounding strap to your bare wrist, and connect the strap to
one of the ESD points on the chassis.
2. Loosen the captive screws located on either side of the air filter unit attached at the front of the router.
NOTE: Removing the cables from the cable manager is not necessary to access the air filter.
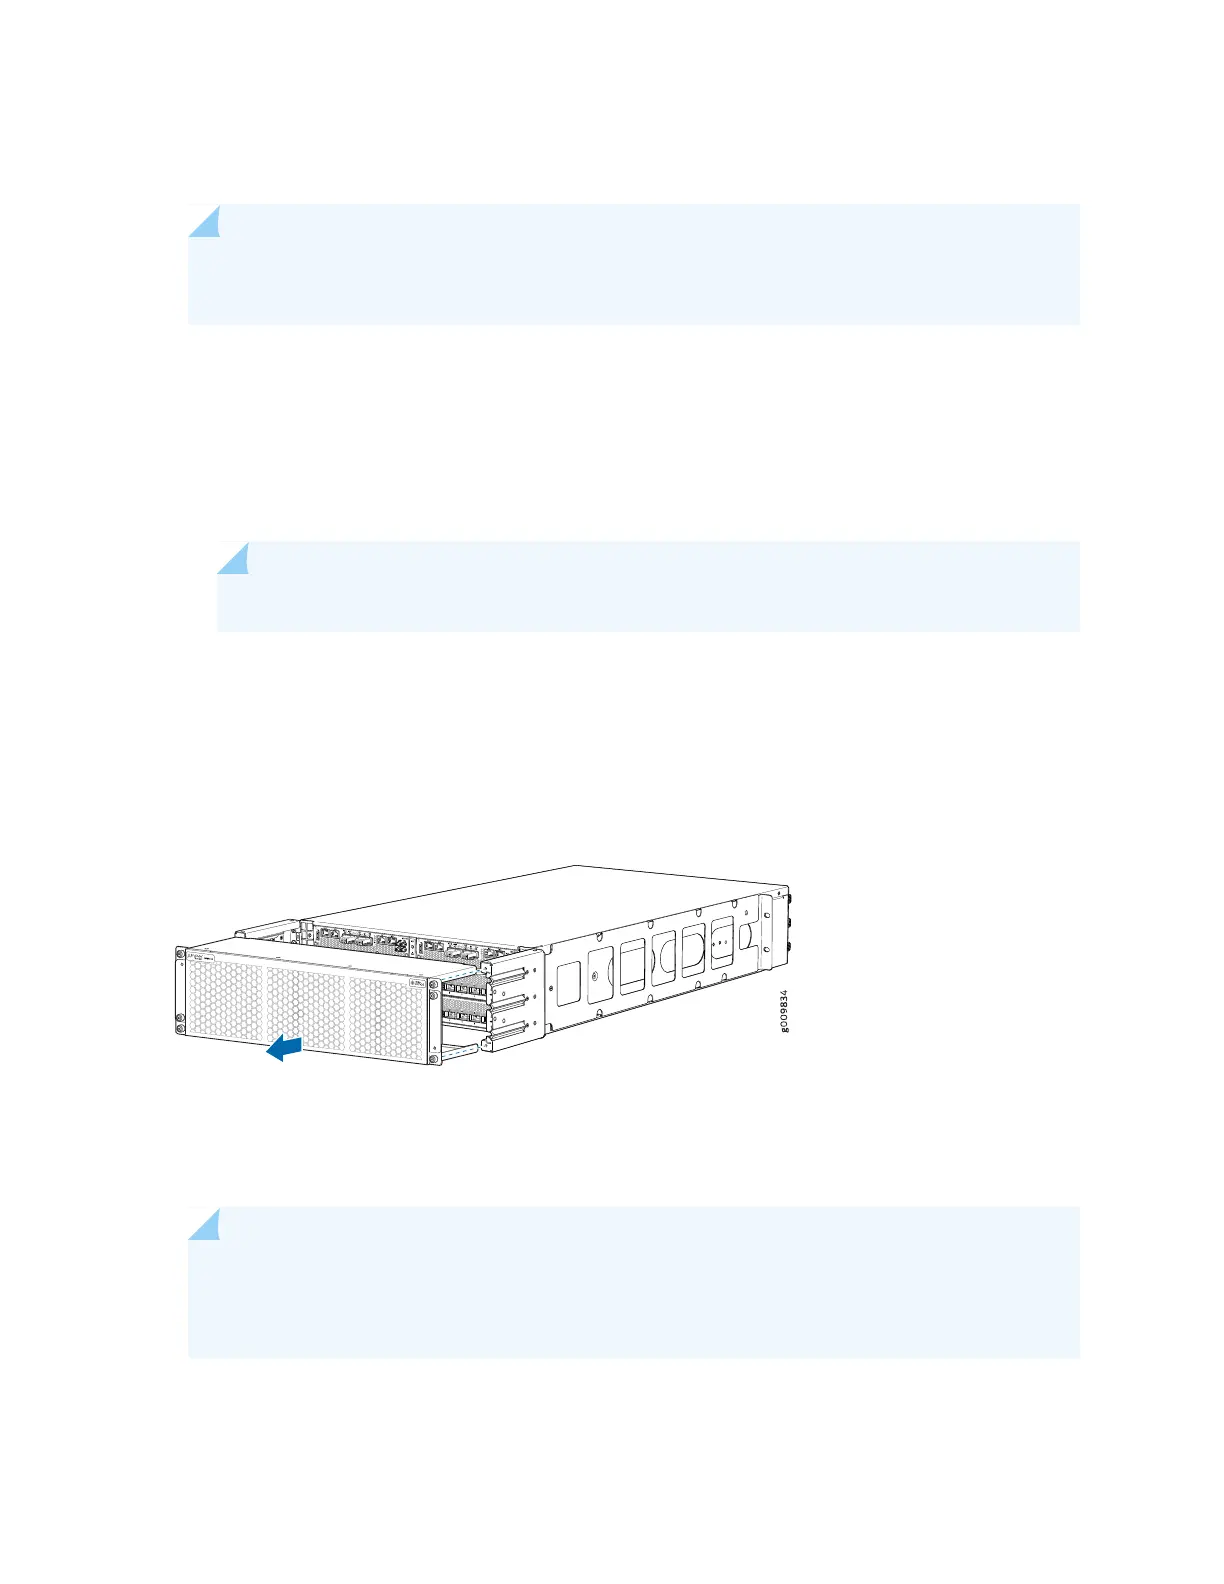
3. Grasp the air filter unit and gently pull the air filter unit out of the cable management brackets. See
Figure 34 on page 118.
Figure 34: Removing the Air Filter from the Chassis
Installing the MX10003 Air Filter Unit
NOTE: The air filter unit is installed on the cable management brackets. Before installing the air
filter unit, ensure that the cable management brackets are already installed on the front of the
router.
118