EasyManuals Logo

Juniper MX10003 Hardware Guide

Juniper MX10003
230 pages
To Next Page IconTo Next Page
To Previous Page IconTo Previous Page
Page #125 background imageLoading...
Page #125 background image
Installing an MX10003 Fan Module
To install the fan module (see Figure 39 on page 125):
1. Attach an ESD grounding strap to your bare wrist and connect the strap to one of the ESD points on
the chassis.
2. Grasp the fan module by the handle, and place one hand under the fan module for support.
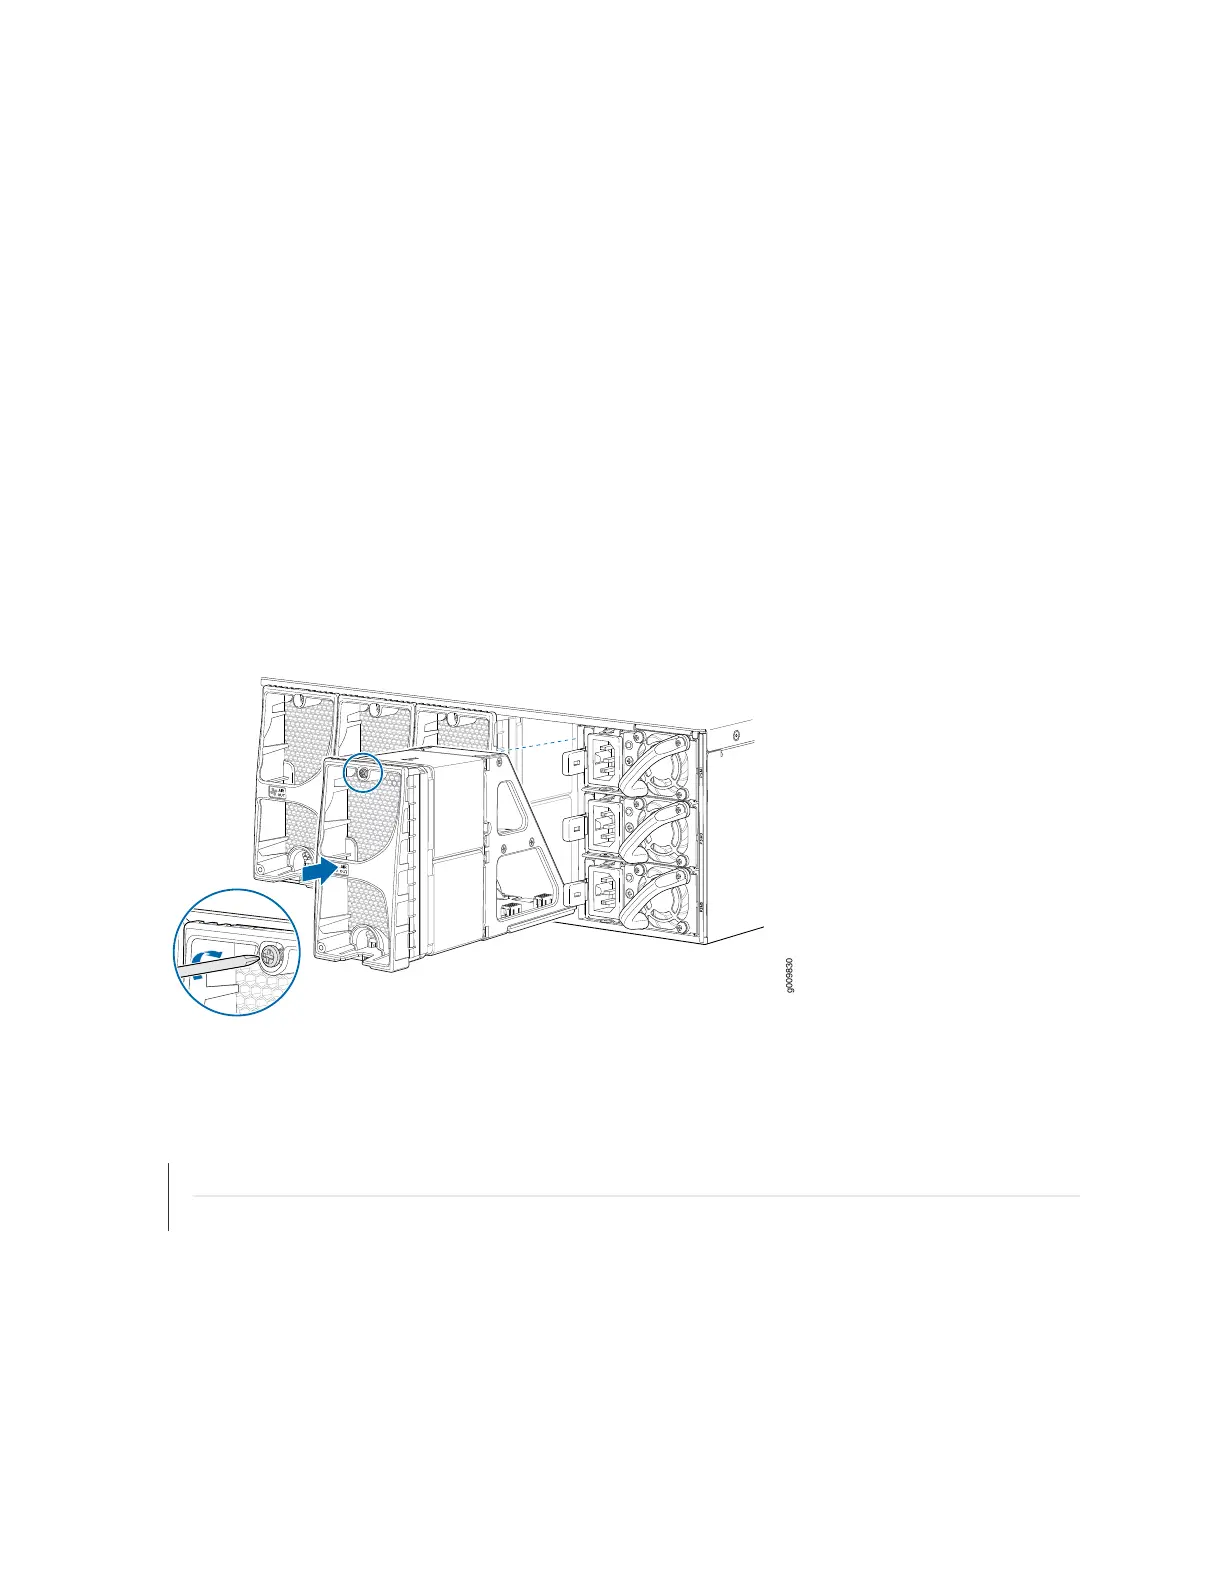
3. Place the fan module on the respective slot, and carefully push the fan module into the chassis until
the socket lock snaps into place and holds it.
4. Using a number-2 Phillips screwdriver, turn the locking screw on the fan module faceplate until it is
tight and secured.
Figure 39: Installing the Fan Module
g009830
SEE ALSO
MX10003 Cooling System Description | 31
Prevention of Electrostatic Discharge Damage | 182
125

Table of Contents

Other manuals for Juniper MX10003

Questions and Answers:

Question and Answer IconNeed help?

Do you have a question about the Juniper MX10003 and is the answer not in the manual?

Juniper MX10003 Specifications

General IconGeneral
ModelMX10003
CategoryNetwork Router
Routing EngineRE-MX10003
Throughput2.4 Tbps
Operating SystemJunos OS
Power SupplyAC or DC
Rack Units/Form Factor3 U
RedundancyPower supplies, fans
Slot Count3

Related product manuals