EasyManuals Logo

Labconco Logic+ A2 User Manual

Labconco Logic+ A2
201 pages
To Next Page IconTo Next Page
To Previous Page IconTo Previous Page
Page #122 background imageLoading...
Page #122 background image
122
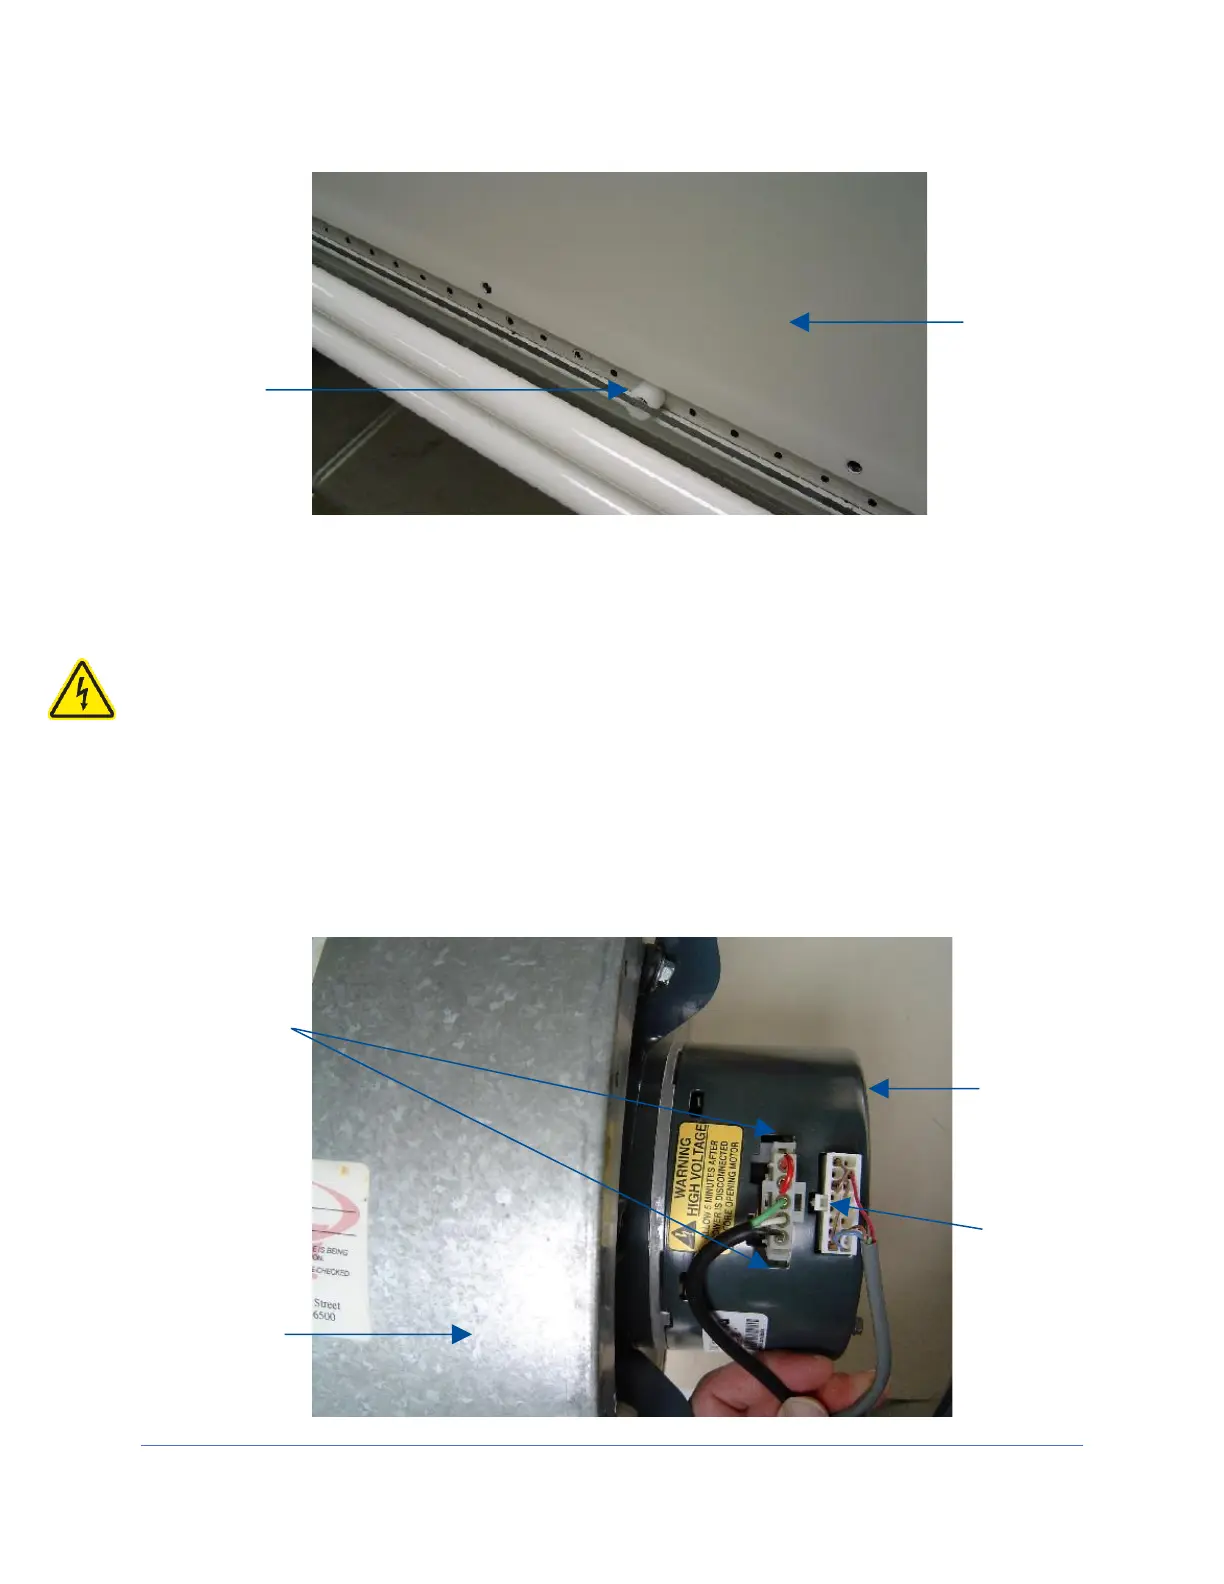
5. Locate the supply blower/motor assembly, it will be on the right side of the
compartment, and resting atop the large, metal plenum.
6. Double check all power has been removed from the biosafety cabinet.
7. Disconnect the two (2) wire harness connections from the motor. The 5-pin
connector, located closest to the blower, is released by depressing the locking
tabs on either side of the connector. The 16-pin data connector is released by
depressing the single locking tab in the center of the connector, on the side of the
connector closest to the blower. See Figure 12-33.
Figure 12-32
Center Sash
Support
Figure 12-33
5-pin
Connector
Locking Tabs
16-pin
Connector
Locking Tab
Motor
Blower
Blower Plenum
Cover

Table of Contents

Questions and Answers:

Question and Answer IconNeed help?

Do you have a question about the Labconco Logic+ A2 and is the answer not in the manual?

Labconco Logic+ A2 Specifications

General IconGeneral
BrandLabconco
ModelLogic+ A2
CategoryLaboratory Equipment
LanguageEnglish

Related product manuals