138
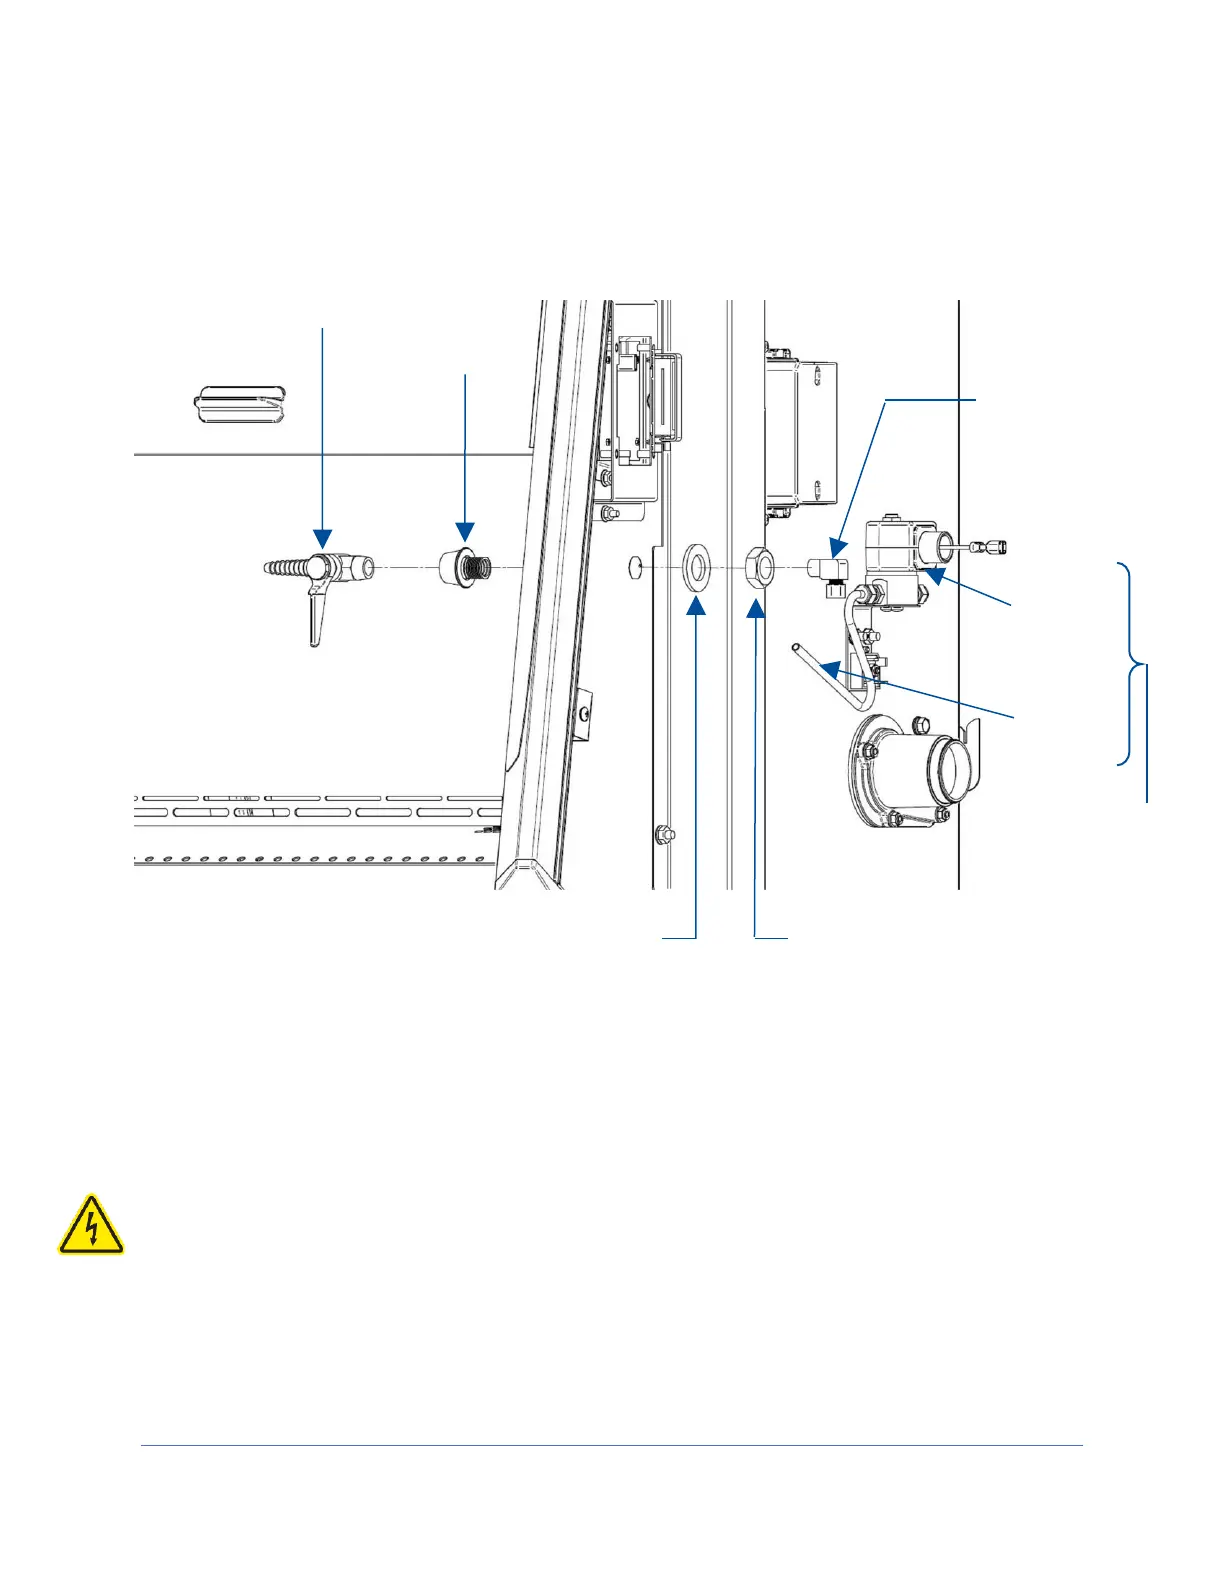
8. Close the petcock valve and leak check all connections with an inert gas and
appropriate detector. If a leak is found, tighten the appropriate fitting connection
further.
9. Ensure the customer-supplied service line tubing is ¼ inch O.D., soft metal, and
that the end has been completely deburred.
10. Route the tubing from the rear or bottom of the cabinet, ensuring that it will line
up with the slot in the rear or bottom of the side panel. The rear slot is located
from 8 ¾ to 11 ¼ inches (222 to 288 mm) from the bottom of the cabinet.
Note: Make sure that the tube routing will not contact any electrical wires. DO
NOT loop service line tubing within the side panels of the cabinet.
11. Make sure the compression nut on the 90 degree fitting is loose, but do not
remove it. Verify the tubing ferrule is in the fitting (just behind/inside the
compression nut.