LM 287 User Manual – 30.10.2023
60
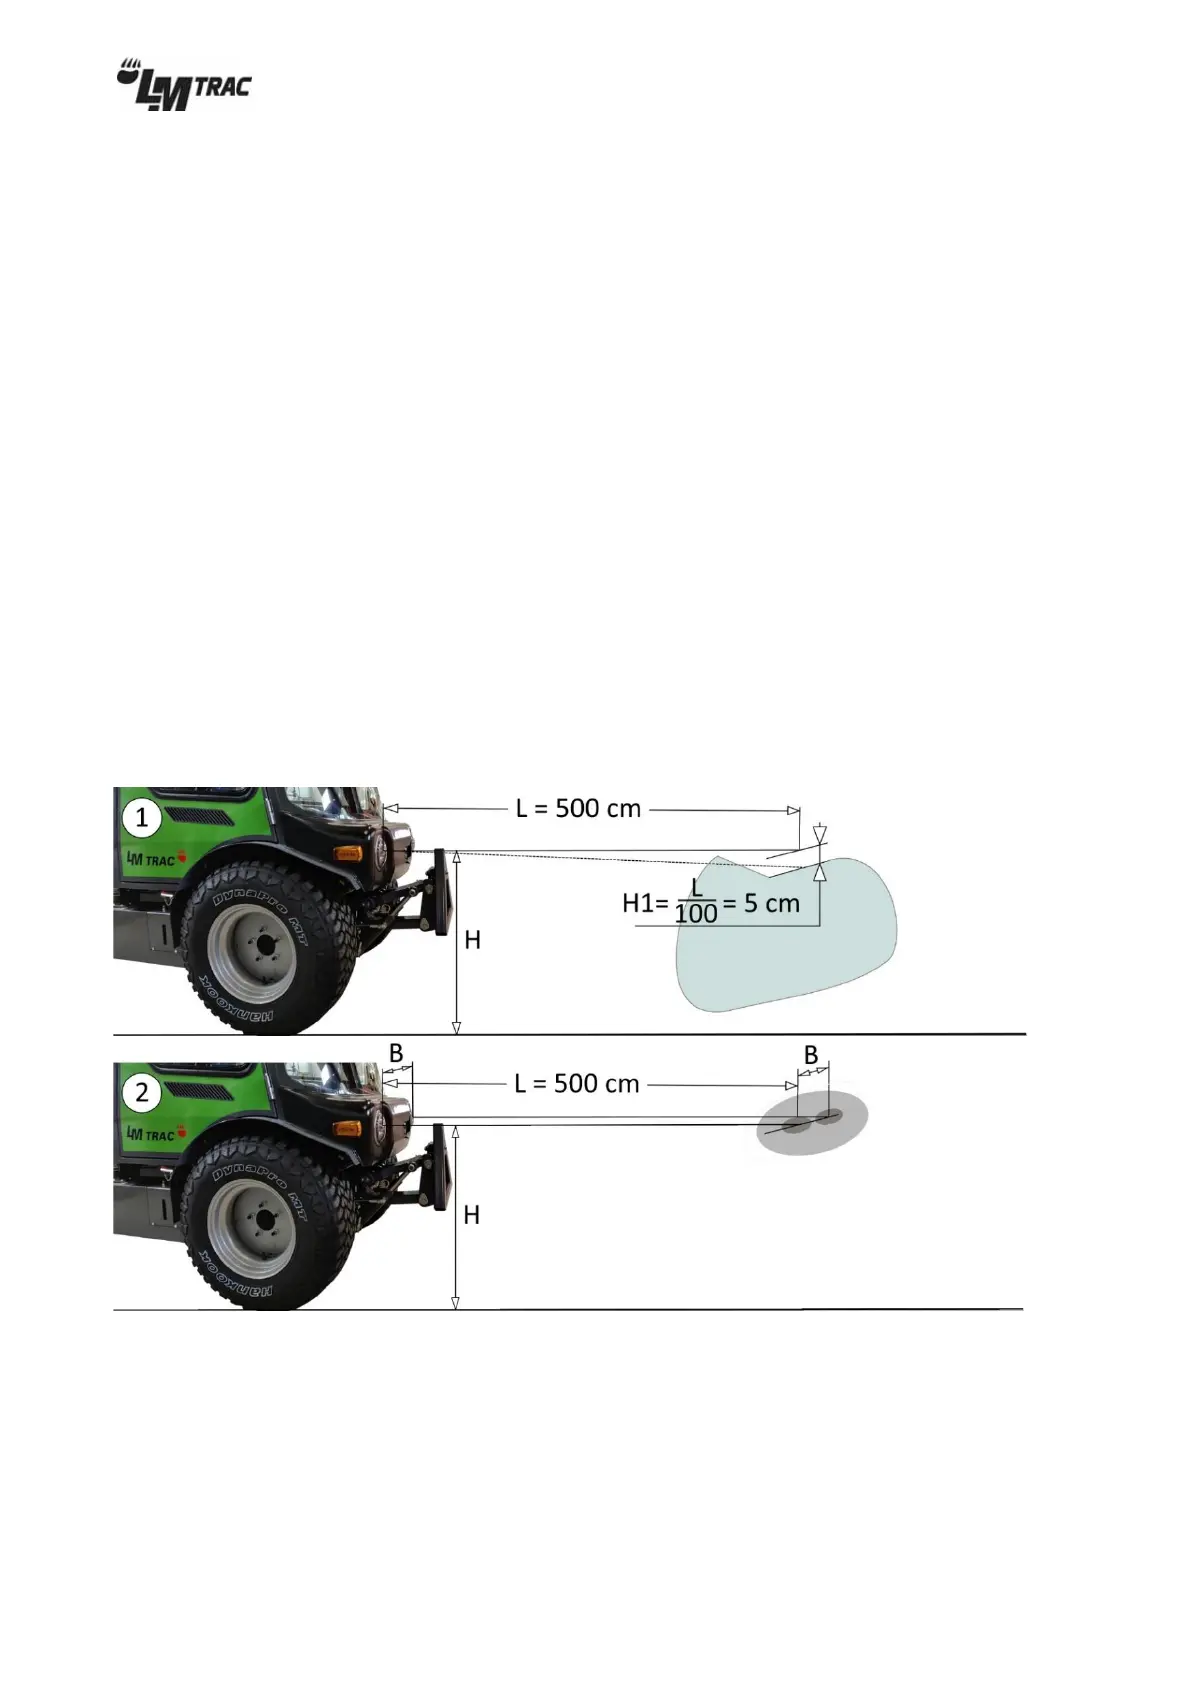
6.3 Headlight adjustment
The correct adjustment of headlights is important when driving on public roads. The lights can be adjusted quickly and
precisely at a service station or repair shop using an optical device. If an optical device is not available, the lights can be
adjusted according to the attached figure.
► Ensure before the adjustment that the machine is under a normal load and that the tire pressures are correct.
► Drive the machine close to a wall (almost touching it on a level surface).
► Draw two crosses on the wall at the centre of the headlamps.
► Reverse the machine to a distance of 5 m from the wall.
Height (1):
► Switch on the low beam. The horizontal top edge of the light pattern of the low beam must be 50 mm below the
crosses drawn on the wall for both headlights.
► If necessary, adjust the height of the headlights to the correct level.
Lateral direction (2):
► Switch on the high beam. In the lateral direction, the centre point of the light pattern of both headlights should be
approximately at the crosses you made.
► If necessary, adjust the lateral direction of the headlights to the correct position.
Dimensions:
L = measuring distance = 500 cm
B = lateral distance between the headlight centre points
H = height of the headlight centre points from the ground
H1 = L:100 L = 500 cm => H1 = 5 cm
Figure 74
6.4 Welding
If welding is required on the machine or a tool attached to it, proceed as follows:
1. Turn the main power switch to OFF.
2. Disconnect the grounding cable (–) of the battery.
3. Protect the hydraulic hoses and electrical wires against sparks, and take into account fire safety.
4. Attach the grounding electrode of the welding device as close to the welding point as possible.
 Loading...