Before start-up
- 22 -
02.20909.2079.9-03
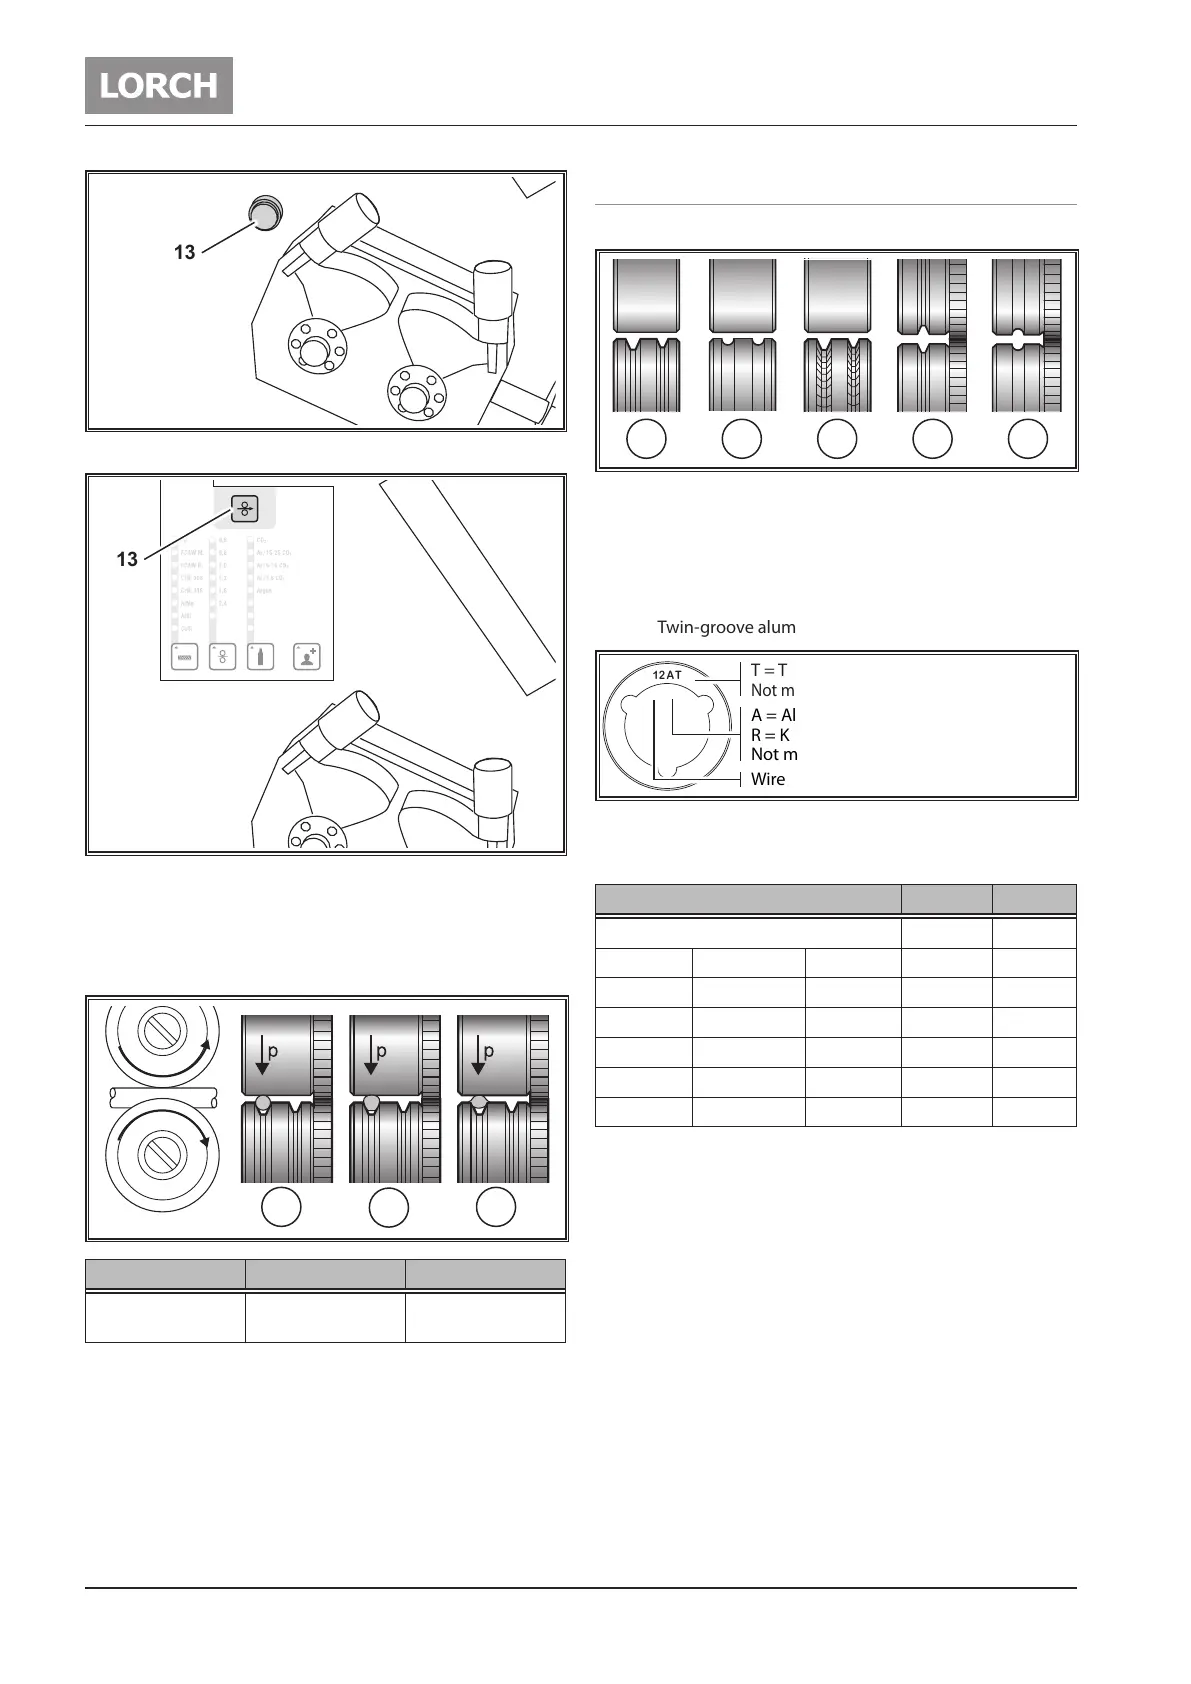
13
Fig. 12: Wire feed button FeederPanel, Basic
13
Fig. 13: Wire feed button BasicPlus, ControlPro
 Press the wire feed button 13.
 Adjust the contact pressure using the regulation screws 37
so that wire feed rollers 35 just slip when the welding wire
coil is stopped. The wire must not be jammed or deformed.
A
B
C
A B C
Correct Contact pressure too
high
Wrong wire feed
roller
Fig. 14: Wire feed rollers
 Adjust the contact pressure of the wire feed rollers 35 on
the side of the inlet nozzle 36 to be less than on the side
of the central socket 8 in order to keep the wire electrode
under tension in the wire feed unit.
 Push the wire feed button 13 until the wire protrudes from
the torch neck by about 20 mm.
 Screw the contact tip matching the wire thickness into the
torch and cut o the protruding end of the wire.
11.3 Changing the wire electrode
 Change the wire feed rollers. Select the appropriate rollers.
A B C D E
Fig. 15: Wire feed rollers
A Steel feed roller
B Aluminium feed roller
C Knurled feed roller (for ux-cored wire)
D Twin-groove steel feed roller
E Twin-groove aluminium feed roller
12 AT
Wire Ø in mm / 10
A = Aluminium
R = Knurled
Not marked = Steel
T = Twin groove
Not marked = One roller with groove
Fig. 16: Marking of wire feed rollers
Colour marking of wire feed rollers
Feed roller/material Wire Ø Colour
Pressure roller without groove All Ø -
Steel - 0.6 mm Black
Steel Aluminium - 0.8 mm Blue
Steel Aluminium Knurling 1.0 mm Red
Steel Aluminium Knurling 1.2 mm Orange
Steel Aluminium Knurling 1.6 mm Yellow
- - Knurling 2.4 mm Grey
Tab. 1: Colour marking of wire feed rollers
 Replace the steel torch with an appropriate torch, or
change the wire feed spiral.
Wire feed spiral: (for steel or ux-cored wire)
 Remove the existing wire feed spiral or plastic core and
insert the new wire feed spiral. (Refer to the operating
manual for the torch)
 Insert the guide tube 51 into the central connection.
 Loading...