&$/$'-867$/,*1 9HUVD3XOVH3RZHU6XLWH6HULHV6HUYLFH0DQXDO
5(9%
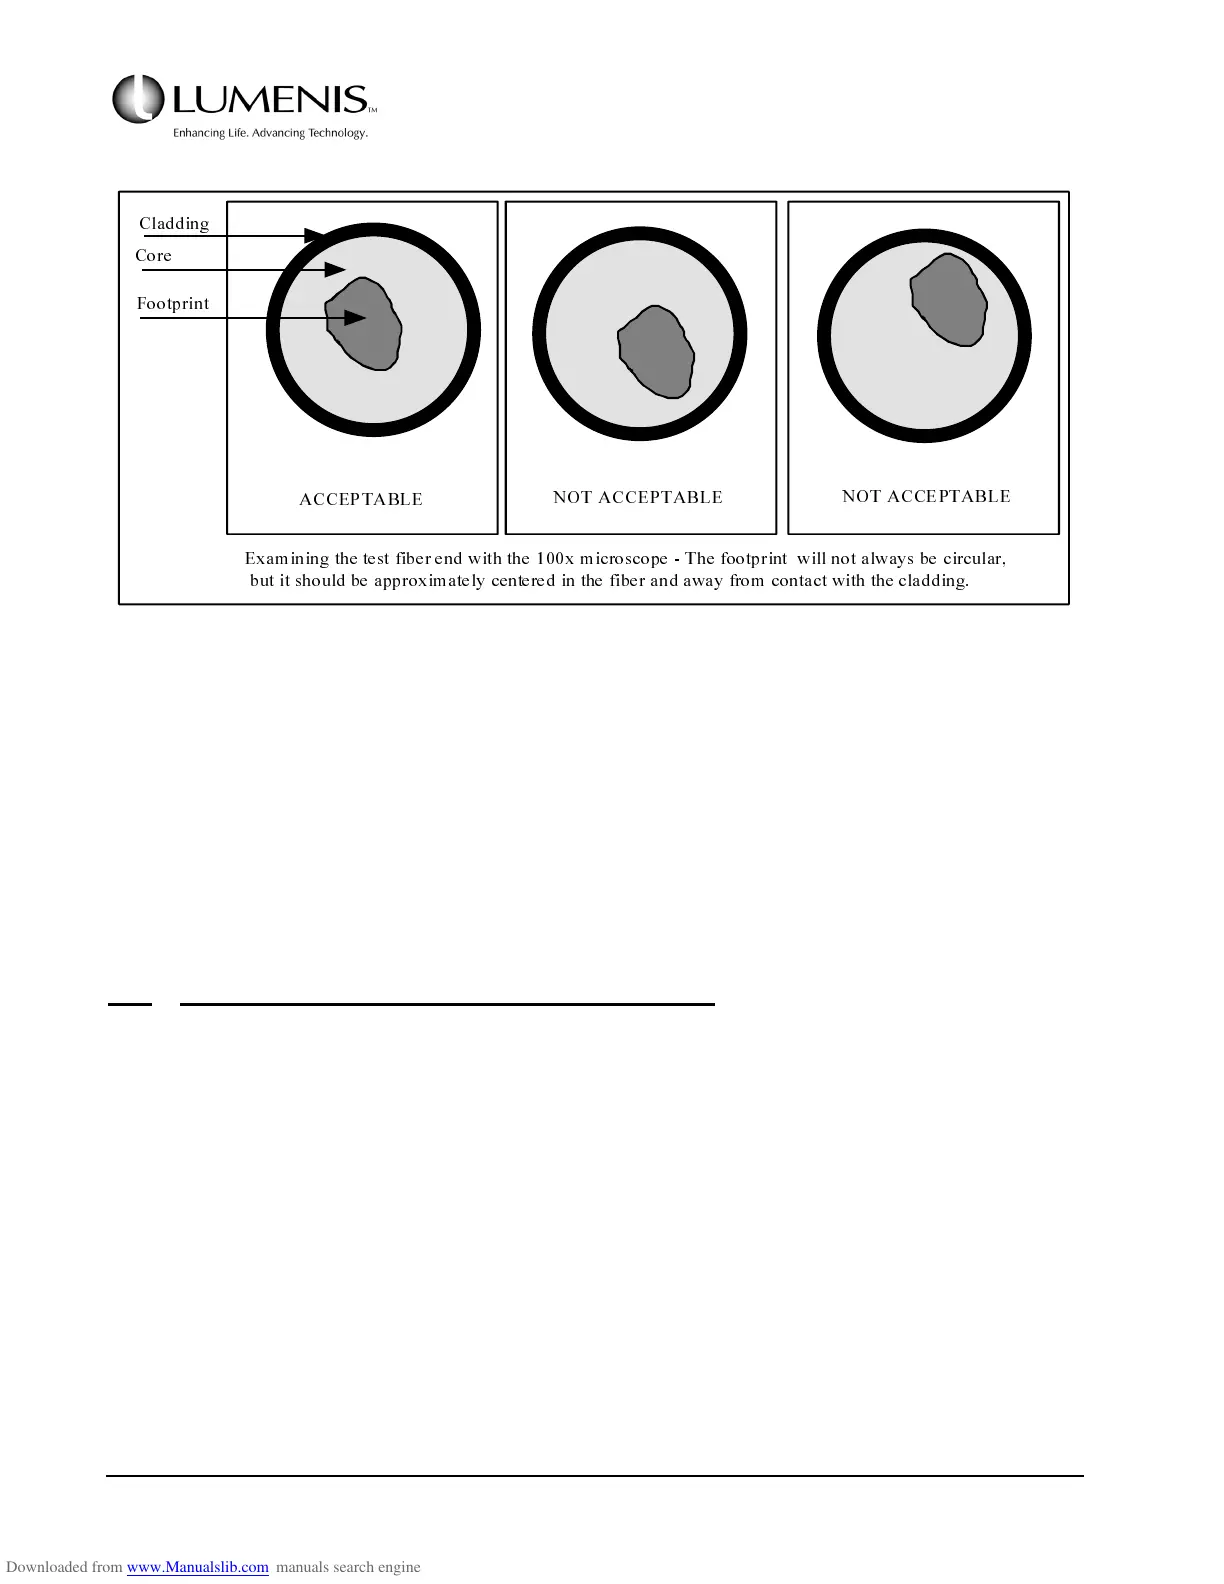
FIG. 3.12: EXAMINING THE TEST FIBER BURN
f. Clean the residual ink from the fiber port & debris shield with a Q-tip.
3. Confirm the calibration. See Section 3.4.
Use the test fiber (0623-973-01) and direct towards the FSH head.
3.6.2 Verify Calibration - Delivered Power Out of the Fiber
Turn the laser on and allow the system to perform the auto calibration, then verify the power calibration for
each wavelength at each operating point in this topic section. All delivered powers must be within ±10% of
requested power.
1. Enable the "autocal" function by setting SW3 on the Controller PCB in the left position. Close the front
door and turn the laser on.
Wait for the User screen to be displayed and ensure that no calibration error messages are displayed.
2. Attach a known good Power Calibration Test Fiber (P/N 0623-973-01) to the fiber port and turn the aim-
ing laser on. Direct the distal end of the fiber towards a calibrated power meter.
The aiming beam diameter on the detector surface should be approximately 1 cm in diameter.
$&&(37$%/(
127$&&(37$%/(
127$&&(37$%/(
([DP LQLQJWKHWHVWILEHUHQGZLWKWKH[PLFURVFRSH7KHIRRWSULQWZLOOQRWDOZD\ VEHFLUFXODU
EXWLWVKRXOGEHDSSUR[LP DWHO\FHQWHUHGLQWKHILEHUDQGDZD\IURPFRQWDFWZLWKWKHFODGGLQJ
&ODGGLQJ
&RUH
)RRWSULQW