20.3 Improving the acquisition / image quality 195
Note
If you execute all correction procedures, you have to keep this order. All gray value settings of the corrections
below assume an 8-bit image.
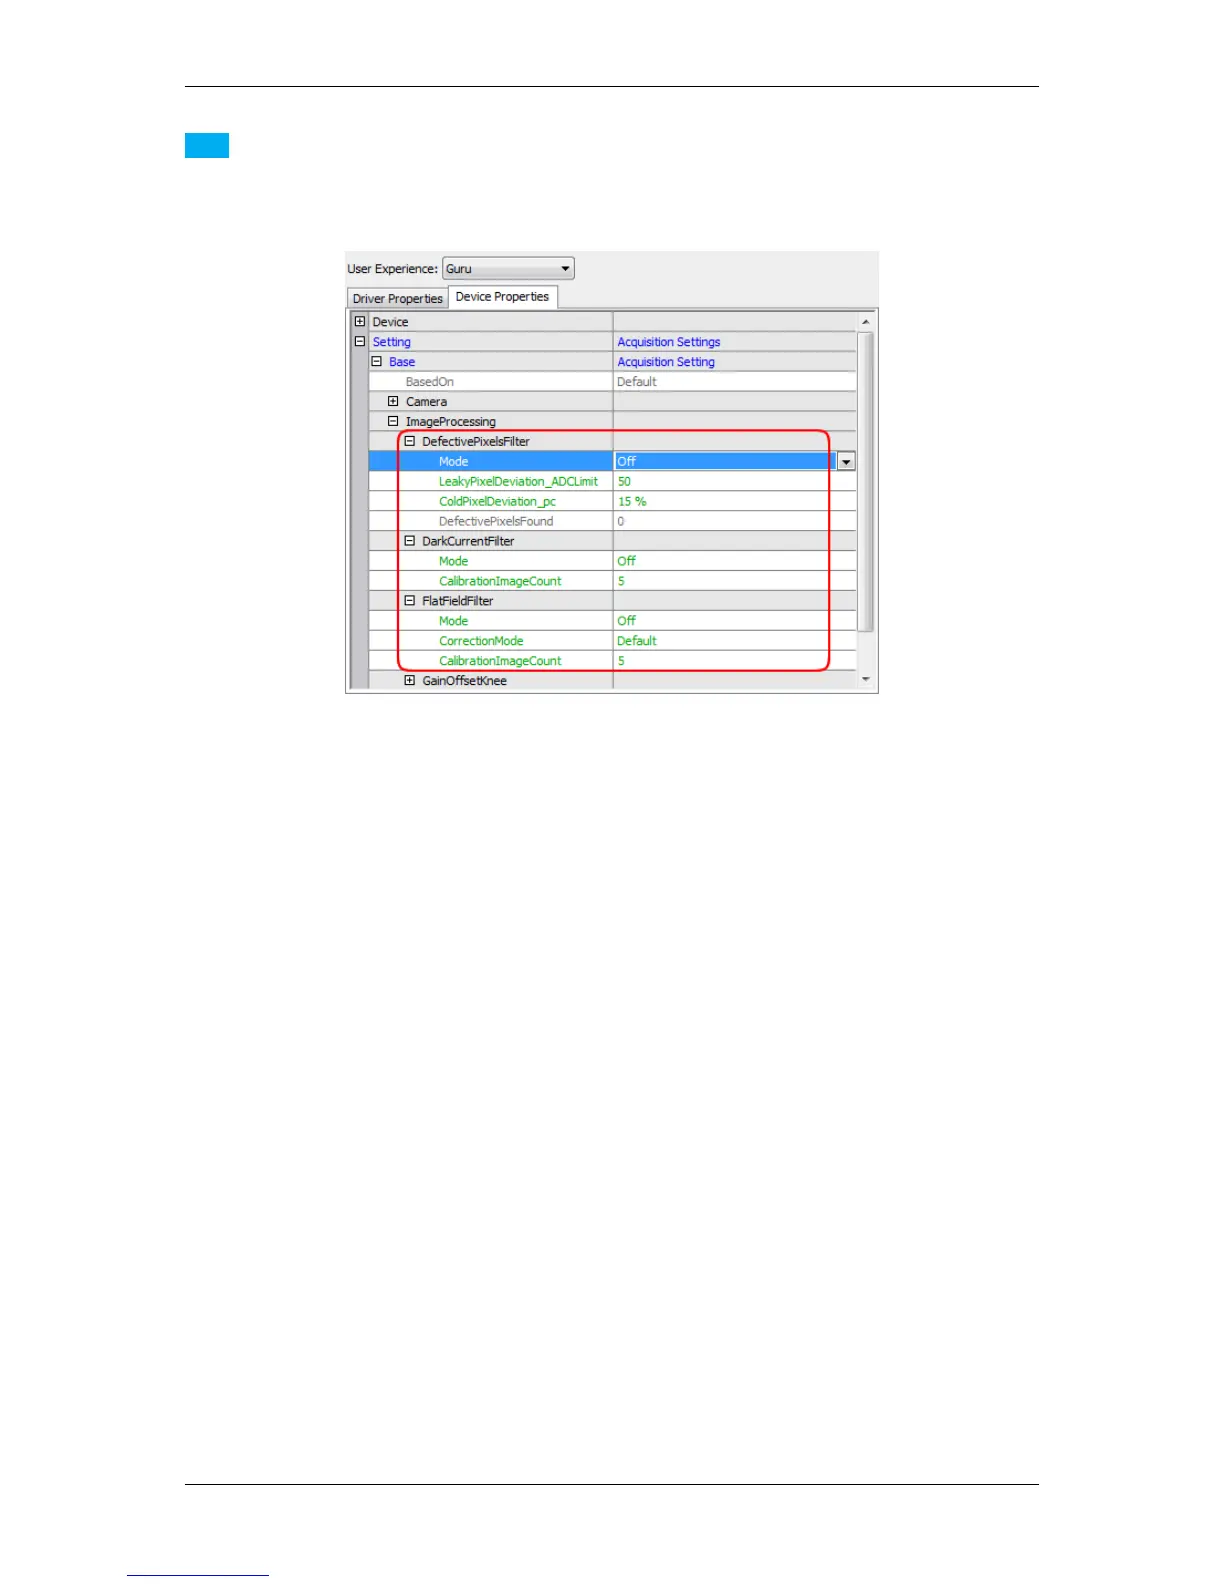
Figure 1: Host-based image corrections
The path "Setting -> Base -> ImageProcessing -> ..." indicates that these corrections are host-based corrections.
Before starting consider the following hints:
• To correct the complete image, you have to make sure no user defined AOI has been selected: Right-click
"Restore Default" on the devices AOI parameters Width and Height or "Setting -> Base -> Camera ->
GenICam -> Image Format Control" using the GenICam interface layout (p. 93).
• You have several options to save the correction data. The chapter Storing and restoring settings (p. 82)
describes the different ways.
See also
There is a white paper about image error corrections with extended information available on our website←-
: http://www.matrix-vision.com/tl_files/mv11/Glossary/art_image_errors_←-
sensors_en.pdf
20.3.1.1 Defective Pixels Correction
Due to random process deviations, not all pixels in an image sensor array will react in the same way to a given light
condition. These variations are known as blemishes or defective pixels.
There are two types of defective pixels:
1. leaky pixel (in the dark)
which indicates pixels that produce a higher read out code than average
2. cold pixel (in standard light conditions)
which indicates pixels that produce a lower read out code than average when the sensor is exposed (e.g.
caused by dust particles on the sensor)
MATRIX VISION GmbH