2-6
Note
Insert T-bolts in the middle rail section before inserting thesplice bars if you
are connecting more than two rail sections.
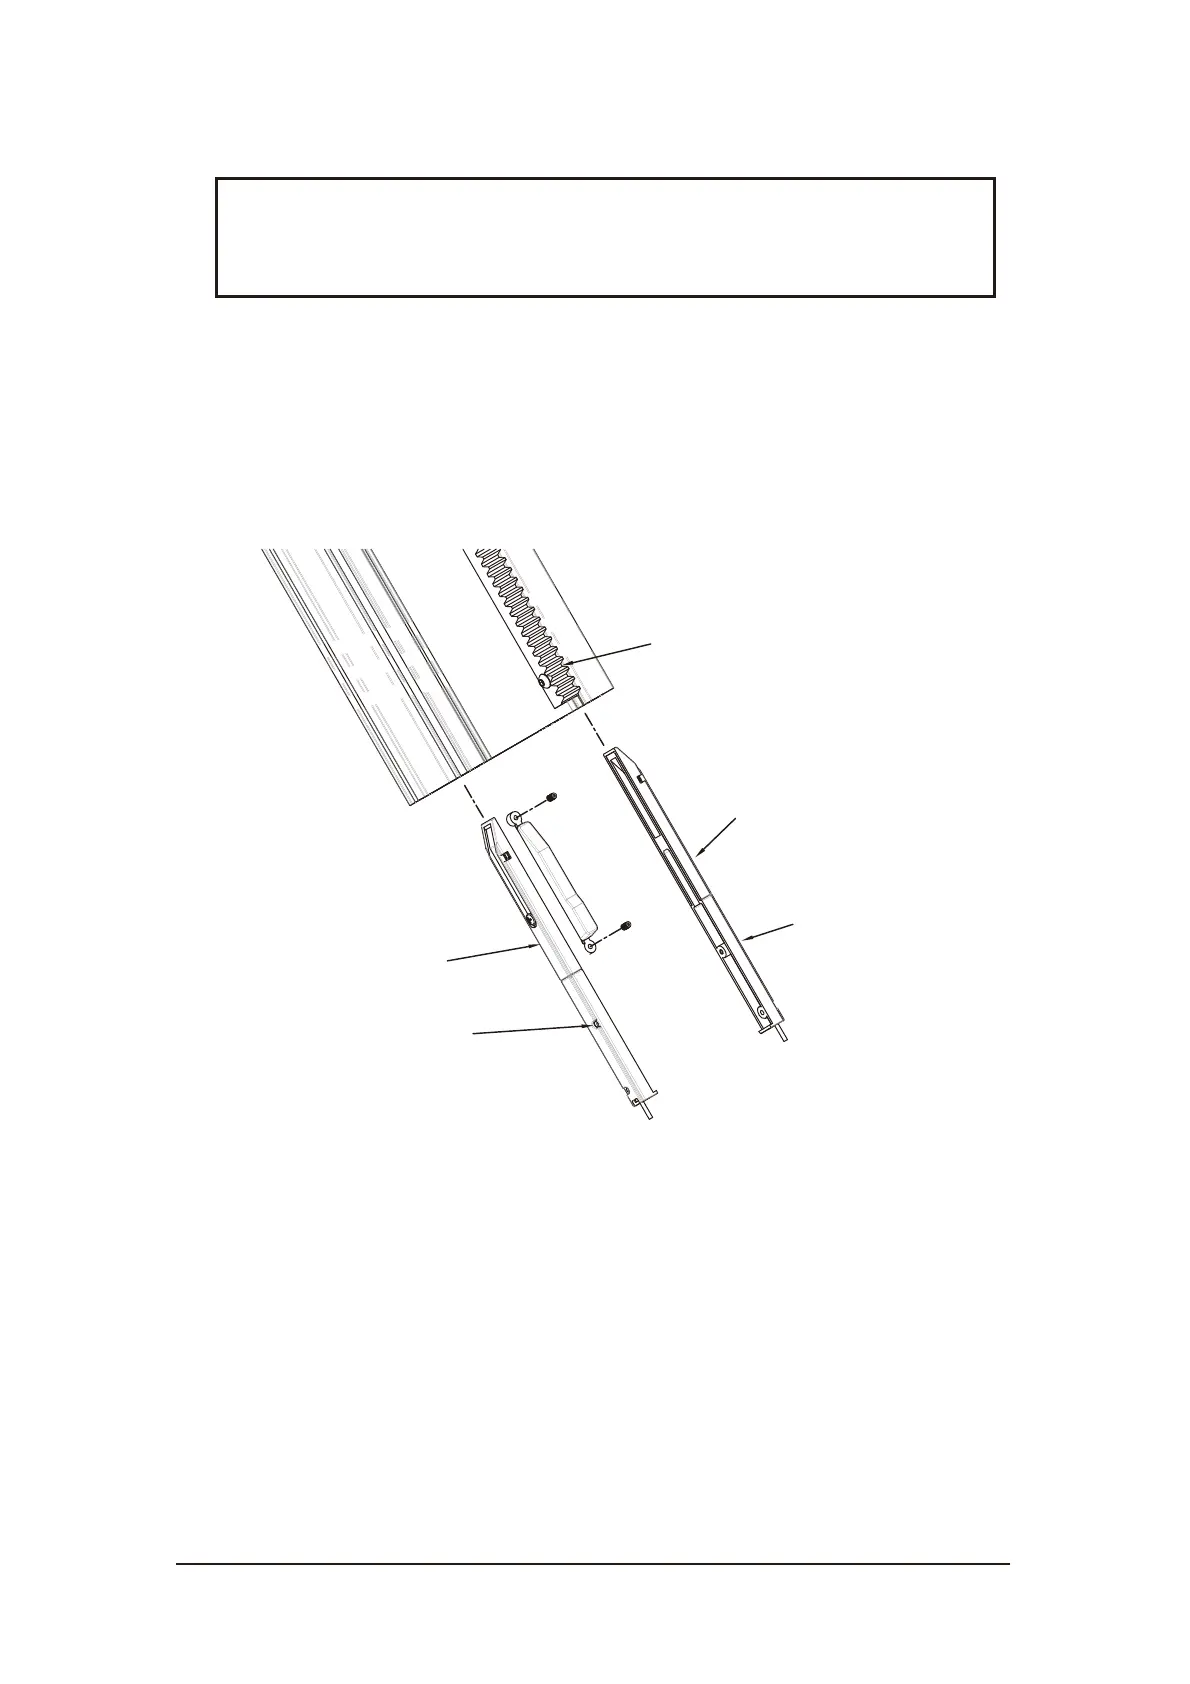
2.5. Install Bottom Rail Accessories
Assemble the charging bases of the bottom rail section. The negative ports are
always installed on the rack side. Tighten the set screws. Install the limit switch
cam on the bottom rail.
Figure 2-7 Install charging bases and limit switch cam
2.6. Install Rail Assembly on Stairs
Position the rail assembly on the nose of steps. Leave the bottom of rail about
3/8”(9mm) above the floor.The minimum distance between the wall and the rail is
2-3/8”(60mm). Slide the T-bolts into the lower slots of the rail. There should be
six t-bolts on one rail section (three on each side). Place the mounting brackets at
lowest and highest stairs the rail spanned. Mount the third one at the middle of the
other two brackets. Ensure the distance between two mounting brackets is smaller
than 40” (1016mm).
Rack
Negative(-)
Black
Set screw
Positive(+)
Red
Set screw