© Microhard Systems Inc. 120
4.0 WebUI Configuration
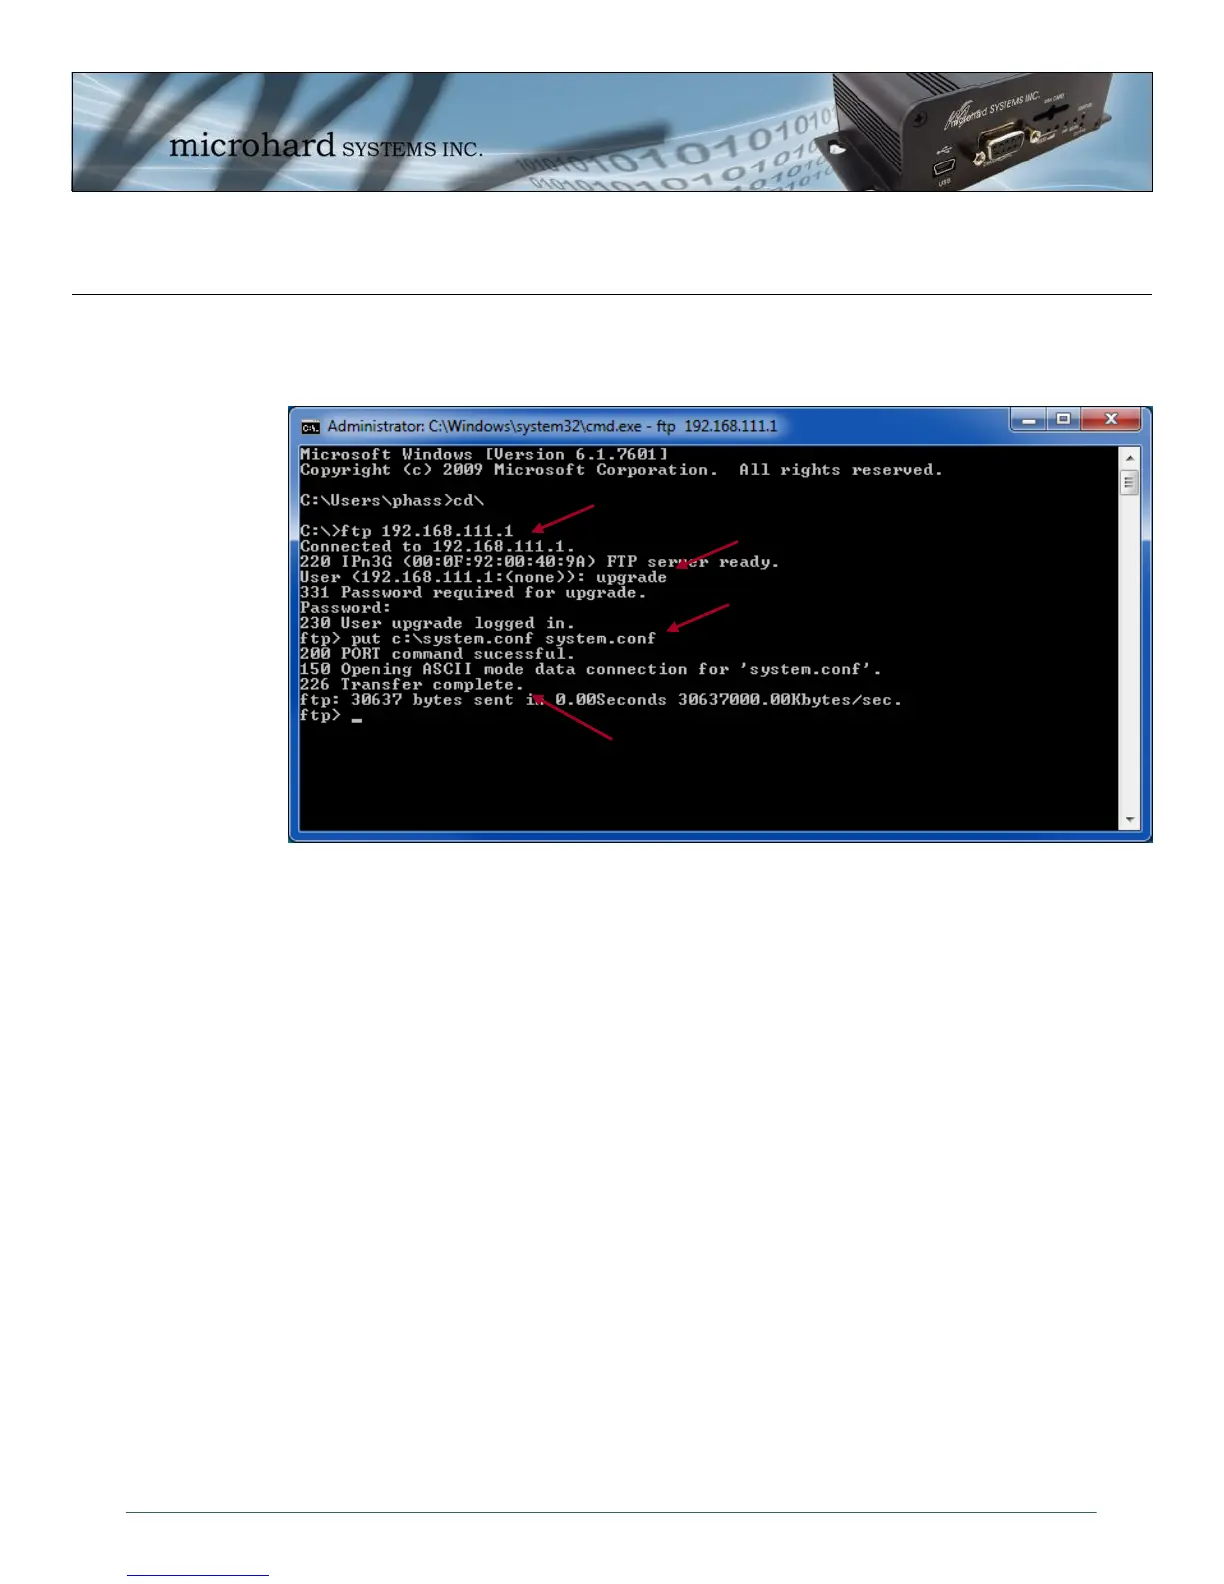
4.11.1.4 Restoring Configuration Settings (FTP)
A system.conf file can be also be uploaded to the IPn3G using FTP as seen below:
Image 4-78: Tools > Maintenance > Configuration Backup (FTP)
1. From a DOS command prompt, start a FTP session with the IPn3G, you can FTP to the USB NDIS IP
Address (192.168.111.1), the LAN IP Address (192.168.0.1), and if the firewall settings allow, the
WAN IP Address. The example uses the USB NDIS Interface address. It is recommended to navigate
to the folder (in DOS) in which the system.conf is located and launch the FTP session from there.
2. Login using the username: upgrade and the password: admin
3. “put” the file by specifying the location of the source file “c:\system.conf” and the destination filename
(it has to be “system.conf”). In the example just the root directory of the PC is being used, so the
source is c:\system.conf,
4. The Transfer should show as complete.
5. The unit will reboot with the settings specified in the system.conf file.
1
2
3
4