OM-278680 Page 28
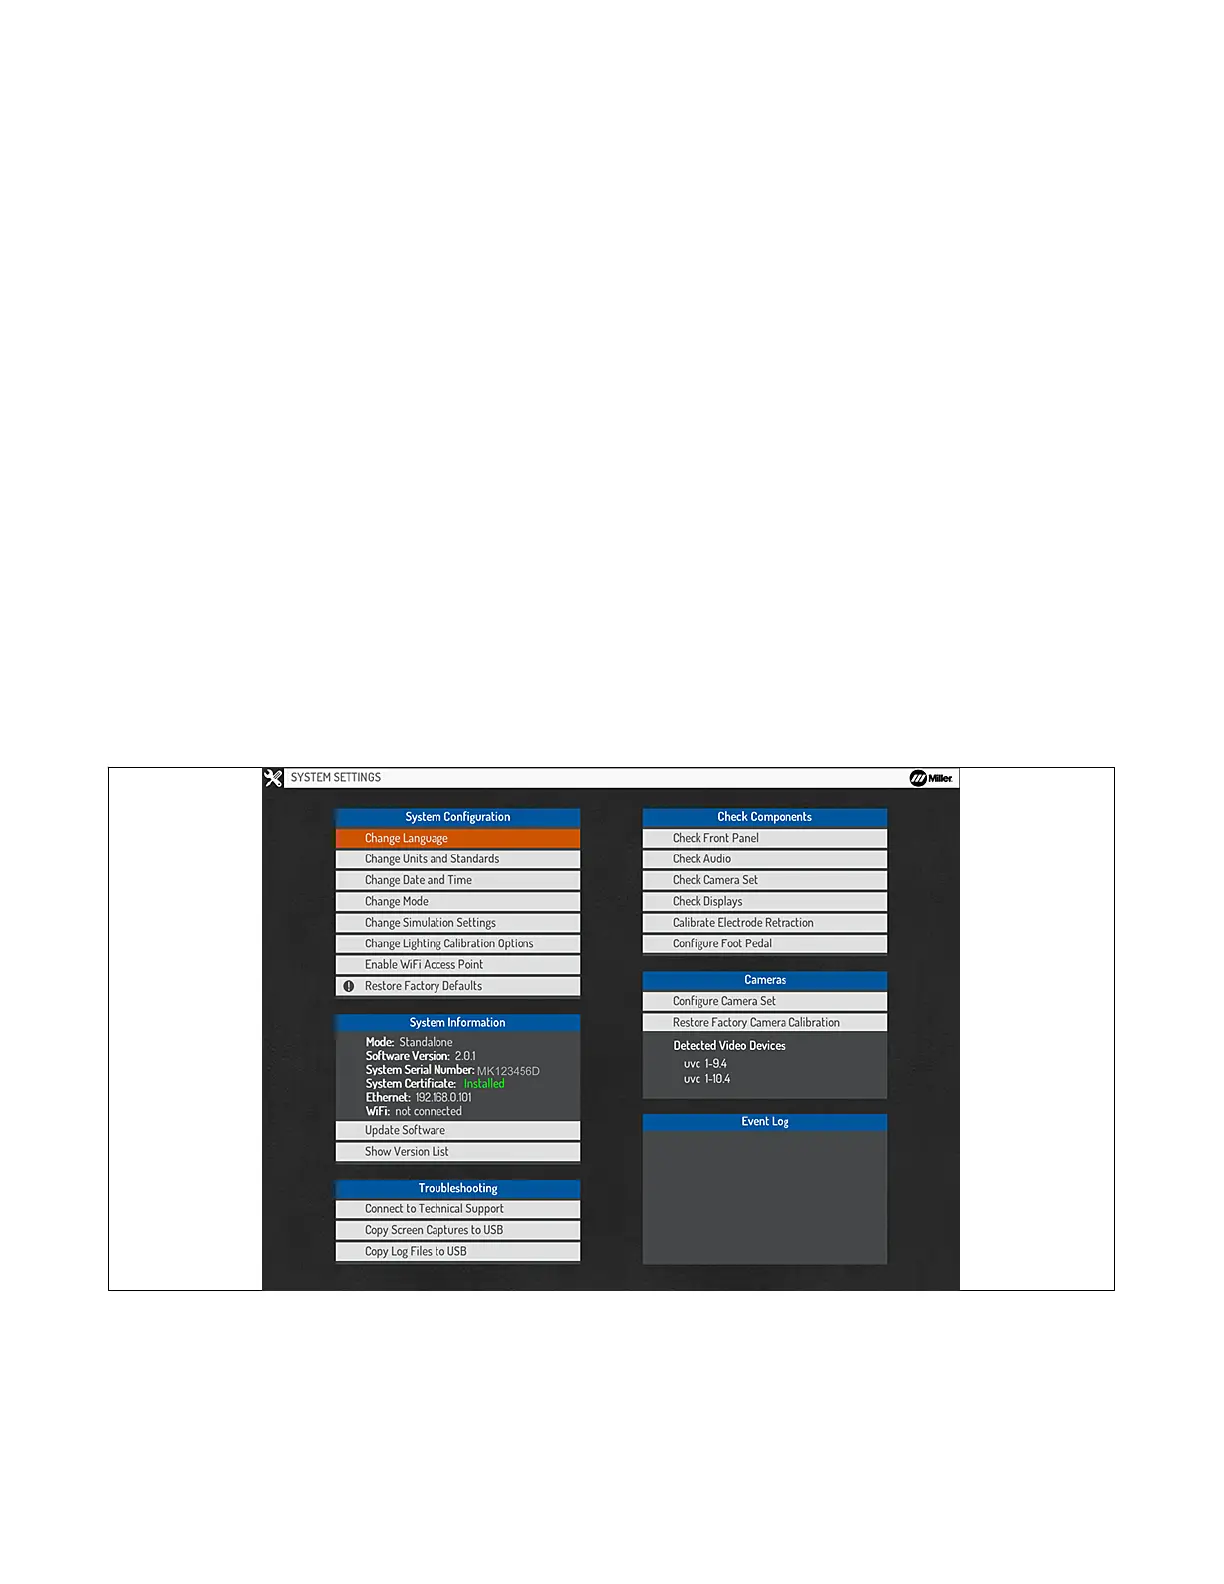
C. Changing System Date And Time
Select Change Date And Time and press OK to change the year, month, day, and time. Select Apply and press OK after making changes, or
press Cancel to exit the menu without saving.
D. Changing System Mode
Before changing to Classroom mode, ensure the system is connected as shown in Section 5-4. The controller and the simulator must have the
same version of software installed (see Section 8-3).
Select Change Mode and press OK to change the system configuration to Standalone or Classroom. Use Standalone mode for a setup with a
single simulator. Use Classroom mode for a setup with multiple simulators and a controller. Select Apply and press OK after making changes, or
press Cancel to exit the menu without saving.
E. Changing Simulation Settings
Select Change Simulation Settings and press OK to change visibility of the top status panel during simulations, change the virtual nozzle
display settings, and change tracking type (Mono or Stereo) for each process. Mono tracking uses only the left camera for tracking, which means
that if the marker on an object is viewable in the helmet display during the exercise that the object will be tracked. Stereo tracking requires both
the left camera and right camera to view the marker on the object for the object to be tracked. Stereo tracking is recommended and results in the
best accuracy of the tracked technique parameters. Mono tracking has lower accuracy but may reduce tracking issues.
F. Changing Lighting Calibration Options
Select Change Lighting Calibration Options and press OK to change the frequency with which the system prompts the user to perform the
lighting calibration process. See Section 7-2C.
G. Change WiFi Access Point Settings
Select Enable WiFi Access Point to broadcast a WiFi network directly from the simulator without the need for a router (only available in
standalone mode).
H. Restoring Factory Configuration
To reset system to the original factory configuration, select Restore Factory Defaults and then press OK (Figure 8-3). A confirmation message
will be displayed. Make a selection to either proceed or cancel.
Figure 8-3. Restoring Factory Configuration
For a system in Classroom Mode, the restore process will restore the simulator to original factory conditions, but will not affect the system
curriculum (courses, students, student history). These changes can only be made by using the Teacher Software (see Section 9). For a system in
Standalone Mode, a number of reset options are provided (see Figure 8-4). Selecting System Configuration Only will restore the system to
original factory conditions, but will not affect the system curriculum. Selecting Curriculum, Students, & Test Data Only will erase all customized
system content and restore the system content to the factory defaults. Selecting Both will restore the system configuration and content to original
factory conditions.
You can use the Teacher Software to create a backup file of the complete system curriculum, students, and test data, which can be reloaded onto
the system at a later date (See Section 9-6B).