OM-278680 Page 16
SECTION 6 − SYSTEM CONTROLS AND COMPONENTS
! Do not use the welding simulator if
you are light sensitive or affected by
video, flashing lights, or other visual
stimuli. Stop using simulator and
consult your physician if you experi-
ence vision problems, nausea,
headaches,
dizziness, vertigo, or
other conditions.
For best performance, keep helmet,
guns, torches, and workpieces free of
dust and debris. Clean components
with a damp cloth. (Do not use chemi-
cals, solvents, or abrasives to clean
markers.)
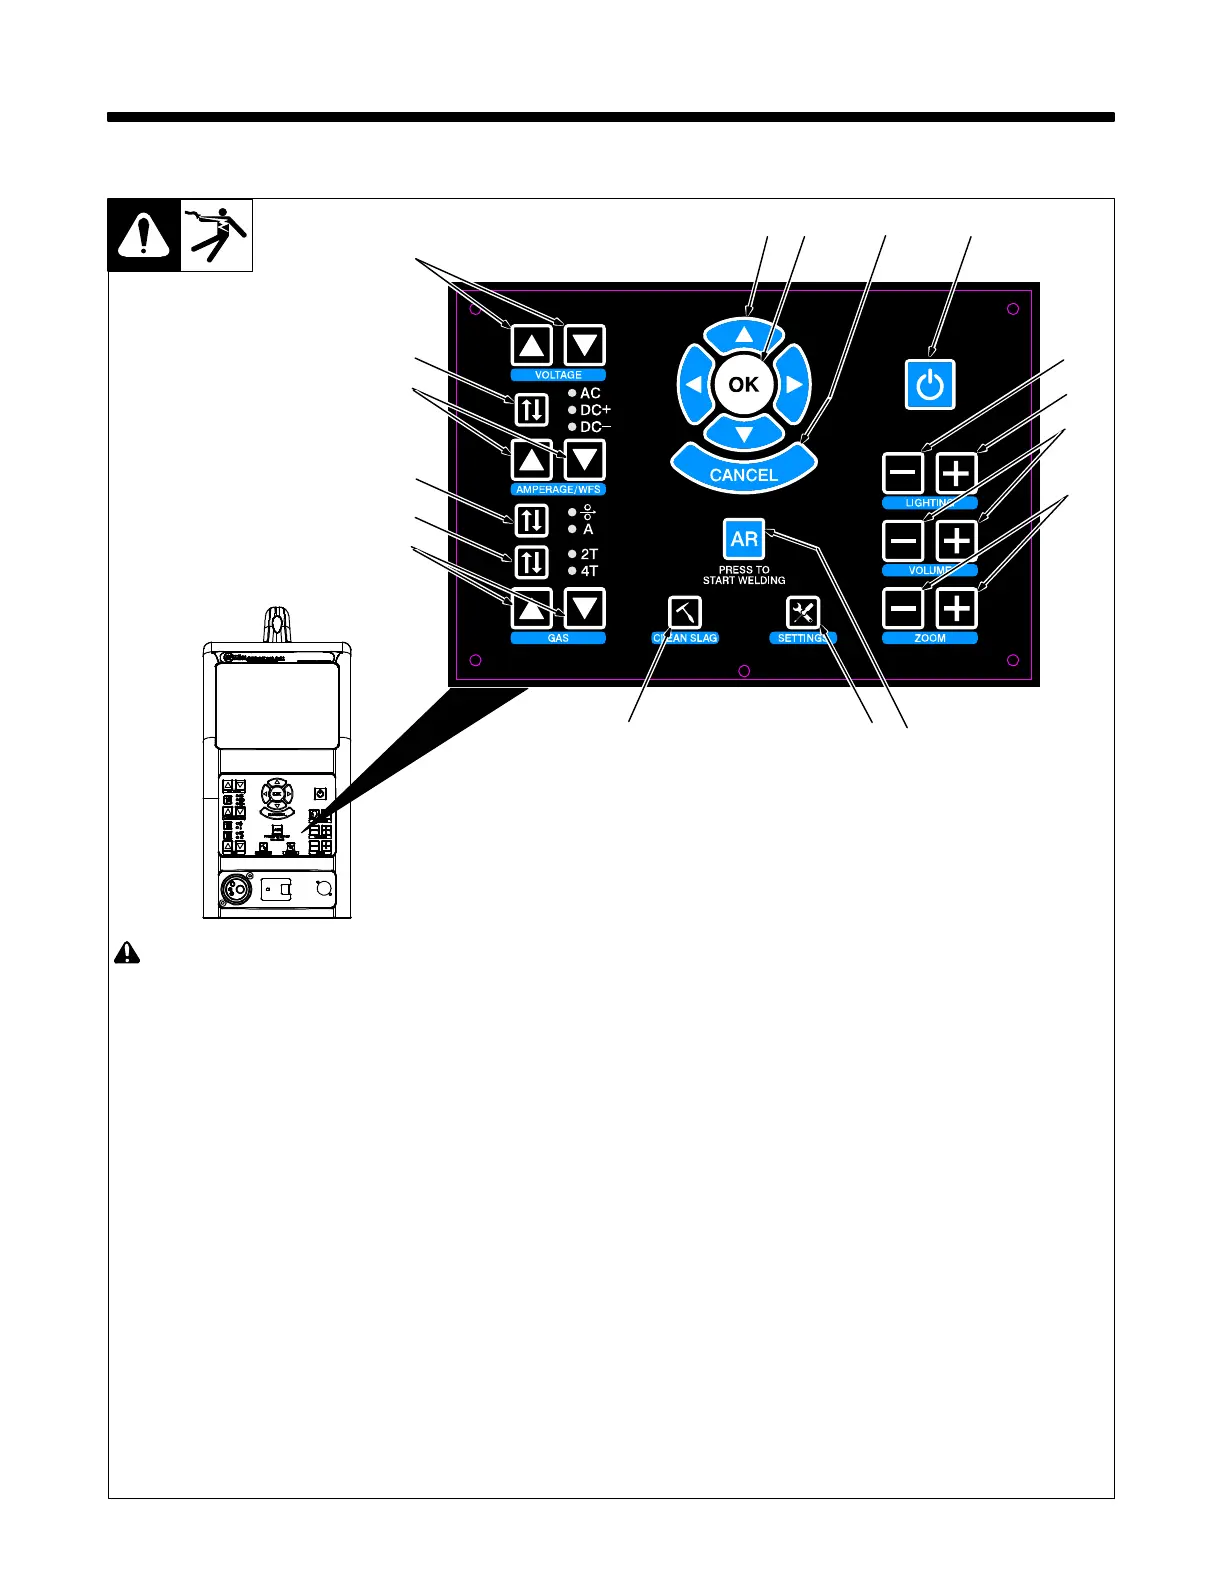
1 Power On/Off Button
Use button to turn system on and off.
2 Helmet Light Intensity Decrease
Button
Use button to decrease intensity of helmet
light.
3 Helmet Light Intensity Increase Button
Use button to increase intensity of helmet
light.
4 Volume Adjustment Buttons
Use buttons to increase or decrease vol-
ume of helmet speakers
5 Display (Zoom) Adjustment Buttons
Use buttons to magnify images on display
screens.
6 Augmented Reality (AR) Button
Use button to turn augmented reality feature
on and off.
7 System Settings Button
Use button to access system settings
menu. Use the settings menu to change lan-
guage, units of measure (standard or met-
ric), camera settings and other parameters.
After starting an exercise, use the System
Settings button to adjust video device set-
tings and optimize AR tracking for the room
lighting conditions (see Section 8-7).
Some settings can only be changed by
the system administrator.
8 Clean Slag Button
Use button to remove slag from augmented
reality workpiece when Stick and FCAW
welding. Slag must be cleaned for test re-
sults to be displayed.
9 Shielding Gas Flow Adjustment
Buttons
Use buttons to increase or decrease the
shielding gas flow for the GMAW, FCAW,
and GTAW weld processes.
10 Gun Trigger Selection Button
Use button to select either two-step or
four-step trigger operation.
11 Amperage/Wire Feed Speed
Selection Button
Use button to select the weld parameter
(amperage or wire feed speed) to be adjust-
ed (see Item 12).
12 Amperage/Wire Feed Speed
Adjustment Buttons
Use buttons to increase or decrease am-
perage or wire feed speed (see item 11).
13 AC/Polarity Selection Button
Use button to select AC weld output or
DCEP or DCEN weld polarity.
14 Voltage Adjustment Buttons
Use buttons to increase or decrease weld
voltage.
15 System Navigation Buttons
Use buttons to navigate AR system pro-
grams and select menu items.
16 OK (System Selection) Button
Use button to activate selected menu items.
17 System Cancel Button
Use button to stop the AR program or activi-
ty in use, or return to the previous screen.
6-1. Simulator Controls
1
2
3
4
5
678
9
10
11
12
13
14
15
16 17
Ref. 276687-A