Operating & Maintaining the Eden 3-D Printer
7–32
DOC-00500 Rev. F
Installing the
New Head
15. Inspectthereplacementhead,andmakesurethattheO‐ringsealsare
inplace(seefigure 7‐43).
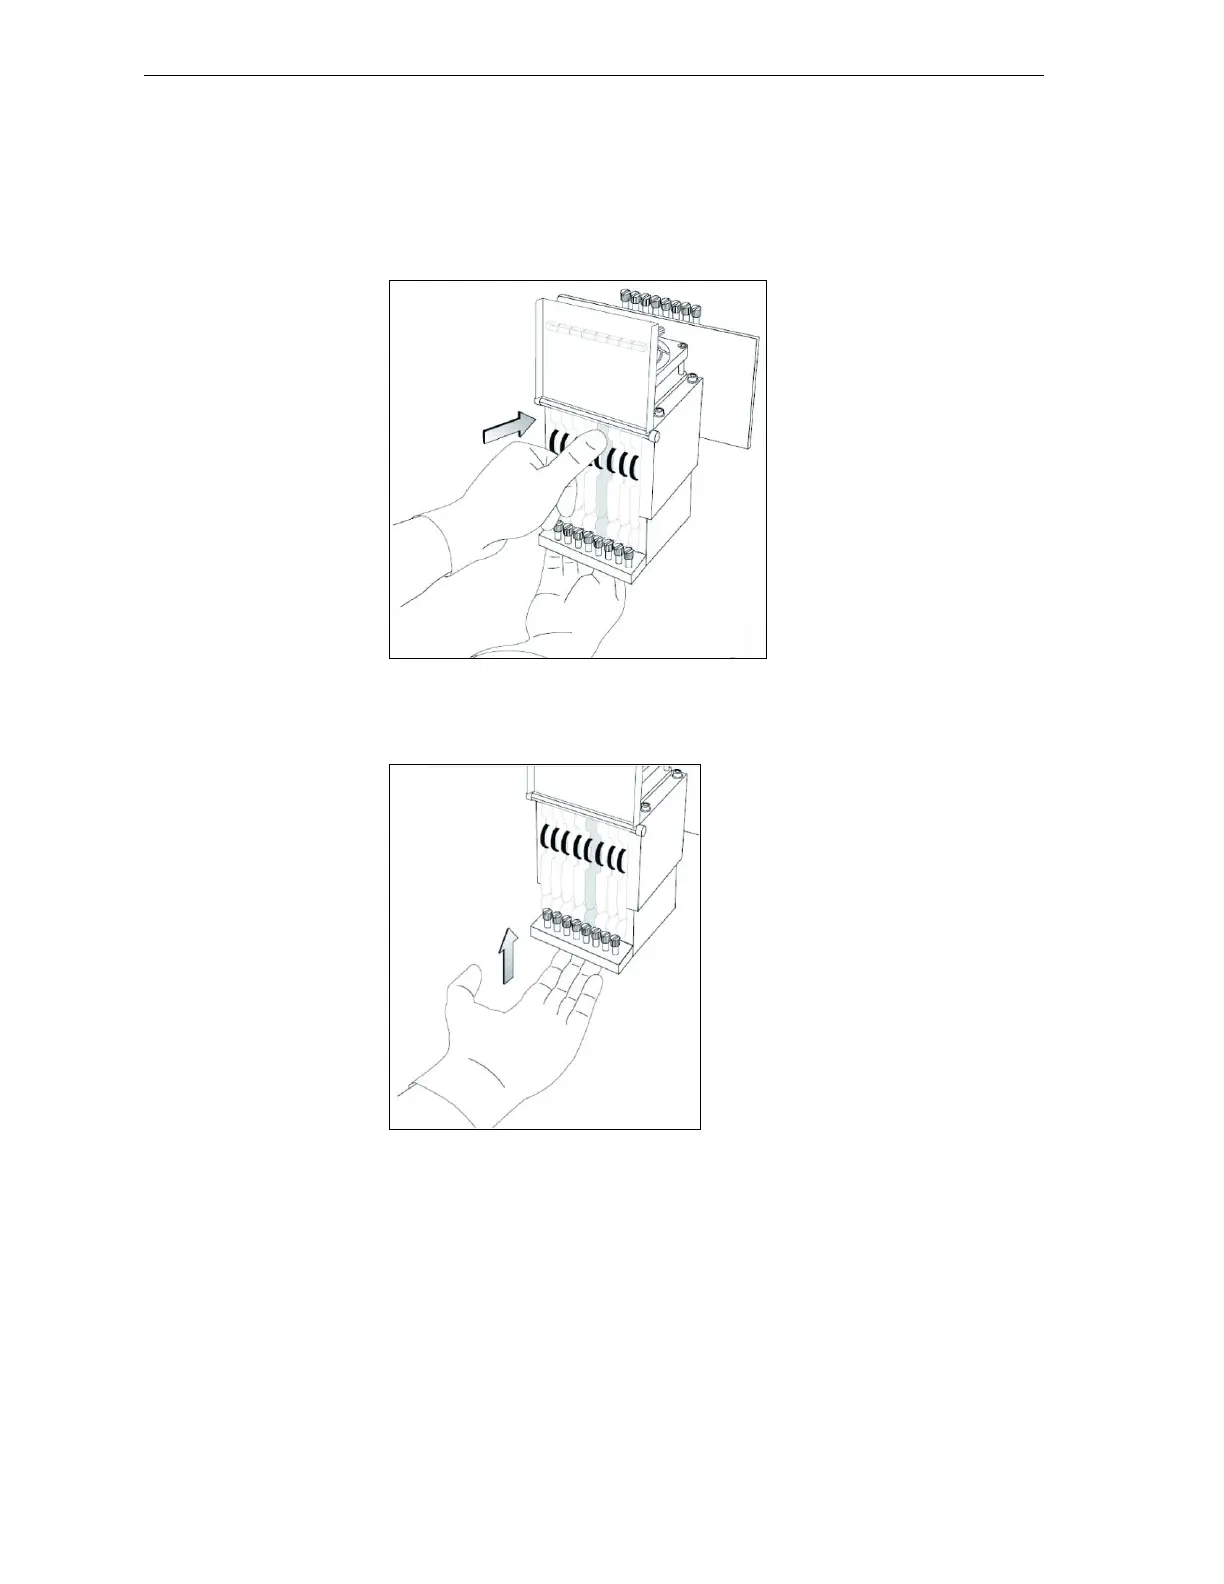
16. Gentlyinsertthereplacementheadintothevacantslotintheprint
block,andpushtheprint‐headdrivercardintoitssocket.
Note: Make sure to insert the head with driver card facing its socket, in the
rear of the print block.
Figure 7-45: Inserting the print-head driver card into its socket
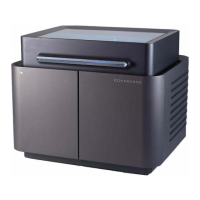
17. Pushtheheadupuntilyouhearitclickintoplace,inbothfrontand
rearholders.
Figure 7-46: Clicking the head into place in the print block
18. Lowerthedooroftheprintheadcompartment,andtightenthescrews
tolockitinplace.
19. Tightentheupperandlowerscrewsthatsecuretheprintheadinthe
printblock(seefigure 7‐39onpage 30).
Note: Hand-tighten these screws. Do not use a screwdriver.
20. IntheReplaceHeadNowdialogbox(seefigure 7‐38onpage 29),
selectthecheckboxtoconfirmthatyouhavereplacedthehead,and
click
Next.