range Pi User Manual Copyright reserved by Shenzhen Xunlong Software Co., Ltd
192
3) After starting the Linux system, first confirm that the i2c device node exists under
/dev
orangepi@orangepi:~# ls /dev/i2c-*
/dev/i2c-0 /dev/i2c-2 /dev/i2c-3 /dev/i2c-4 /dev/i2c-6
4) Then connect a i2c device on the i2c pin of the 40Pin connector
Corresponding
to No. 3 pin
Corresponding
to No. 27 pin
Corresponding
to No. 19 pin
Corresponding
to No. 5 pin
Corresponding
to No. 28 pin
Corresponding
to No. 23 pin
Corresponding
to No. 1 pin
Corresponding
to No. 1 pin
Corresponding
to No. 1 pin
Corresponding
to No. 6 pin
Corresponding
to No. 6 pin
Corresponding
to No. 6 pin
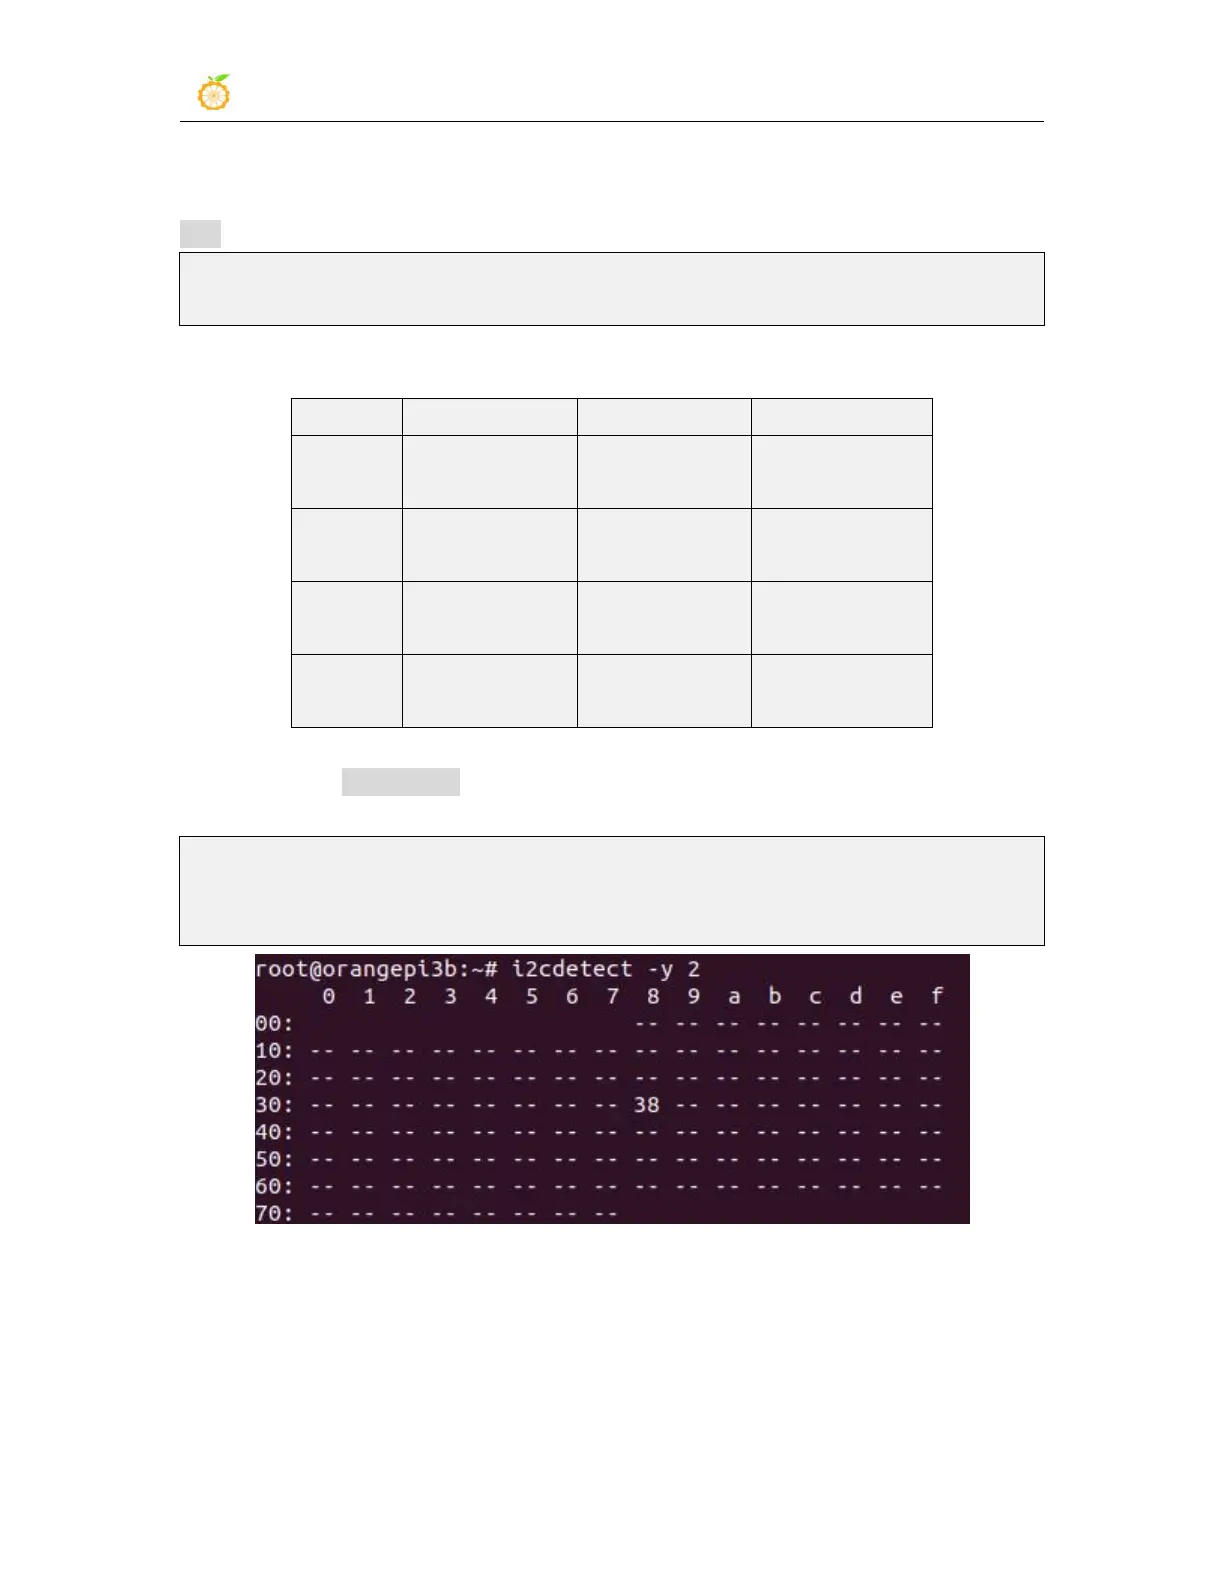
5) Then use the i2cdetect -y command, if the address of the connected i2c device can be
detected, it means that i2c can be used normally
orangepi@orangepi:~$ sudo i2cdetect -y 2 #i2c2 command
orangepi@orangepi:~$ sudo i2cdetect -y 3 #i2c3 command
orangepi@orangepi:~$ sudo i2cdetect -y 4 #i2c4 command
3.16.5. 40pin UART test
1) As can be seen from the table below, the available uarts for Orange Pi 3B are uart2,
uart3, uart7 and uart9, a total of four groups of uart buses, of which uart2 is the system’s
debugging serial port by default.