range Pi User Manual Copyright reserved by Shenzhen Xunlong Software Co., Ltd
40
Note, after burning the image into eMMC, if the test finds that it cannot be
started, please clear the SPIFlash and try again. For the method of clearing
SPIFlash, please refer to the method of using RKDevTool to clear SPIFlash.
2.5.2. Use the dd command to burn the Linux image into eMMC
Note that the Linux image mentioned here specifically refers to the image of
Linux distributions such as Debian, Ubuntu, OpenWRT or OPi OS Arch
downloaded from the Orange Pi data download page.
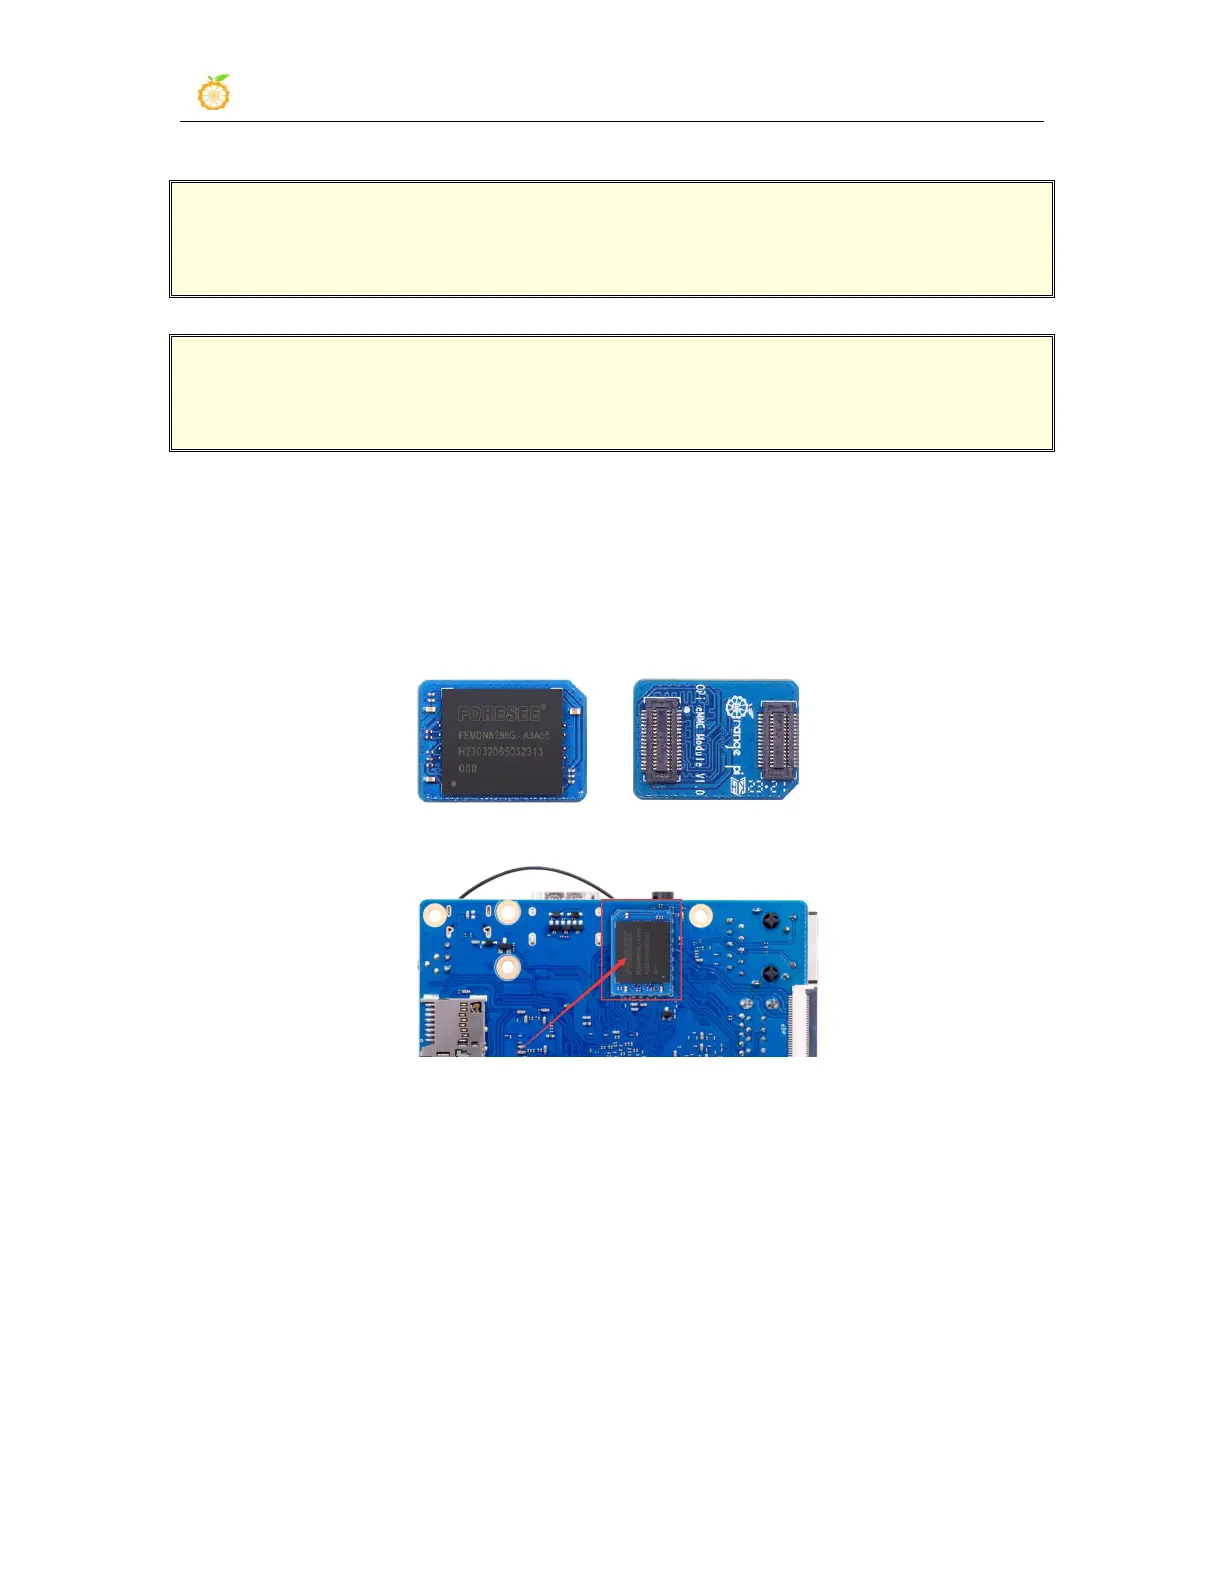
1) The development board reserves the expansion interface of the eMMC module.
Before burning the system to the eMMC, you first need to purchase an eMMC module
that matches the eMMC interface of the development board. Then install the eMMC
module to the development board. The eMMC module and the method of plugging into
the development board are as follows:
2) Using the dd command to burn the Linux image to eMMC needs to be completed with
the help of a TF card, so first you need to burn the Linux image to the TF card, and then
use the TF card to start the development board to enter the Linux system. For the method
of burning the Linux image to the TF card, please refer to the instructions in the two
sections of the method of burning the Linux image to the TF card based on the
Windows PC and the method of burning the Linux image to the TF card based on
the Ubuntu PC.
3) After using the TF card to start the Linux system, we first upload the decompressed