range Pi User Manual Copyright reserved by Shenzhen Xunlong Software Co., Ltd
203
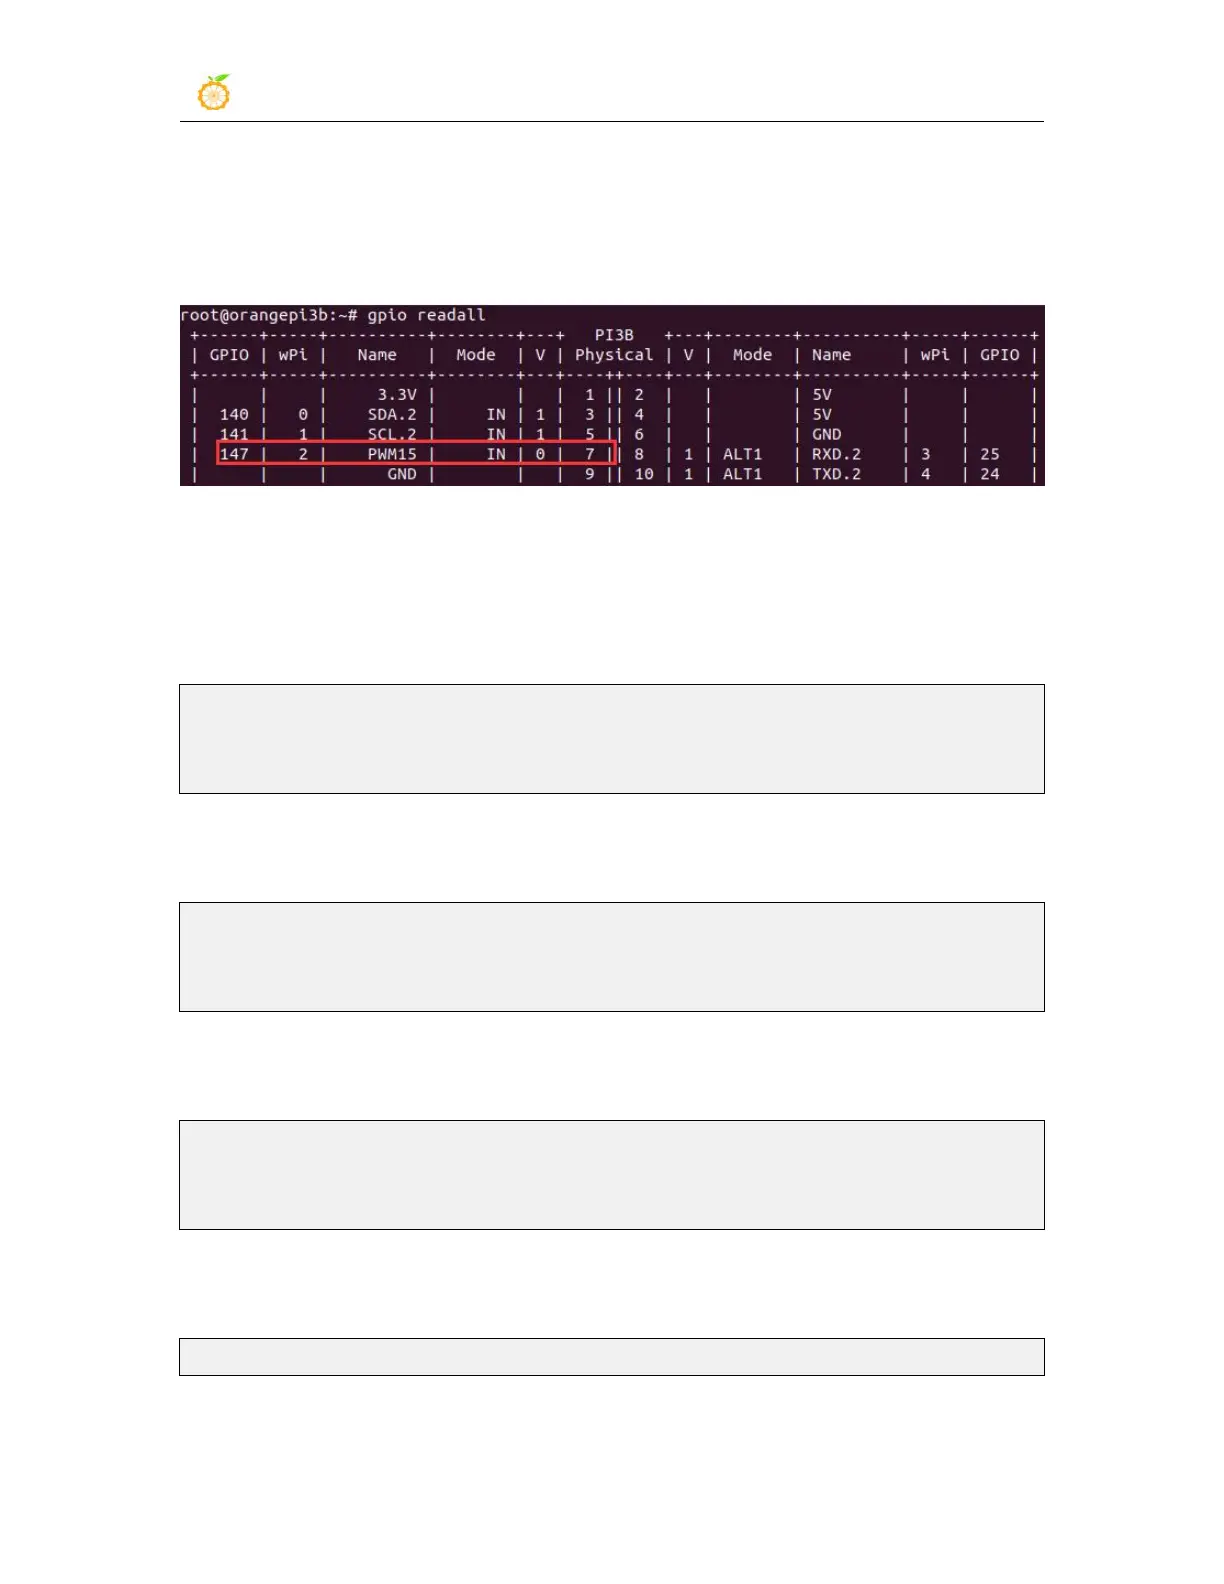
1) The following takes pin 7
—
the corresponding GPIO is GPIO4_C3
—
the
corresponding wPi number is 2
—
as an example to demonstrate how to set the high and
low levels of the GPIO port
2) The steps to test directly with the command are as follows:
a. First set the GPIO port to output mode, where the first parameter of the
pinMode function is the serial number of the wPi corresponding to the pin, and
the second parameter is the GPIO mode
root@orangepi:~/wiringOP-Python# python3 -c "import wiringpi; \
from wiringpi import GPIO; wiringpi.wiringPiSetup() ; \
wiringpi.pinMode(2, GPIO.OUTPUT) ; "
b. Then set the GPIO port to output low level. After setting, you can use a
multimeter to measure the voltage value of the pin. If it is 0v, it means that the
low level is set successfully.
root@orangepi:~/wiringOP-Python# python3 -c "import wiringpi; \
from wiringpi import GPIO; wiringpi.wiringPiSetup() ;\
wiringpi.digitalWrite(2, GPIO.LOW)"
c. Then set the GPIO port to output a high level. After setting, you can use a
multimeter to measure the voltage value of the pin. If it is 3.3v, it means that the
high level is set successfully.
root@orangepi:~/wiringOP-Python# python3 -c "import wiringpi; \
from wiringpi import GPIO; wiringpi.wiringPiSetup() ;\
wiringpi.digitalWrite(2, GPIO.HIGH)"
3) The steps to test in the command line of python3 are as follows:
a. First use the python3 command to enter the command line mode of python3
root@orangepi:~# python3
b. Then import the python module of wiringpi