7 - 8
Controls
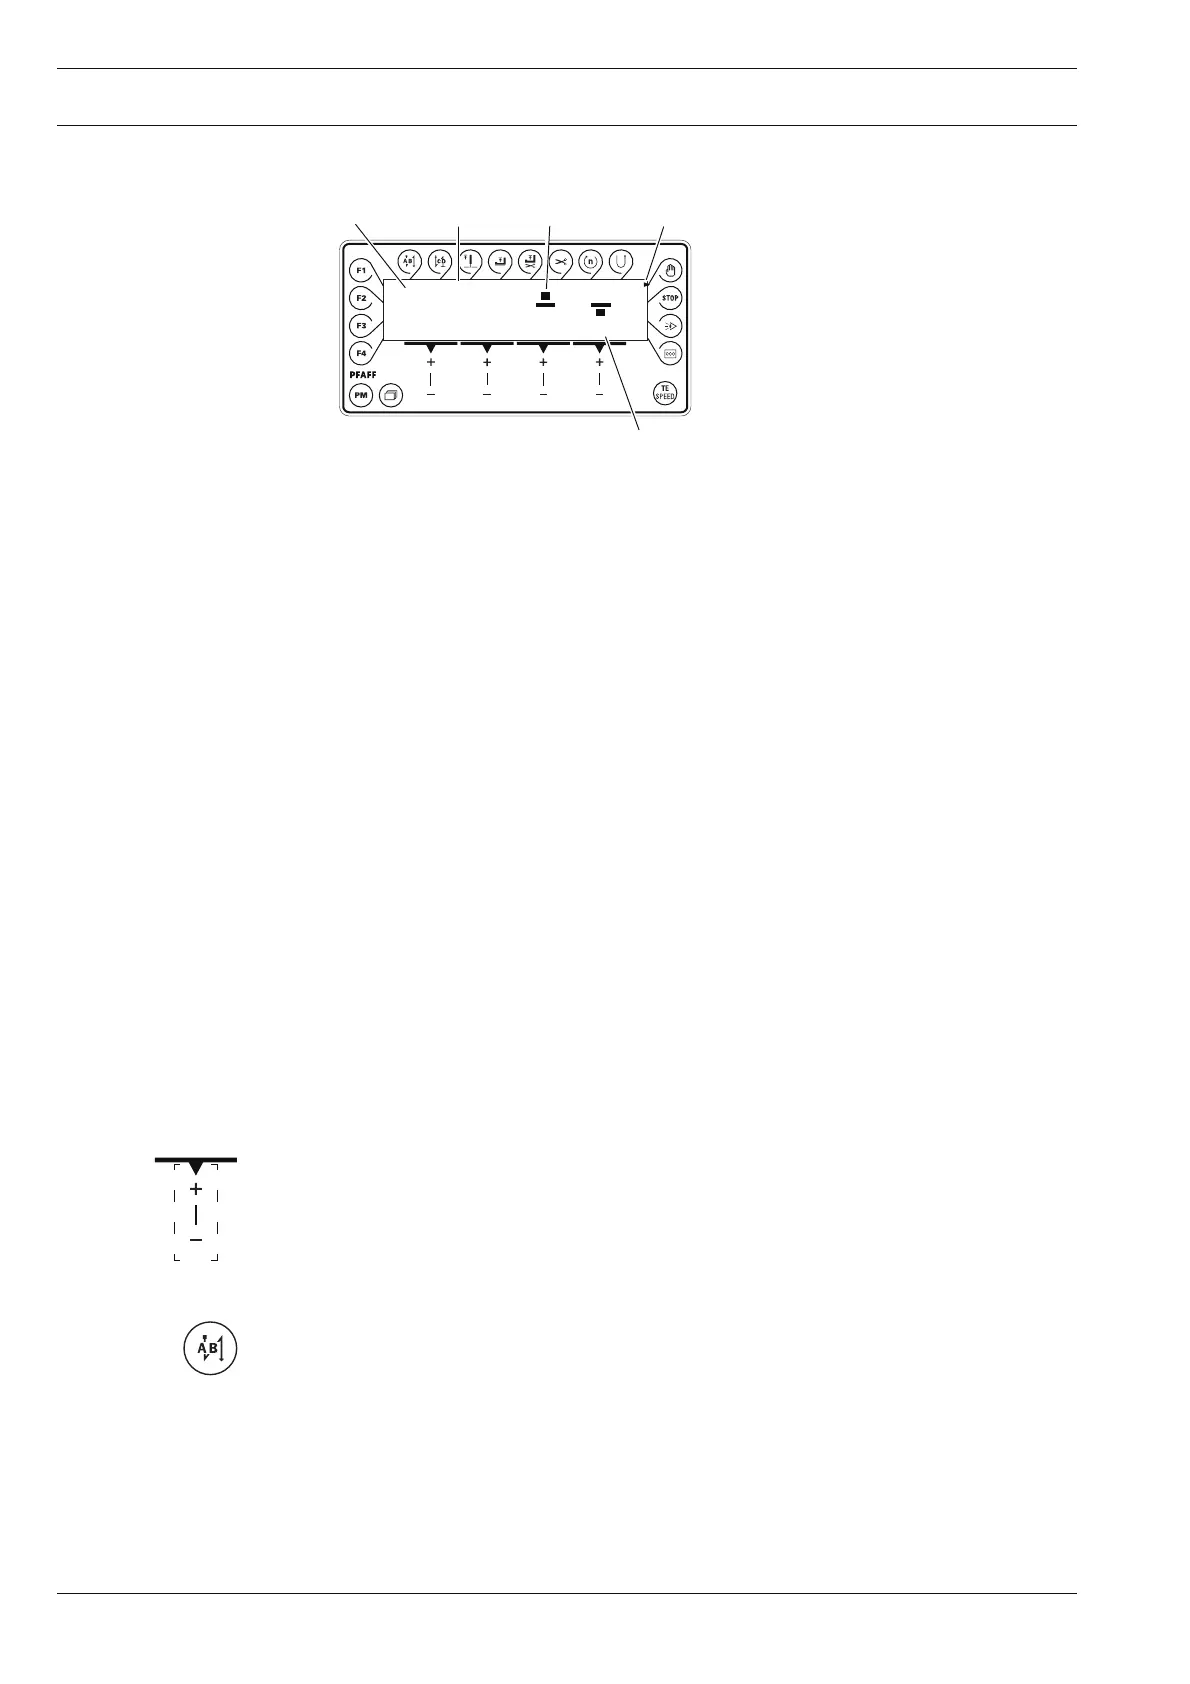
7.12 Control panel
The control panel consists of display 1 and the function keys described below. Display 1
consists of a two-row, alpha-numerical display with 16 symbols per row. The special
symbols 3 and texts 4 show the respective status of the function keys and the operating
modes of the machine.
During the power-on phase the control panel automatically switches on all LCD segments
and a beep tone for a short time. Afterwards the lettering PFAFF appears on the display,
until the higher-ranking control unit sends commands to the control panel.
7.12.01 Displays on the screen
● Connected functions are shown with a triangular symbol 2 below or next to the
respective function key.
● In sewing mode all relevant sewing data is displayed and can be changed directly
depending on the machine status, also see Chapter 10 Sewing.
● When entering the parameters, the selected parameter number with the corresponding
parameter value is displayed, see Chapter 13.08.01 Parameter input.
● When entering the seam programs, the data is entered in corresponding input menus,
see Chapter 11 Input.
7.12.02 Function keys
The function keys described below are used basically to switch the machine functions on
and off.
If a value must be given for the activated function, this is entered with the relevant +/- key.
By pressing down the relevant +/- key the corresponding value 5 is changed slowly. If the +/-
key is held down longer, the values change more quickly.
Start backtacks
● By pressing this key, the backtacking function at the beginning of the seam (start
backtacks) is switched on or off. The number of forward stitches (A) or reverse stitches
(B) for the start backtacks can be changed in each case by pressing the +/- key
underneath. To convert from double backtacks to single backtacks the relevant number
of stitches for the seam segment is set at zero.
● When entering the code number, the key corresponds to the number 1.
3.5 3.5
PM
5
341 2