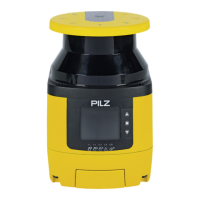
Installation and alignment
Operating Manual PSEN sc M 3.0/5.5 08-17
1005387-EN-05
| 75
Prerequisites
} Mounting surface with 2 through-holes for screws M5x10mm, distance 73mm horizont-
ally towards each other for fixing the bracket of the safety laser scanner.
} The mounting surface has to be accessible from both sides for installation.
Procedure:
1. Turn the safety laser scanner when the safety laser scanner is to be operated with the
top side down.
2. Use two M5 screws to fix the safety laser scanner to the mounting surface. Tighten the
screws to 3 Nm.
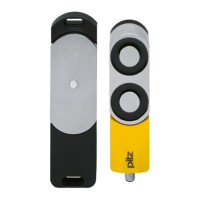
8.3 Installation of the protective bracket PSEN sc bracket H at
the safety laser scanner
For easy and flexible installation of the safety laser scanner, the safety laser scanner is
fixed to a protective bracket PSENscbracketH (see Order reference
accessories [ 135]). The protective bracket protects the safety laser scanner against
damage by falling objects.
With this protective bracket, the safety laser scanner can be used in both brackets
PSENscbracketPR (for inclination to the side or upwards and downwards) or
PSENscbracketP (for inclination upwards and downwards) (see Order reference:
Accessories [ 135]).
1. Turn the safety laser scanner when the safety laser scanner is to be operated with the
top side down.
2. Fix the PSENscbracketH at the rear of the safety laser scanner with twoM5 screws
and tighten both screws with 3 Nm.
Legend
[1] PSENscbracketH (protective bracket for safety laser scanner)
[2] M5 screws for fixing the PSENscbracketH at the safety laser scanner
[3] PSENscbracketH installed at the safety laser scanner

 Loading...