Installation and alignment
Operating Manual PSEN sc M 3.0/5.5 08-17
1005387-EN-05
| 80
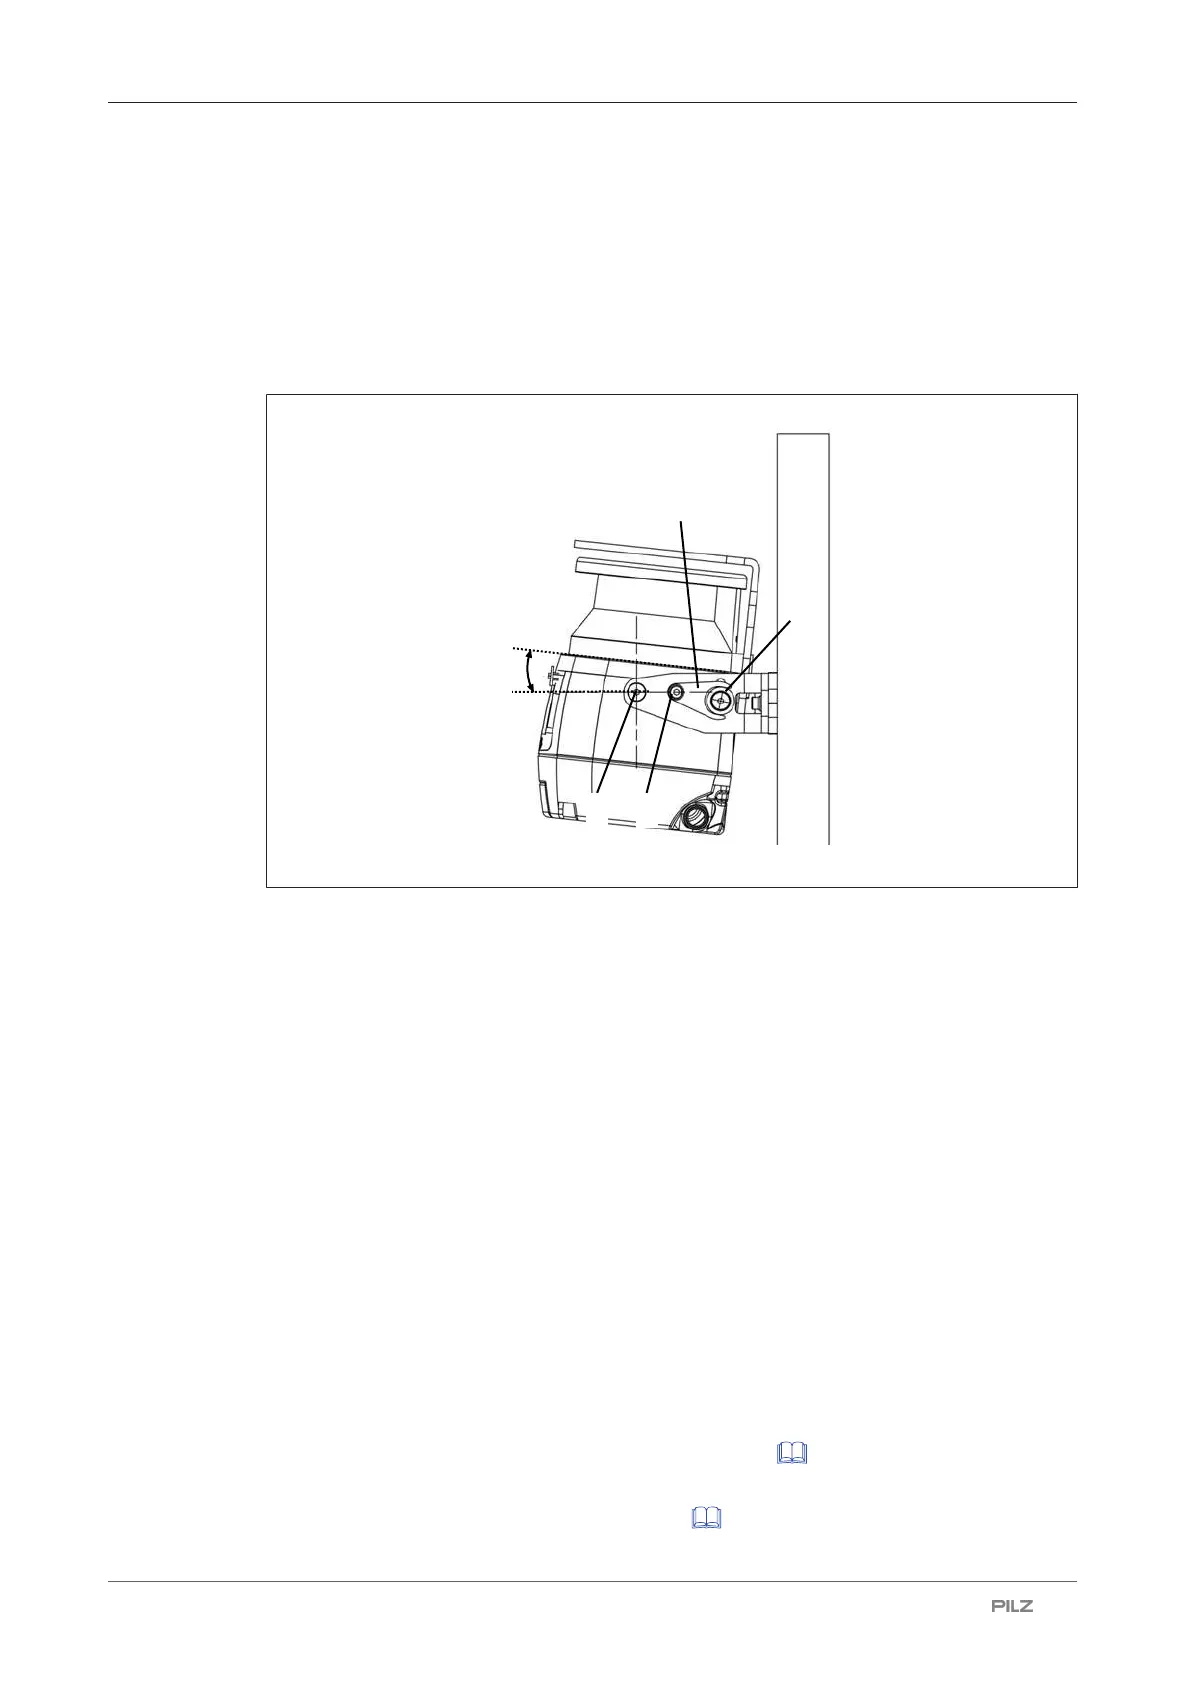
8.7 Set the angle of inclination of the safety laser scanner
Procedure:
1. Change the inclination of the safety laser scanner within the permitted range of ±6°.
If necessary, loosen the fixing screws for the safety laser scanner [3], the fine adjust-
ment screws for the inclination of the safety laser scanner [4] and the set screw for the
adjusting disc for angle of inclination [2].
Legend
[1] Adjusting disc for angle of inclination
[2] Set screw for adjusting disc for angle of inclination
[3] Fixing screws for safety laser scanner
[4] Fine adjustment screws for the incline of the safety laser scanner
2. Tighten the fixing screws for the safety laser scanner [3] with 3 Nm. Tighten the fine ad-
justment screws for the inclination of the safety laser scanner [4].
3. Tighten the set screw for the adjusting disc for angle of inclination [2] with 2,5 Nm.
8.8 Set the side inclination of the safety laser scanner
Prerequisites
} The bracket PSENscbracketPR has to be installed at the mounting surface.
Procedure:
1. Change the side inclination of the safety laser scanner within the permitted range of
±8.5°.
If necessary, loosen the roll angle fine adjustment screws [7] (see diagram Installation
for inclination to the side or upwards and downwards [ 77]).
2. Tighten up the roll angle fine adjustment screws [7] (see diagram Installation for inclina-
tion to the side or upwards and downwards [ 77]) to 2,5 Nm.
 Loading...