Indicator Lights
A light-emitting diode (LED) is integrated into the front of the EagleEye Producer device. These LED
lights emit colors that refer to various system states and allow you to identify the current state for the
EagleEye Producer system. Detailed LED and system states mappings are shown in the following table.
LED System State
Blue Power On, EagleEye Producer normal state
Blinking Blue On, not in a call, receive IR
EagleEye Producer boot up
Fast Blinking Blue Calibrate webcam room view
Amber Standby - asleep
Alternate Amber and Blue Software update, Factory restore, USB image update
Blinking Amber USB disk plugged in
Green On, In a call
Blinking Green On, in a call, receive IR in a call
Fast Blinking Red System error
Blink Needs attention, receive IR
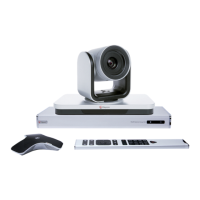
Change the EagleEye Camera
On the EagleEye Producer, to change an EagleEye camera to another EagleEye camera , you must
power off the EagleEye Producer first.
Procedure
1. Power off the EagleEye Producer.
2. Disconnect and remove the existing EagleEye camera.
3. Connect the desired EagleEye camera.
For information about how to connect an EagleEye camera, see the Polycom EagleEye Producer
Setup Sheet.
4. Power on the EagleEye Producer.
Note: The camera on the EagleEye Producer can be either an EagleEye IV or EagleEye III camera.
When used with the EagleEye IV an additional adapter cable is required, which is included in the
EagleEye Producer kit.
An EagleEye Digital Extender and the Digital Breakout Adapter are available for the EagleEye
Producer. For more information on these accessories, refer to the RealPresence Group Series
Integrator Reference Guide.
Configuring a Camera or Camera Control System
Polycom, Inc. 179
 Loading...