Technical Bulletin PAGE: 6/17
Procedure for replacing “Group A” parts
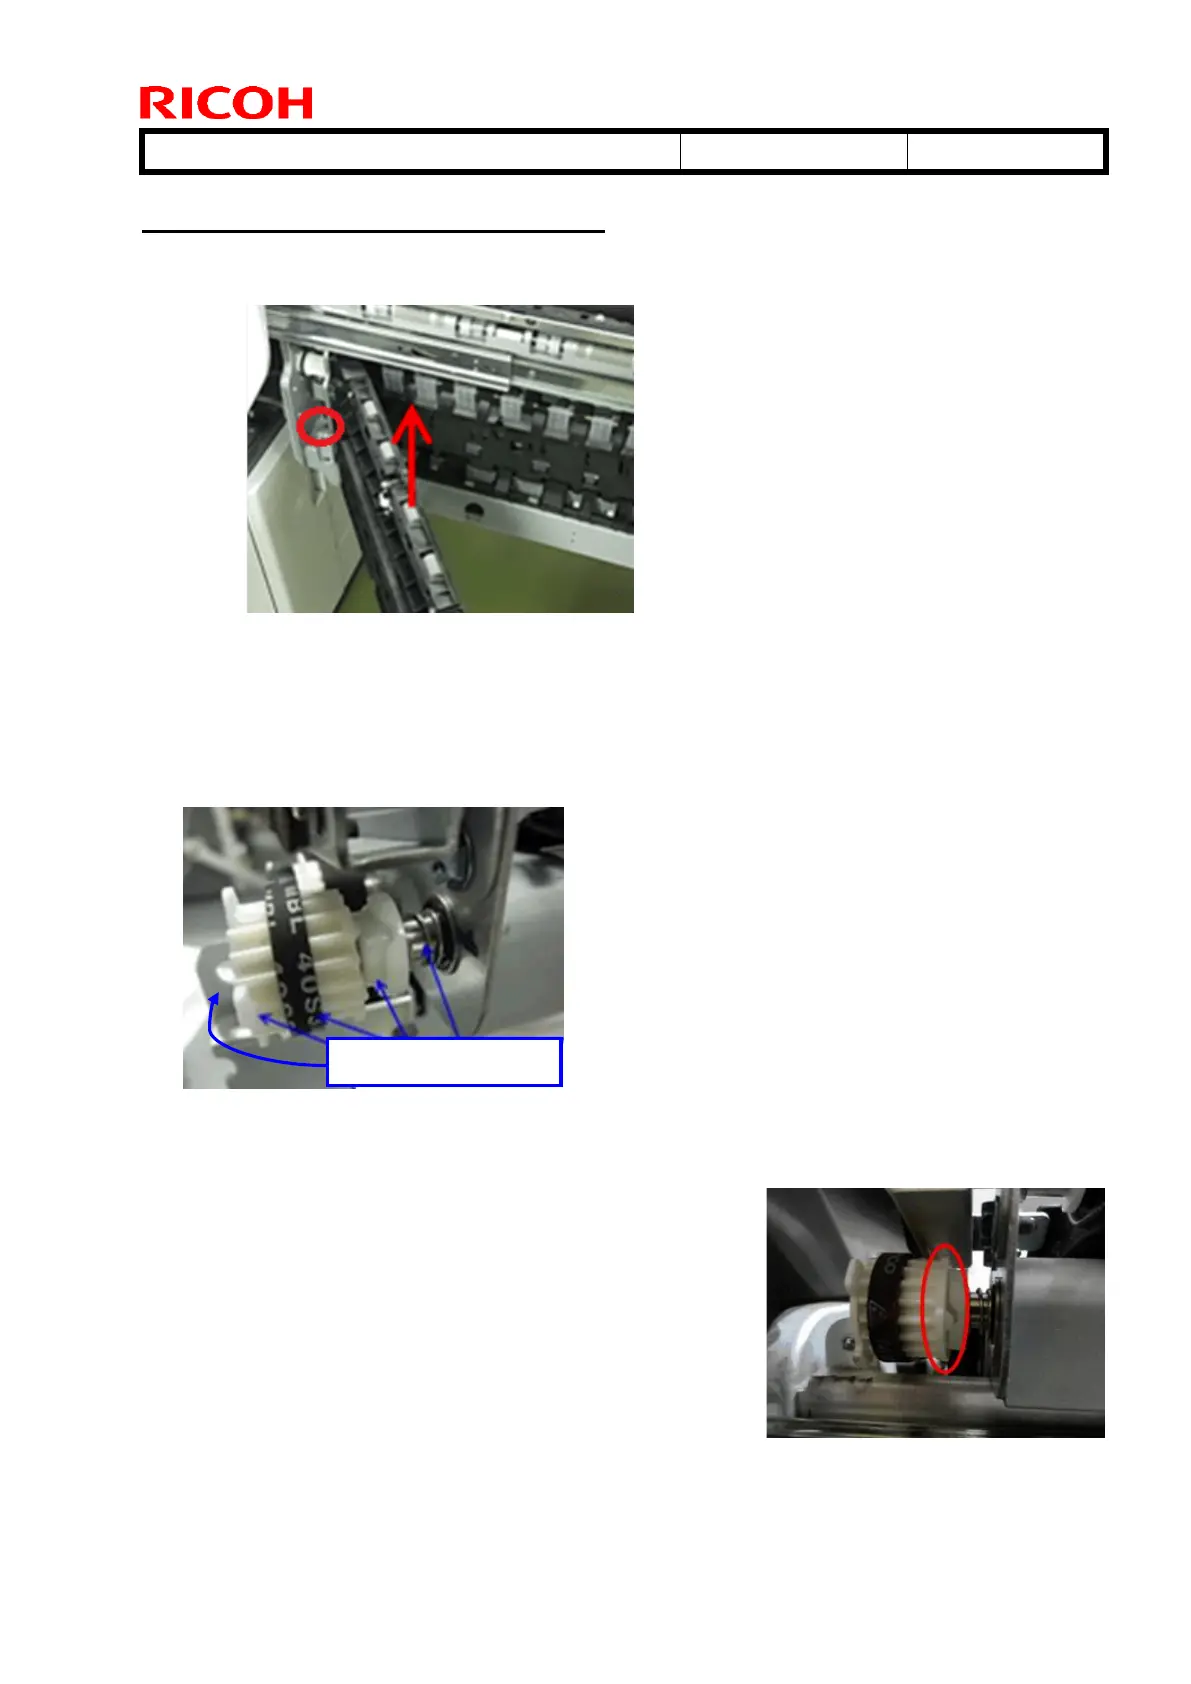
1. Remove the GUIDE PLATE:EXIT:LEFT LOWER:ASS'Y (No9).
1-1. Open the drawer unit. Remove the C-ring and lift to remove the guide plate assembly unit.
2. Remove the paper exit unit.
See the following section of the FSM for the procedure:
4. Replacement and Adjustment > Paper Exit and Duplex unit > Paper exit unit
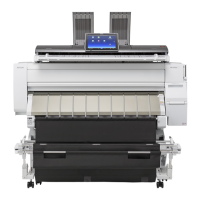
3. Remove the ROLLER:EXIT:EXIT:ASS'Y (No3).
3-1 Remove the E-ring, gear, belt, coupling and spring.
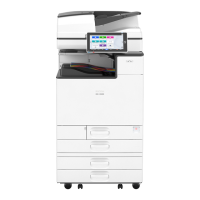
IMPORTANT
When putting back the unit, make sure to attach the coupling in
the correct orientation as shown in the photo.
If attached backwards, Jam 78 may occur when printing on
187mm or smaller paper.