73
Creating a Patch
Creating a Patch
Naming a Patch (PATCH Name)
Before you save the patch, here’s how to give it a new name.
1.
Make sure that the patch that you want to name is selected.
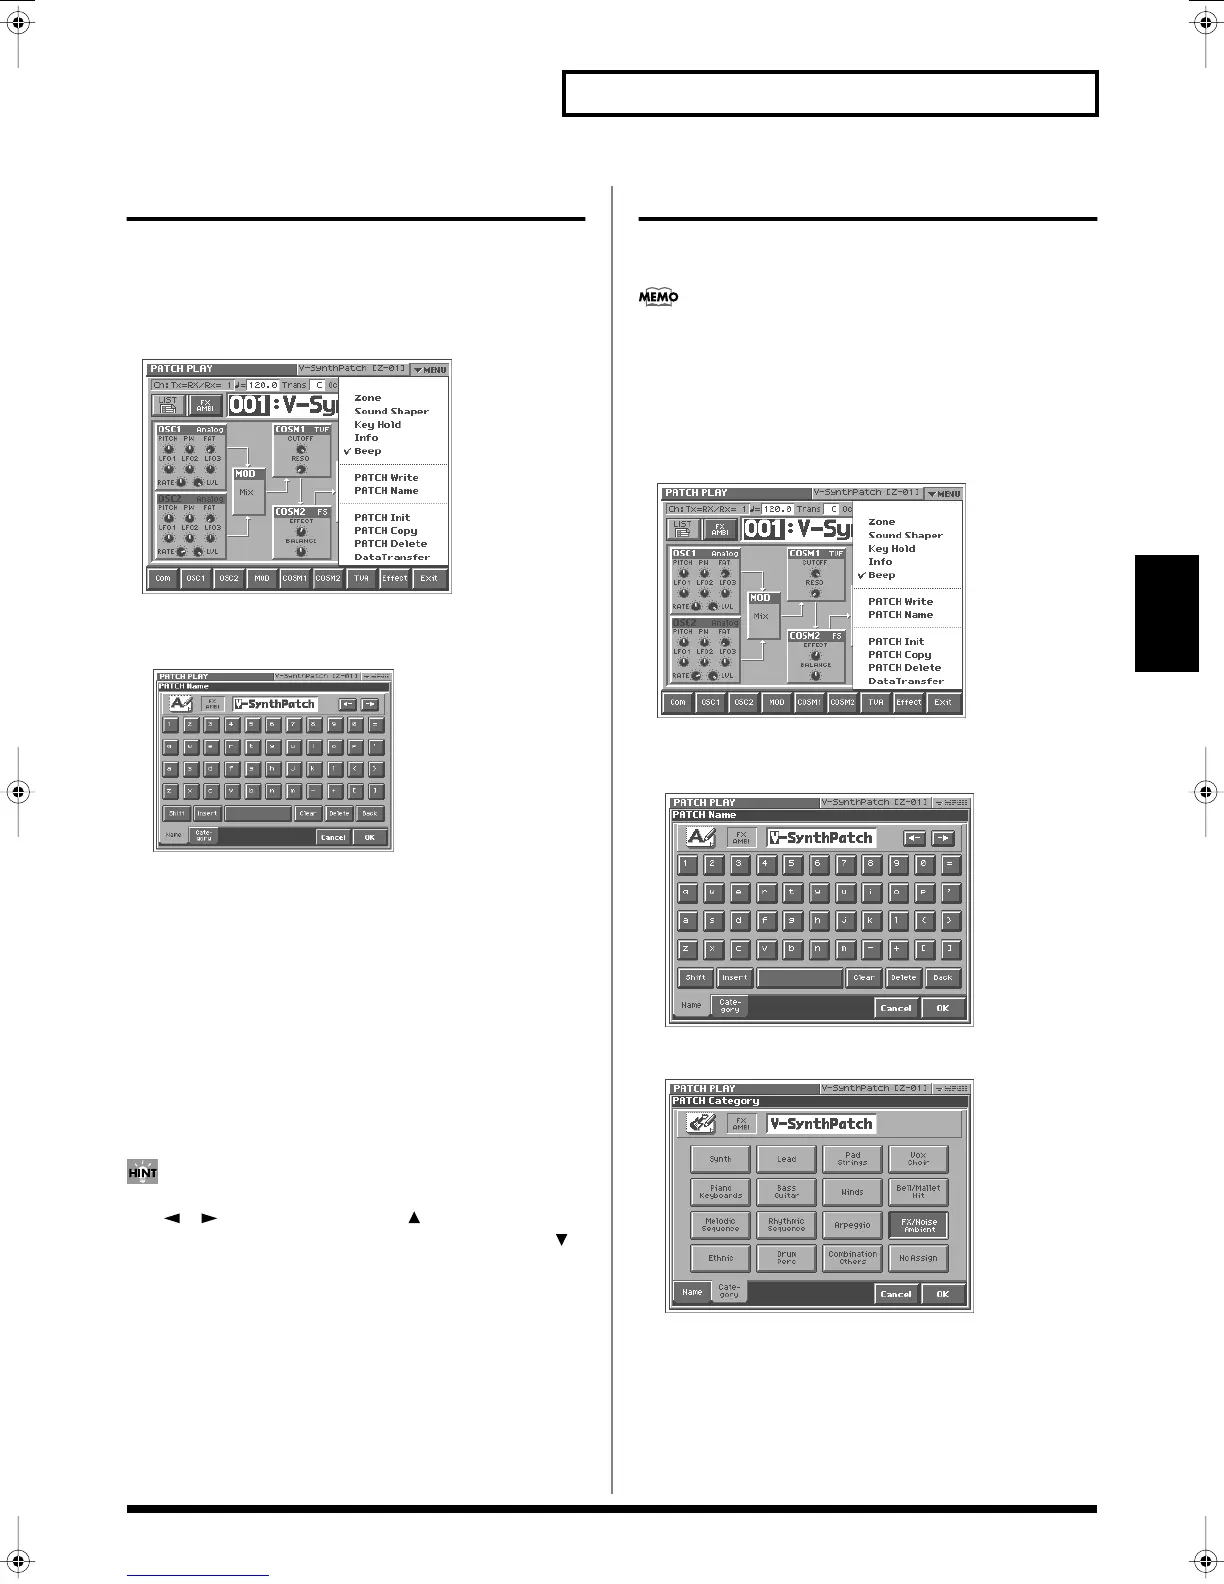
2.
Touch <
▼
MENU> in the upper right of the screen.
A pulldown menu appears.
fig.03-02a_50
3.
In the pulldown menu, touch <PATCH Name>.
The PATCH Name window appears.
fig.03-03_50
4.
Touch the on-screen alphabetic or numeric keys to enter the
new name in the text box.
The on-screen keys have the following functions.
<
←
><
→
>:
Move the cursor in the text box to the desired input
location.
<Shift>:
Turn this on when you want to input uppercase letters
or symbols.
<Insert>:
Turn this on when you want to insert a character at the
cursor location.
<Clear>:
Erases all characters in the text box.
<Delete>:
Deletes the character at the cursor location.
<Back>:
Deletes the character that precedes the cursor location.
You can also move the input location cursor by pressing the
[ ][ ] cursor buttons. Pressing [ ] will change the
character at the cursor location to uppercase, and pressing [ ]
will change it to lowercase.
5.
When you have finished inputting, touch <OK> to finalize the
patch name.
* You will lose your edited patch settings if you switch to another patch
or turn off the power. If you want to keep a patch whose settings you
have edited, then perform the Save operation (p. 74).
Assigning the Category of a Patch
If you assign a category to your patches, you’ll be able to search for
them by category in the PATCH List window.
If no category is assigned to a patch, its category name will be
“No Assign.”
1.
Make sure that the patch that you want to category is
selected.
2.
Touch <
▼
MENU> in the upper right of the screen.
A pulldown menu appears.
fig.03_50
3.
In the pulldown menu, touch <PATCH Name>.
The PATCH Name window appears.
fig.04_50
4.
Touch <Category> tab in the lower area of the display.
fig.05_50
5.
Select a category from the list.
6.
Touch <OK> to finalize the category.
Reference_e.book 73 ページ 2005年3月10日 木曜日 午後5時6分