36 Software Installation & SD Memory Utilities SPS-2000 Program Manual v1.30
Yea
Date
6-di
it time of ca
ture: HHMMSS
Capturing SPS-2000 Screens
Equipment Required
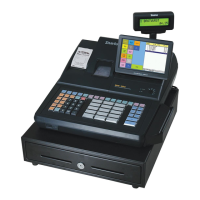
SPS-2000 Terminal
PS/2 Keyboard
SD Memory Card
NOTE: SD cards must be formatted as FAT 32. To avoid compatibility issues, CRS recommends
that you purchase SD cards from CRS.
SD Memory Card Reader
Screen Capture Procedure
1. Set S Mode System Option-General Function Option #14 “Silent Key Depression” to NO.
2. Power down SPS-2000.
3. Connect a PS/2 Keyboard to the appropriate port.
4. Power up SPS-2000.
5. Insert a SD Memory Card into the SD slot on the right-front of the terminal.
6. Navigate to the screen you wish to capture.
7. Press and hold the F5 key on the keyboard until the audible “beep” is heard. After a delay that may
last several seconds, the screen capture confirmation dialog box momentarily displays and closes. Do
not proceed until the confirmation displays.
8. If you wish to capture multiple screens, press and hold F5 for each screen you wish to capture. Be
sure to wait until the confirmation dialog displays before attempting another screen capture or
operation.
9. When you have completed screen captures and wish to save them to the SD memory card, press and
hold the F9 key (press and hold F10 to save to USB with KERNEL v 1.10 or later) on the keyboard
until the audible “beep” is heard. The copy dialog box momentarily displays and closes. All
captured screens are copied to the sps2000capture folder on the memory card. (If you are saving
screen captures to the SD card for the first time, the SPS-2000 will create the sps2000capture folder
automatically.) After captures are copied to the SD card, press F7 on the keyboard to erase the
captures from the ECR memory.
Screens are automatically saved in the .png image format and named using the following convention:
20051120054251.png
10. Remove the SD Memory Card from the SPS-2000 terminal and insert the card into the SD Card
Reader at the PC. You can copy the captured screens to your hard drive, or insert them as needed into
Microsoft Word documents.