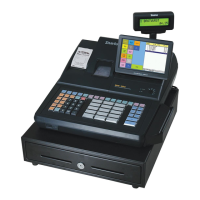
SPS-2000 Program Manual v1.30 Software Installation & SD Memory Utilities 27
D. Install the Updated Software
Power down the SPS-2000 (the main power switch is located on bottom of SPS-2000 in the right-rear
corner).
Optional: Upgrade the Micom
Micom rarely changes. Update only if specifically instructed to by CRS support.
1. Hold front power button down.
2. Turn SPS-2000 main power switch ON while holding down front power button.
3. Touch [1][2][8][7] for system password.
4. Touch SYSTEM MENU.
5. Touch MICOM DOWNLOAD.
6. Touch YES when prompted “COPY MICOM FILE?”.
7. The ECR display will monitor the progress of the MICOM download (25%, 50%, 75%, 100%).
When successful the TFTP Server window will display “Sent micom.bin to...”.
Optional: Upgrade the BOOT ROM
BOOT ROM rarely changes. Update only if specifically instructed to by CRS support.
1. Power down the SPS-2000 (the main power switch is located on bottom of SPS-2000 in the right-rear
corner).
2. Hold front power button down.
3. Turn SPS-2000 main power switch ON while holding down front power button.
4. Touch [1][2][8][7] for system password.
5. Touch SYSTEM MENU.
6. Touch BOOT UPDATE.
7. Touch YES when prompted “COPY BOOTLOADER?”.
8. The ECR display will first read: “Downloading BootRom.bin . . .” and then will display location
updates until the message “Finished” displays when complete. When successful the TFTP Server
window will display “Sent BootRom.bin to...”.
Upgrade the Application Software
1. Power down the SPS-2000 (the main power switch is located on bottom of SPS-2000 in the right-rear
corner).
2. Hold front power button down.
3. Turn SPS-2000 main power switch ON while holding down front power button.
4. Touch [1][2][8][7] for system password.
5. Touch SYSTEM MENU.
6. Touch COPY ALL.
7. Touch YES when prompted “COPY ALL FOR THE NAND FLASH?”.