78
MPS4232
Section 6: Maintenance
The MPS’s Calibraon Coecient le can be uploaded or
updated using the MPS Web Server or FTP le server via
Ethernet connecon. Using the MPS Web Server is the
preferred method.
Backup coecient les are provided with every calibrated
MPS module on a Scanivalve USB Thumb Drive. These les
should be archived on a local computer for future use.
In the event you cannot locate your backup le, please
contact Scanivalve with the model and serial number of
your module.
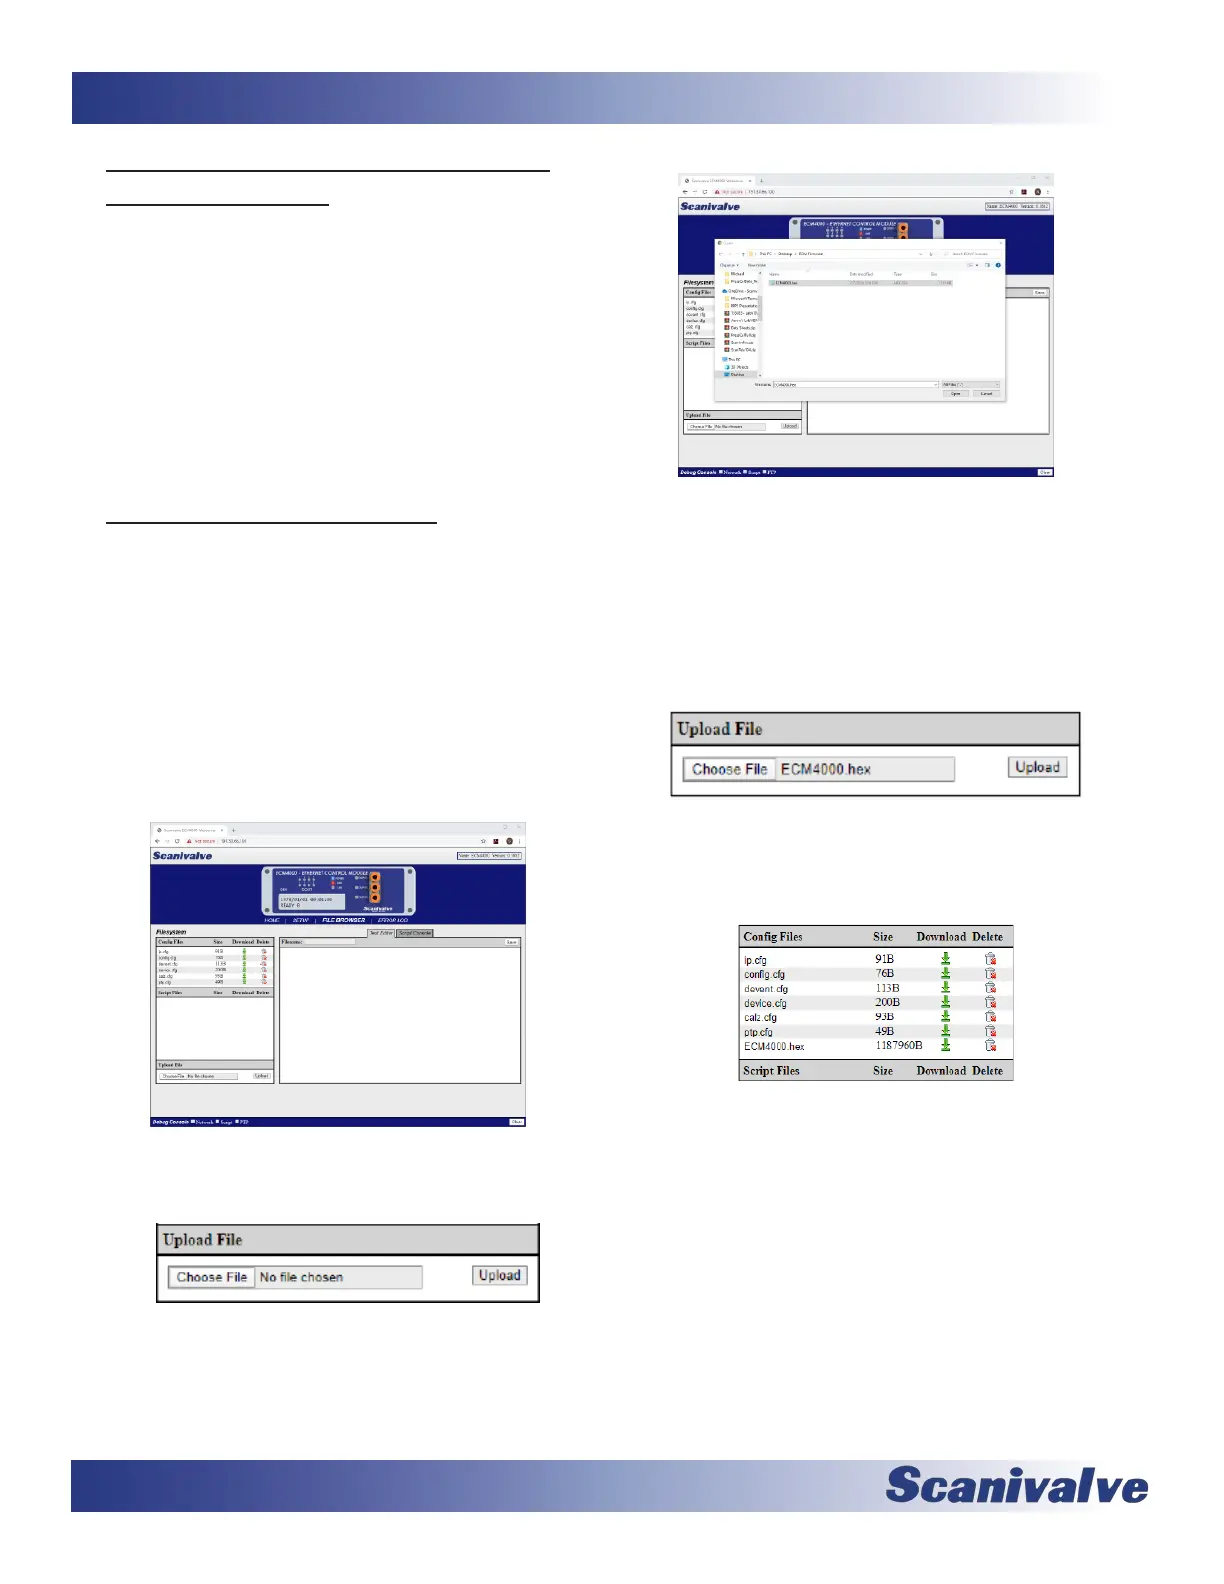
1. Connect the MPS to the host computer via Ethernet
connecon. Ensure the MPS is powered on.
2. Open the web browser of choice:
Google Chrome
Microso Edge
Mozilla Firefox
Note: Verify pop-ups are allowed in the browser.
3. Enter in the MPS’s IP address into the address bar
and press enter.
4. Navigate to the File Browser page on the MPS’s Web
Server.
5. In the “Upload File” secon, click “Choose File.”
6. Navigate to the locaon where the MPS’s coecient
le is stored. The le will be called “Cal_<sn>.cfg”
where <sn> is the serial number of the module.
Select the le and click “Open.”
7. The Cal cfg le will now appear in the “Upload File”
secon. Click “Upload.” A dialog box will appear
with informaon.
If there is an exisng Cal cfg le on the MPS with the
same name, the upload process will overwrite the
exisng le.
8. The Cal cfg le will now appear in the “Cong Files”
table.
9. The new le must be loaded into RAM by one of the
following methods:
- Double click on the new Cal.cfg le and click the
LOAD buon.
- Power cycle the MPS
- Execute a REBOOT command
- Execute a LOAD <cal lename> command
where <cal lename> is the name of the Cal le