You should now see a blip of green running across the step LEDs, showing the current playback
position in the pattern.
You can adjust the tempo using the TEMPO knob at the bottom right of the panel if required, and see
the green blip change speed.
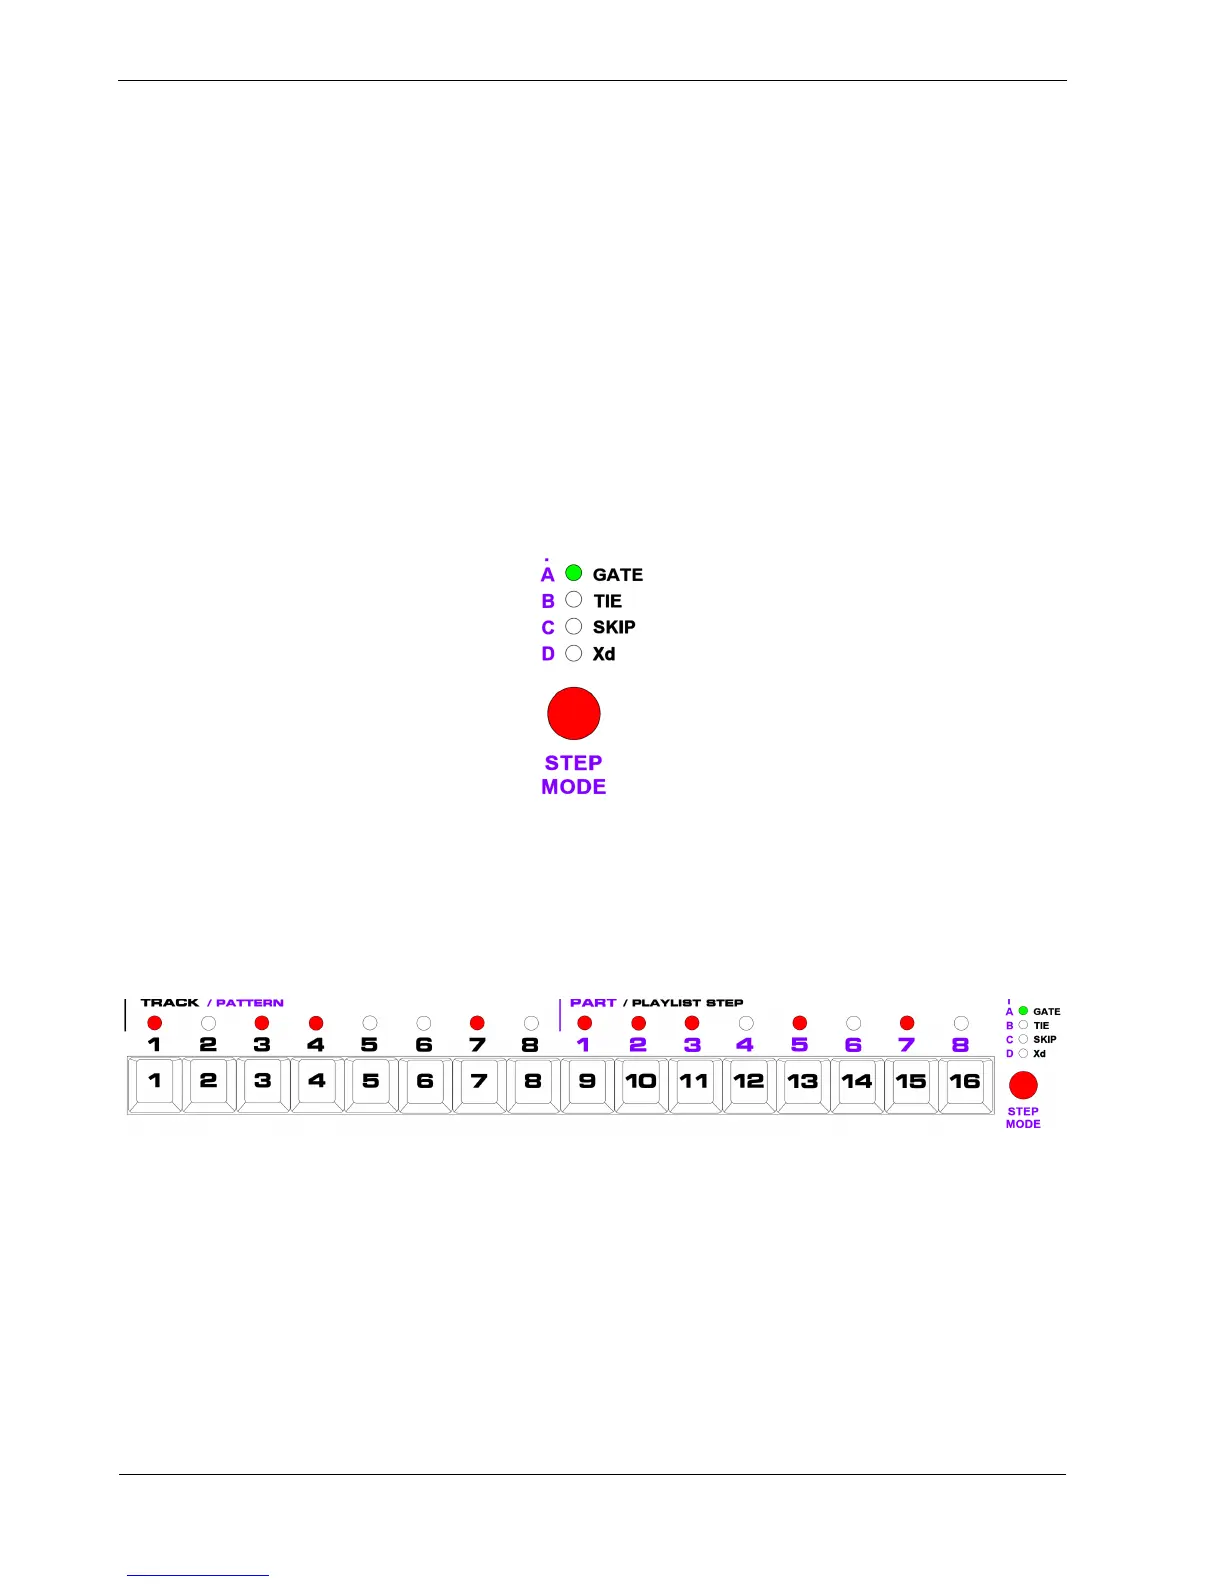
Setting Gates
In pattern edit, the 16 step keys are used to toggle status values in a pattern on or off.
There are several status values for each step in a pattern, but the most important is gate.
When you first enter pattern edit, the step keys are assigned to gate, as shown by the status LED just
above the STEP MODE button, labelled GATE:
Gate controls whether a note will be played on each step in the pattern or not.
With P3 running, start pressing some of the step keys, 1 to 16, to turn steps on and off.
An active gate status is shown by the LED above the step lighting up red, like this:
As the green blip passes each step with gate active, you should hear a note playing on the attached
instrument.
They’ll all be the same note so far, but it’s a start.