STEP MODE
You have already used the step keys for editing the gate status in the getting started section.
The step keys can also be assigned to any of the other status rows in a P3 pattern.
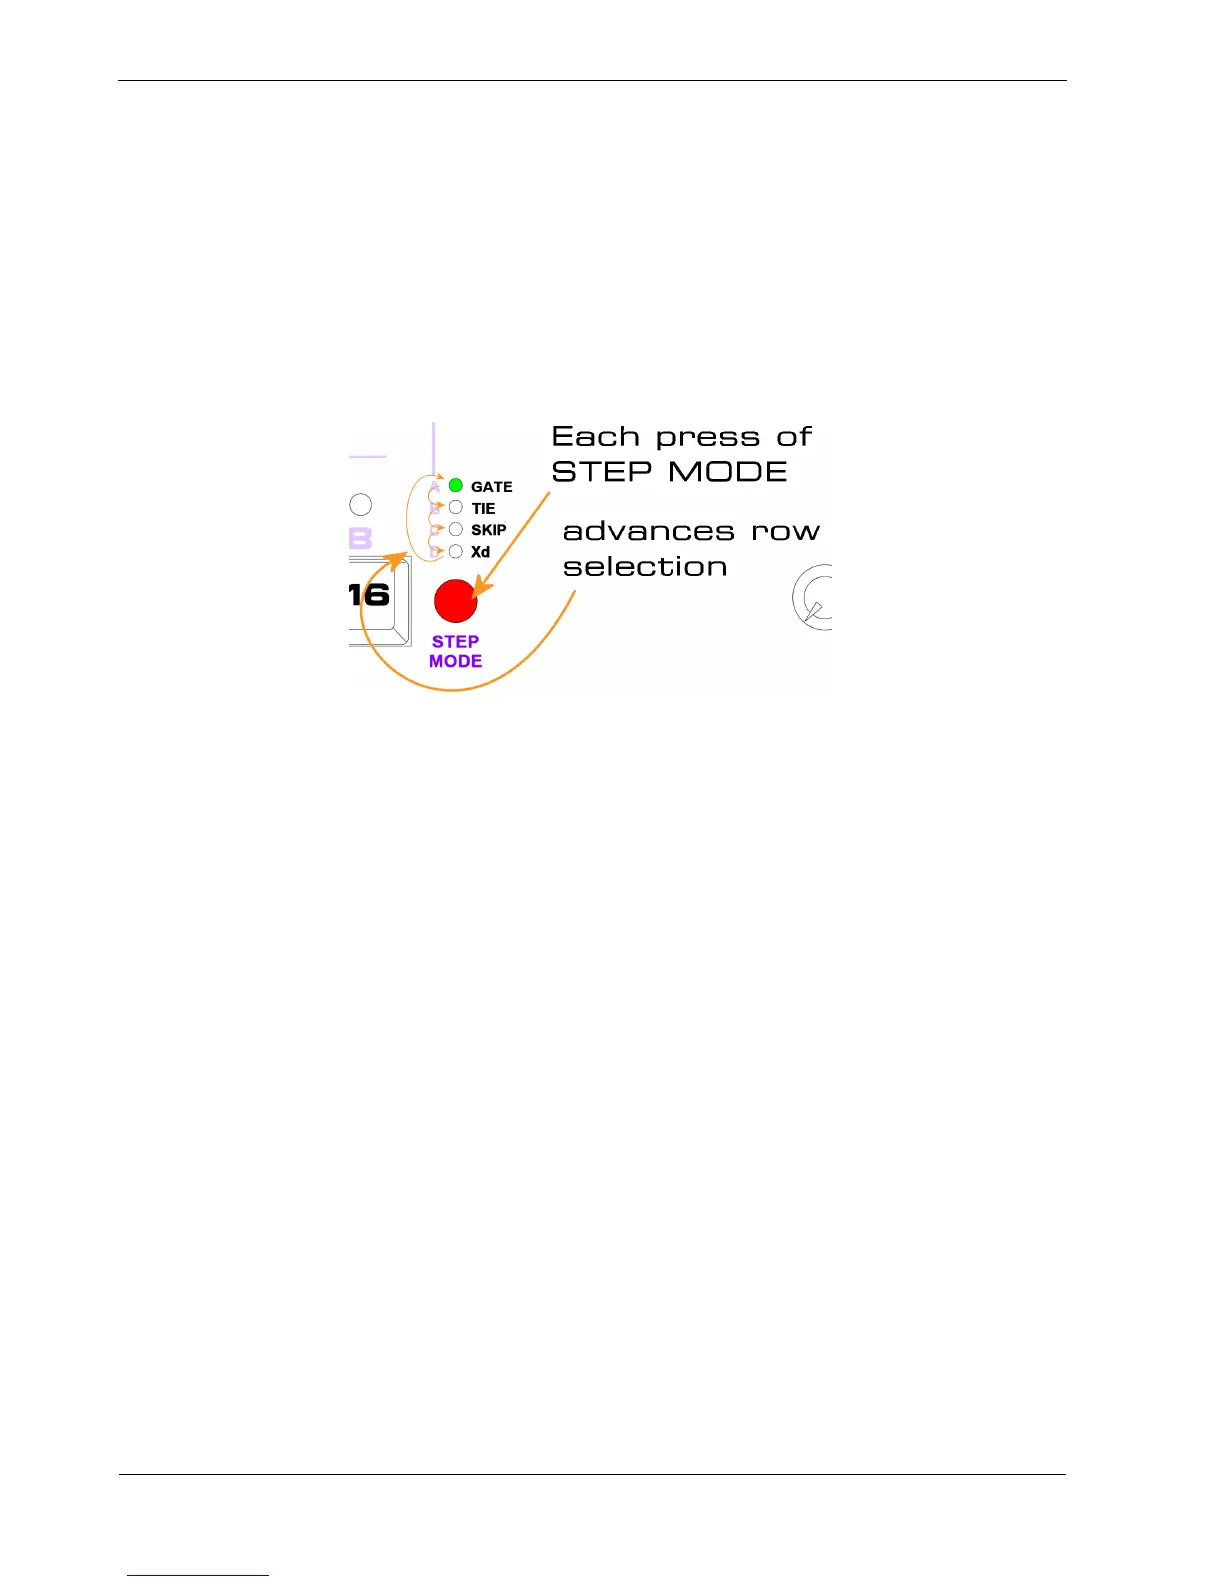
The step keys are assigned using the STEP MODE button.
Above this button are four status LEDs, which show the current row being edited.
Each press of the STEP MODE button advances to the next row, like this:
Since the status rows have on / off values, their current setting can be shown on the LEDs above each
step key.
The default assignment for the step keys when you enter pattern edit is the gate row.
STEP LED Colours
P3’s step LEDs are tri-colour types.
Inside each LED there is a red and a green element.
Either can be turned on independently, or both can be on at the same time.
Since gate is the most important status row:
• gate status is always shown in red on the step LEDs.
• All other status values are shown in green on the step LEDs
Whatever status row you select to edit, you can always see what the gate status on each step is.
Since gate is shown in red, and other status values may be shown in green, it seems there is a problem
if both gate and another status value are active on the same step.