5-86
SCANNER/INTERNET FAX►Other functions
1
Place the original.
Place the original in the document feeder tray of the automatic document feeder, or on the document glass.
► AUTOMATIC DOCUMENT FEEDER (page 1-67)
► DOCUMENT GLASS (page 1-69)
2
Tap the mode display to switch to the initial screen of each mode.
► Changing mode from each mode (page 5-9)
3
Specify the destination.
► RETRIEVING A DESTINATION FROM AN ADDRESS BOOK (page 5-15)
► VIEWING A LIST OF THE SELECTED DESTINATIONS (page 5-17)
► USING A SEARCH NUMBER TO RETRIEVE A DESTINATION (page 5-18)
► ENTERING AN ADDRESS MANUALLY (page 5-19)
► SPECIFYING A NETWORK FOLDER (page 5-20)
► RETRIEVING A DESTINATION FROM A GLOBAL ADDRESS BOOK (page 5-21)
► USING A TRANSMISSION LOG TO RESEND (page 5-23)
4
Tap the [Others] key, and tap the [Erase] key.
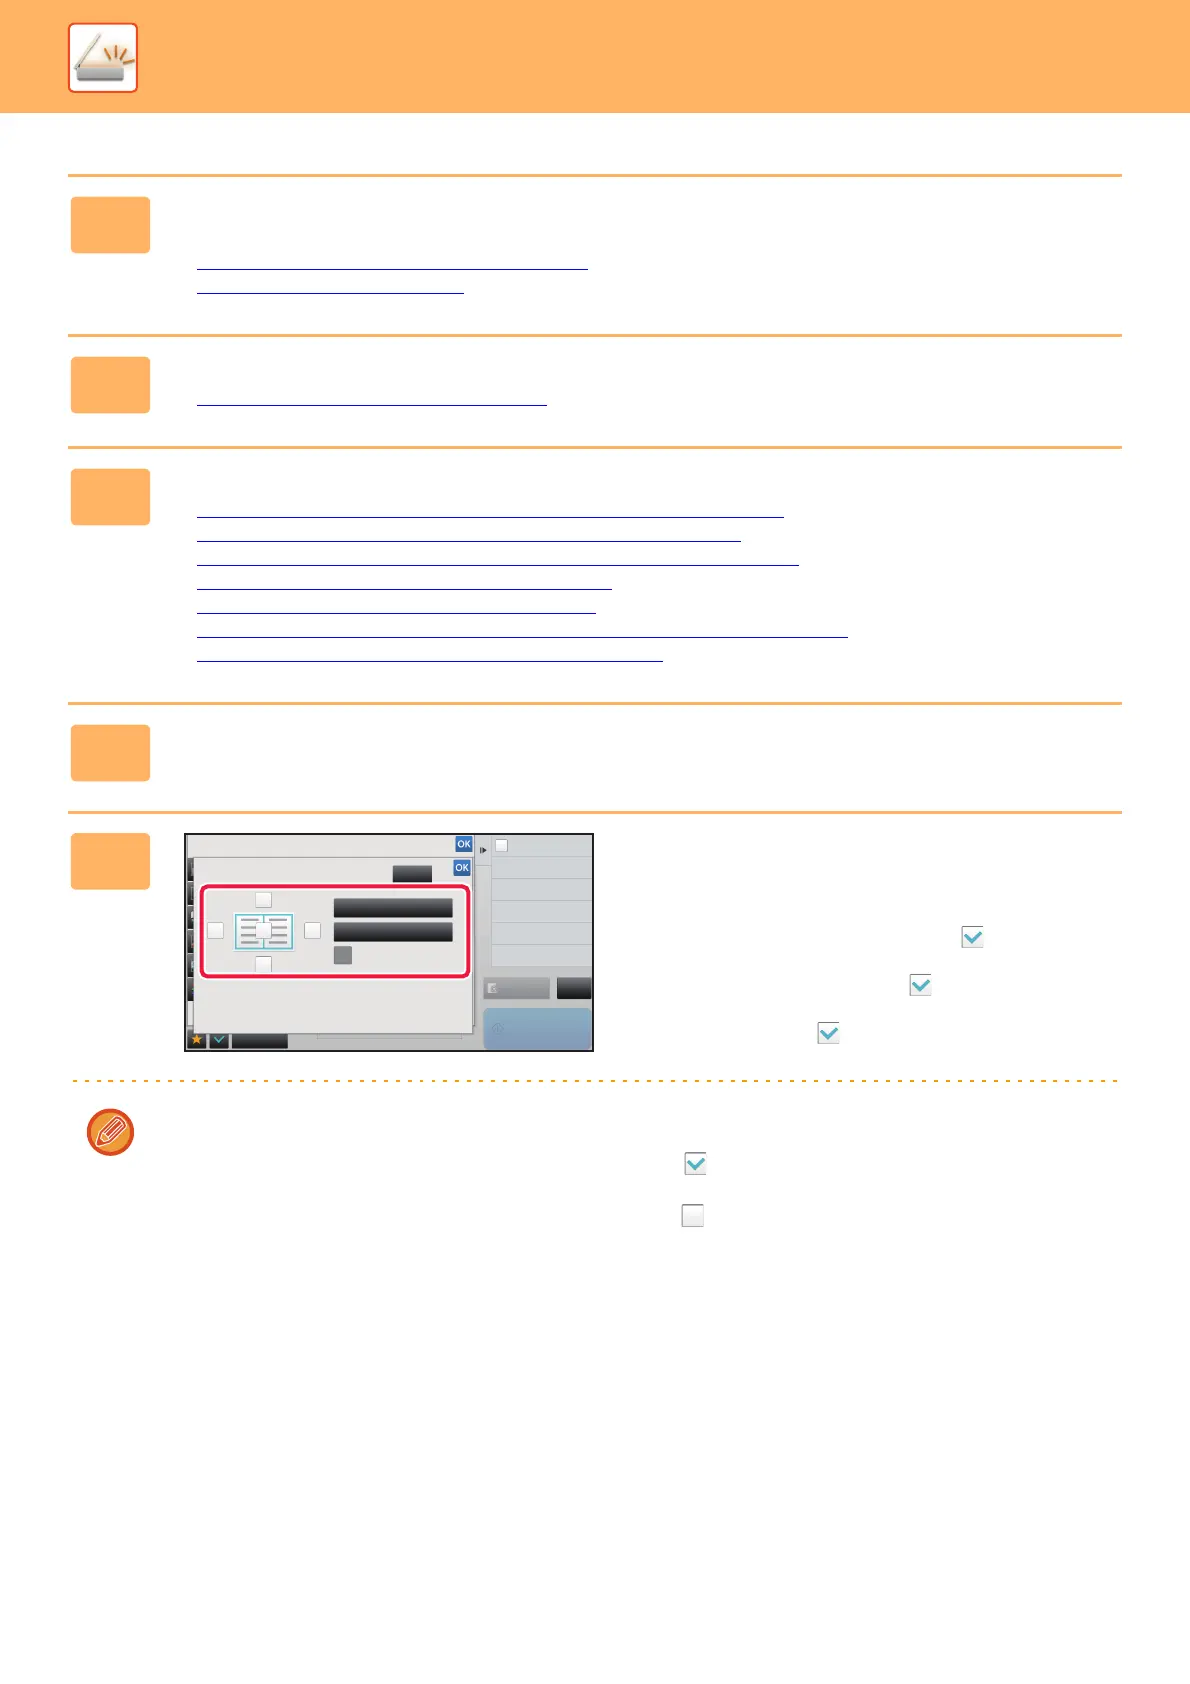
5
Tap the checkbox of the edge that you
wish to erase, and specify the erase
position.
Check that he tapped checkbox is set to .
If the [Specify Frame] key is tapped, the [Up], [Down], [Left],
and [Right] checkboxes are set to .
If the [Specify Frame+Center] key is tapped, all the
checkboxes are set to .
Specify the erase edge on the reverse side when erasing edges of one to three sides of Up, Down, Left, and Right on
the front side to scan a 2-sided original.
• If the [Reverse erase position of back face.] checkbox is set to , the edge in the position opposite to the erased
edge on the front side will be erased.
• If the [Reverse erase position of back face.] checkbox is set to , the edge in the same position as on the front side
will be erased.
Back
Others
Preview
CA
Start
Color Mode
Background Adjustment
Erase
Clear
Outer Frame
Specify Frame+Center
Specify density of image to send.
Exposure
Specify density of image to send.
Exposure
Reverse Erase Position of
The Back Face
Down
Up
RightLeft
Divide into 2 Pages
Dual Page Scan