SIREMOBIL Iso-C SPR2-230.061.01 Page 18 of 48 Siemens AG
System Manual Rev. 13 12.04 CS PS 24 Medical Solutions
6 - 18 Replacing boards / replacing components
VIDEOMED DC 6
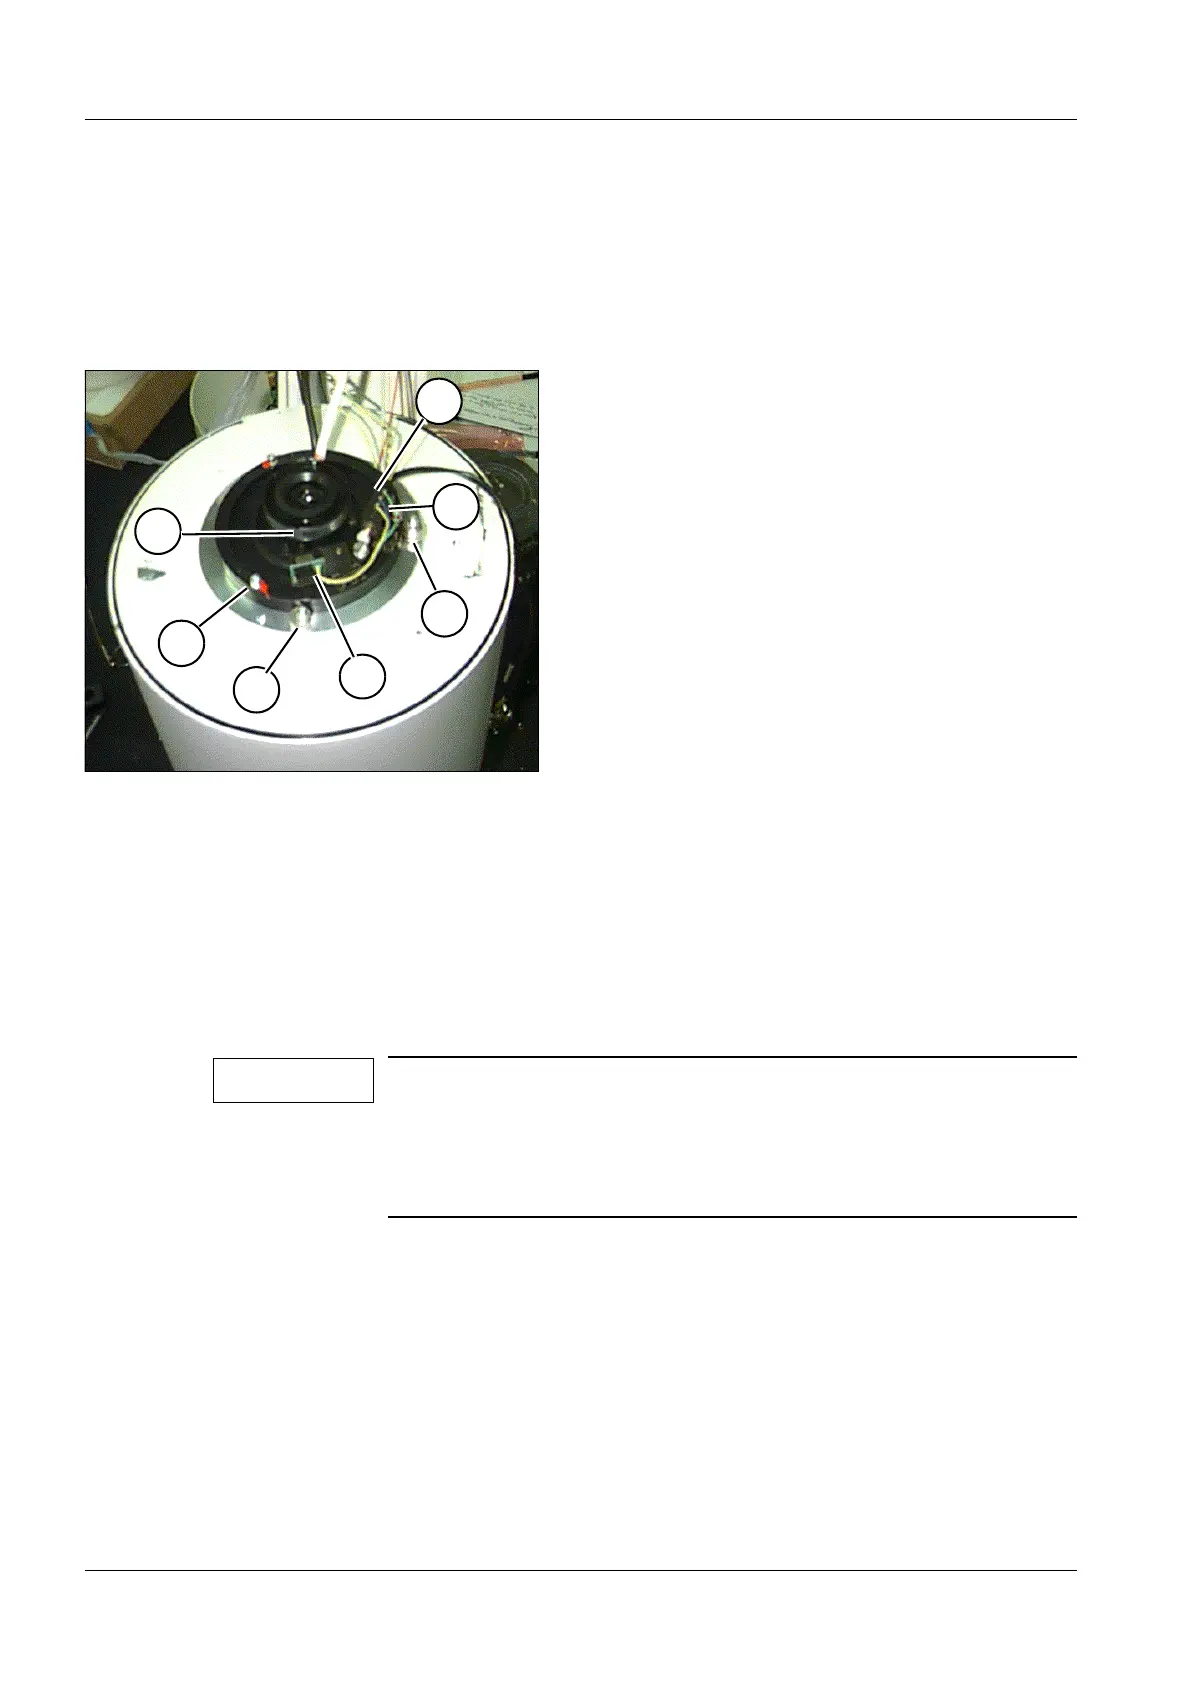
• Cut off the cable ties (refer to the arrow, Fig. 6) and disconnect the plugs.
• Remove plug X1 at the Compact optics.
• Remove the VIDEOMED DC and place it on a clean surface. Refer to: Replacing the
VIDEOMED DC.
High voltage section of the I.I. mini voltage supply 6
• Remove the high voltage section of the I.I. mini voltage supply. Remove both attach-
ment screws at the C-arm flange. Refer to the arrows, Fig. 6.
• Disconnect the anode cable from the high voltage section.
• Remove the O-ring and the cap nut from the cable.
Compact optics 6
• Remove the attachment screws of the Compact optics. If necessary, remove the retain-
er clip for the plug / cable leads as well.
• Remove the Compact optics.
Fig. 7
When removing the Compact optics, make sure that no dust or
dirt particles contaminate the I.I. output.
Do not loosen the eccentric screws (2/Fig. 7) on the edge of the
Compact optics! These screws are used to center the Compact
optics to the I.I. output.
1
3
2
4
2
5
3
NOTE
 Loading...


