Section 06 TRANSMISSION
Subsection 01 (DRIVE BELT)
DRIVEBELTHEIGHT
MEASUREMENT AND
ADJUSTMENT
Measurement
NOTE: The drive belt height measurement must
be performed each time a new drive belt is in-
stalled.
NOTE: To obtain an accurate drive belt height
measurement, it is suggested to allow a break-in
period of 50 km (30 miles).
Before checking the belt height, ensure that a
good-condition proper belt (refer to the APPLICA-
TION CHART) is installed.
Adjust pulley distance and alignment. Refer to
PULLEY DISTANCE AND ALIGNMENT.
To obtain maximum vehicle performance, the belt
height must be adjusted according to specifica-
tions shown in the accompanying chart.
MODEL BELT HEIGHT
All models
Top edge of drive belt cord should be
flush with driven pulley edge.
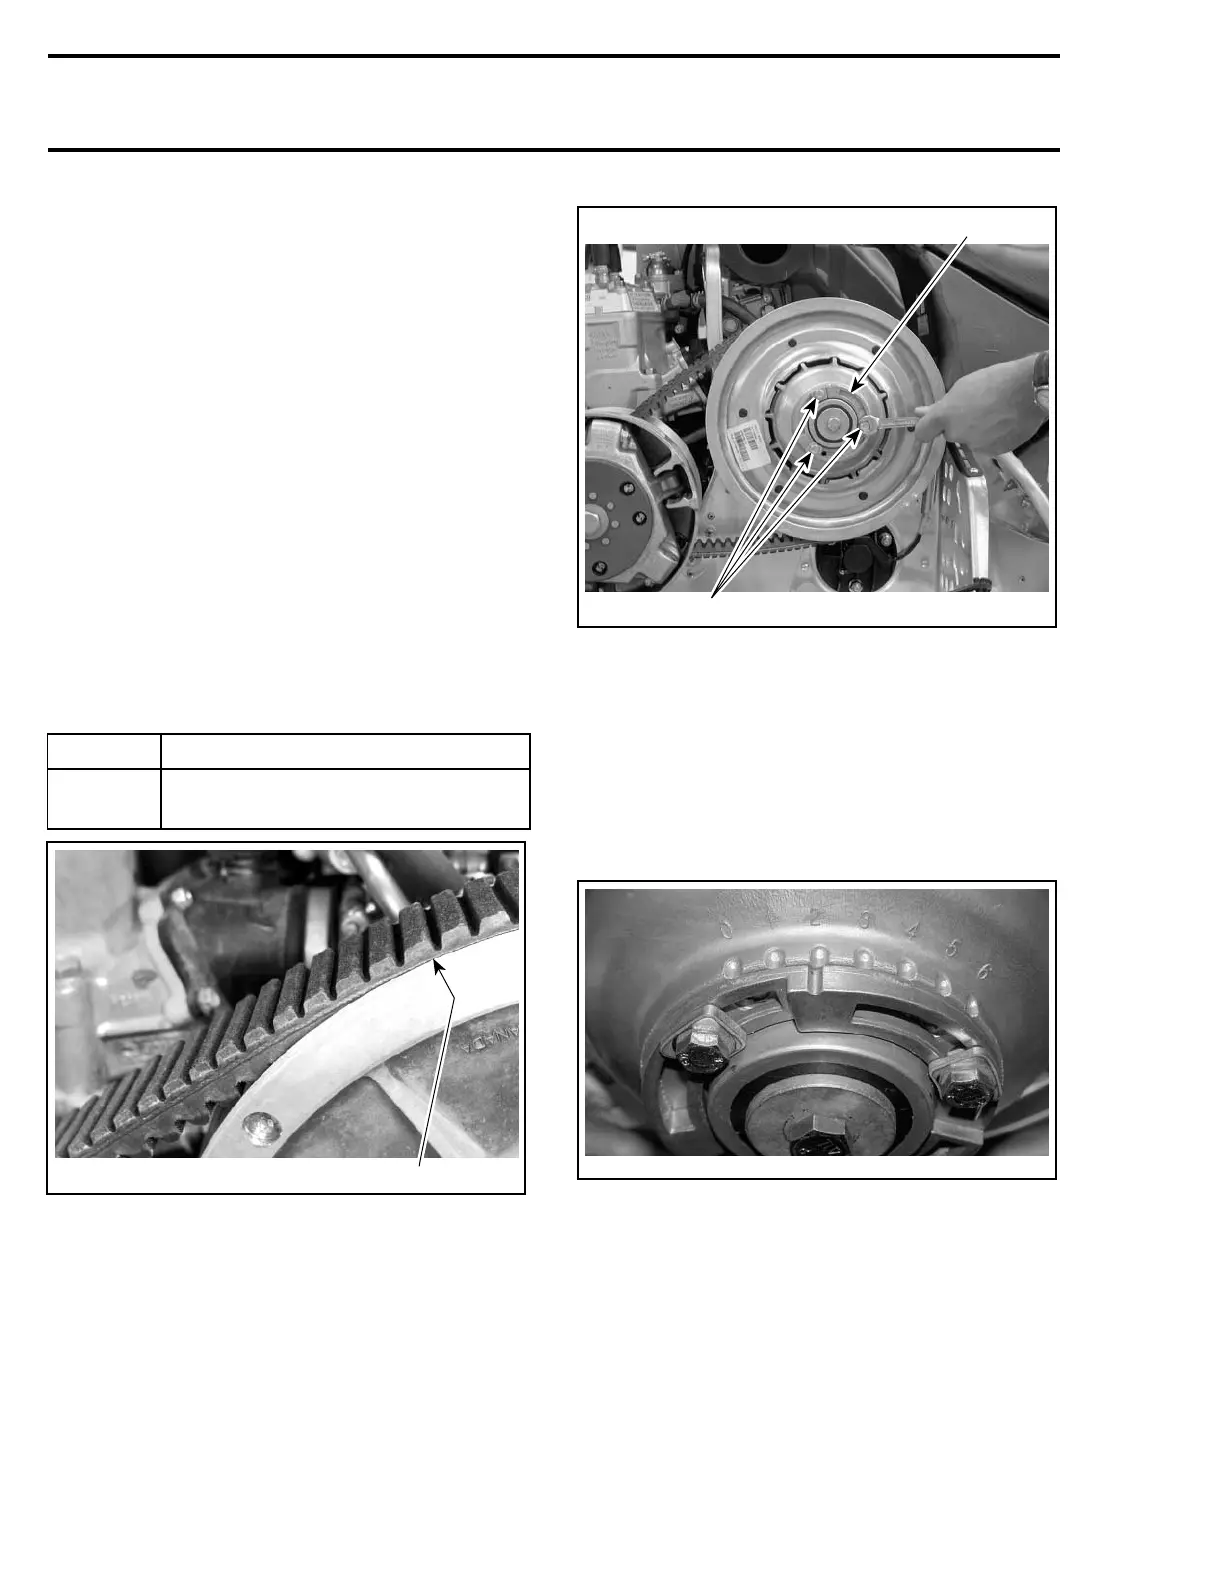
1
A02D1UA
1. Flush
Adjustment
Before adjusting the belt height, ensure that a
good-condition proper belt (refer to the APPLICA-
TION CHART) is installed.
Adjust pulley distance according to specification,
refer to PULLEY DISTANCE AND ALIGNMENT.
1
2
A33D0DA
TYPICAL
1. Screws
2. Adjustment ring
Loosen screws and turn adjustment ring as fol-
lows:
To lower belt in driven pulley: turn adjustment ring
counterclockwise and tighten the screws.
To raise belt in driven pulley: turn ring clockwise
and tighten the screws.
A33D0EA
DRIVEN PULLEY NOTCHES
Turn the adjustment ring up to one notch, tighten
the screws, then rotate driven pulley to allow drive
belt to settle in pulley. Check height, if required
the adjustment ring can be turned up to 1/4 or 1/2
the notch. Check height, repeat as required.
NOTE: Notches are there on the driven pulley for
reference purpose only and the desired adjust-
ment can be attained at any point.
216 Te m plat e
 Loading...