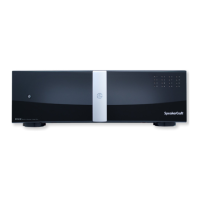
Page 32 MZC-88 Installation Instructions
device to either Doorbell/Status Input 1 or 2 using a 3.5mm mini plug to activate either or both of the phone and video
page inputs. These inputs can also be used for sensing the ON/OFF condition of external devices or trigger other system
events.
NOTE: The Doorbell/Status Inputs will not function without proper configuration in EZ-Tools.
CONTACT CLOSURES
1. Connect two stripped wires from a device such as a screen, lift, drapes, switched outlet etc, that requires a switch closure
to activate.
2. Strip approximately
1
⁄4 inch of each lead and twist the stripped ends so there are no loose strands that can cause shorts.
3. Carefully slide each of the individual conductors into one of the spring clip terminals.
4. Visually check for loose ends. Lightly pull the wire to confirm connection.
NOTE 1: Some devices may provide voltage on one terminal and only require a switch closure for activation, while
others may require adding an appropriately rated power supply. If external voltage is required, connect an appropriately
rated power supply in series with one of the contact closure terminal pairs. Check the device being activated to deter-
mine if it requires AC or DC voltage and if polarity is critical for operation. Polarity is not critical at the MZC-88 Contact
Closure end.
NOTE 2: The Contact Closures will not function without proper configuration in EZ-Tools.
NOTE 3: Be sure controlled device does not excede the 30V 2A rating of the contact closures.
EXPANSION
1. Connect to PORT and LOOP terminals on additional MZC-88 Controllers in expanded systems, using CAT-5 cables termi-
nated with RJ45 connectors. See Section: Expanded Systems for additional information.
RS232 DATA I/O
1. Connect one end of the Serial cable to the RS232 DATA I/O Port on the MZC-88 Rear panel and the other end to the
device being controlled via RS232. NOTE: This connection requires configuration in EZ-Tools.
CONTROL PORT
1. Connect the Serial Port on a PC running EZ-Tools to the MZC-88 Control Port using a SpeakerCraft 3.5MM PLUG TRANS-
FER CABLE when programming the system or incorporating Firmware Upgrades.
NOTE 1: If a Serial Port is not available on the PC, connect the 3.5mm Plug Transfer Cable to the USB/SERIAL ADAPTOR
CABLE included with EZ-Tools. Connect one end to a USB port on the PC and the other end of the assembled cable to
the Control Port on the MZC-88.
NOTE 2: Use of the USB/Serial Adaptor Cable requires loading the USB/Serial driver to the PC running EZ-Tools. The
driver can be downloaded from the EZ-Tools Program Disc or from www.speakercraft.com.
COMMON IR OUT
1. Connect to a SpeakerCraft Terminator Block, IR emitter or IR Blaster for control of common system devices other than the
common external source components.
TERMINATOR BLOCK
1. Connect the IR IN and GND terminals on a SpeakerCraft AT-1.0 TERMINATOR to the MZC-88 Common IR OUT jack using
a 3.5mm mini plug. POLARITY: TIP=SIG; SLEEVE=GND.
2. Set the Common IR Out HI/LO switch on the MZC-88 to LO.
3. Connect a SpeakerCraft PS 2.0 power supply to the AT-1.0. (Connect to AC only after all system connections have been
made and system is ready for use.)
4. Connect SpeakerCraft Emitters (IRE 0.5, 1.0, 2.0, 3.0, 4.0) and properly attach to the devices to be controlled.
IR EMITTER
1. Carefully attach a SpeakerCraft IR Emitter (Models: IRE- 0.5, 1.0, 2.0, 3.0, 4.0) over the IR eye on the front panel of com-
mon source component to be controlled via infrared.
2. Carefully pull the emitter wire to the back of the MZC-88. Do not block accesses for discs and tapes.
3. Connect the 3.5mm mini plug to the COMMON IR OUT jack.

 Loading...