Page 60 MZC-88 Installation Instructions
7. When done, click OK and the New Commands will all be placed in and appear below the New Model Folder in the
CMD Library.
8. To Learn a Command: First have the “teaching” remote ready and pointed directly at the LEARNING SENSOR on
the LTM-1.0 (spaced about 1” away). Set the SENSE switch to LO. (This switch may need to be set to HI if the teaching
remote has weak output.)
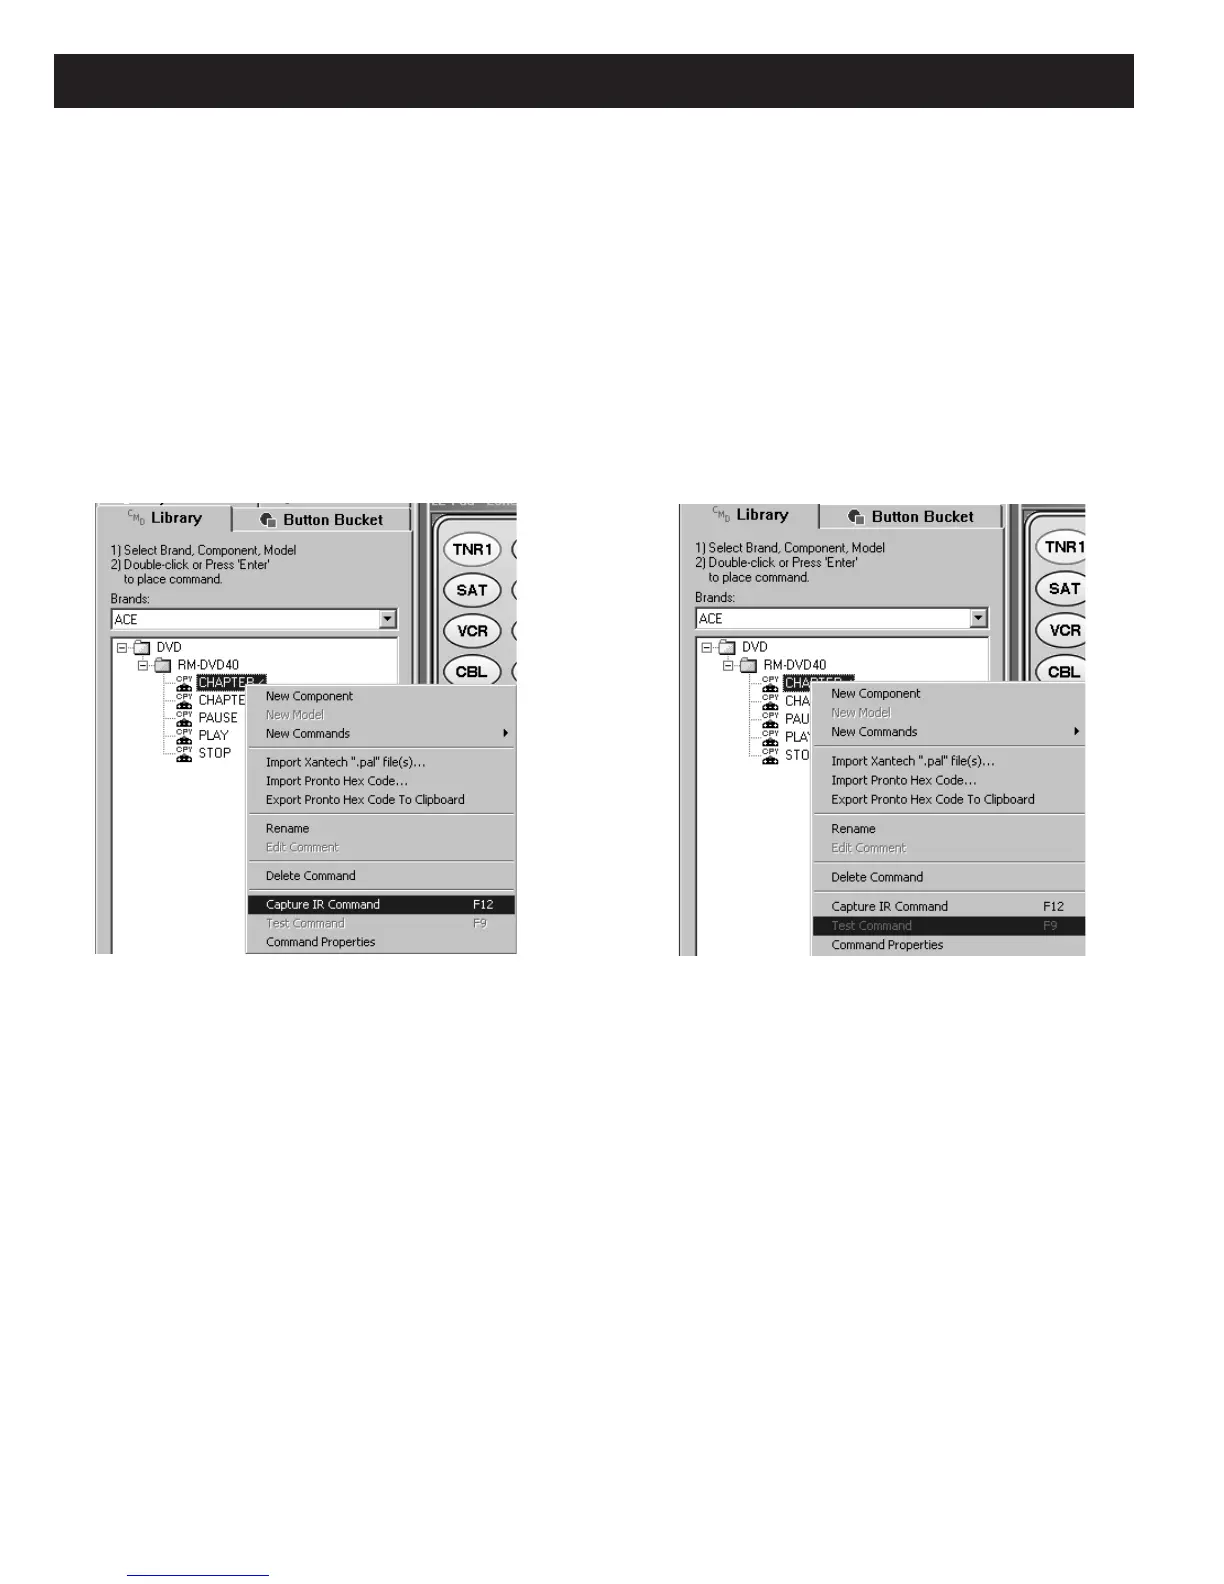
9. Next, left click the desired command and press F12 (or right click the desired command and left click “Capture IR
Command” in the pop up). (See Figure 34) An “IR Command Capture” pop-up will appear.
10. At this point, press and hold the corresponding key on the “teaching” remote until the green ACTIVITY INDICATOR on the
LTM-1.0 turns off. The word “Capturing…” and two bars in the pop-up show progress. About 5 seconds are allowed to
capture the command. If the command is learned, the words “Capture Successful” appear momentarily and the com-
mand name in the list will turn RED. If not, “Capture Unsuccessful” appears and the command name remains BLACK.
11. To
test the command, left click the command and press F9 (or right click the command and left click “Test Command”
in the pop up). (Refer to
Figure 47)
NOTE: The ability to test commands assumes there is an emitter attached to the component under test and the emitter
is plugged into the IR OUT jack on the LTM-1.0. Or simply aim the BLASTER EMITTERS on the LTM-1.0 at the com-
ponent under test (up to 30 feet away).
Remember, for the BLASTER EMITTERS to work, the emitter must be
unplugged from the IR OUT jack!
12. Repeat steps 8-11 for all remaining IR commands as needed. Once learned commands can be used in any EZ-Tools
project in the normal manner.
EXISTING BRANDS
To add a new model to an existing brand, proceed as follows:
13. Select the brand in the CMD Library (i.e., Carver).
14. To add a new Component (i.e., DVD), do so as in step 4 above.
15. Add a Model Name as in step 5 and Command Names as in step 6.
16. Repeat steps 8-11, as necessary, to learn all desired commands.
Figure 47
Capture IR (or Press F12)
Figure 48
Test IR (or Press F9)

 Loading...