MZC-88 Installation Instructions Page 47
DEFAULT PROJECT - Begin programming by opening the default “MZC88DEF1.etp” project (Refer to Figure 31) or by
creating a new project. It is highly recommended to start with the default project that comes factory installed on the MZC-
88 and with EZ-Tools. The default project matches the layout of the included MKP-8.1 Keypads and has a good amount of
the source switching and volume commands already in place. The default project can be modified to suit the requirements
of a given installation for additional keypad modules and changes in source components.
NEW PROJECT - To start an entirely new project, left click “New … MZ-88 Project” from the File menu or click the dual
Green MZC-88 Icon. Type in a New Project Filename for the project, such as “JonesHome” and click “Save”. This places
the filename in the
“Projects” folder in the EZ-Tools directory. A typical path to the Projects folder would be “C:\Program
Files\SpeakerCraft\EZ Tools\Projects”.
ASSIGNING IR COMMANDS TO BUTTON KEYS
If the default project keypad button layout will be used as is, IR commands to control the source components can now be
assigned. IR commands are obtained from the embedded EZ-Tools Command Library. IR commands can also be learned into
the Library for use in any EZ-Tools project. This example will use the existing commands from the library.
10. With the “MZC88DEF1.etp” default project open, save it with a new file name, such as
“JonesHome”, by using “Save
As…” in the File menu. This will retain the default project “as is” for future use.
11. Start with the
Source buttons in Zone 1. Zone 1 will be cloned to the other zones, after it has been configured. The
default program already has non-IR commands (MZC-88 internal commands indicated with a red asterisk *) programmed
for source/zone routing, so only the source IR function commands need to be added. The source IR commands will
typically create an IR macro (sequence) of commands to turn on a source component, place it in Play, and turn on any
other devices that may need to come on with the single press of a Source button. Left click on the
CMD LIBRARY tab. A
Brands window appears with device folders just below. (Refer to Figure 32)
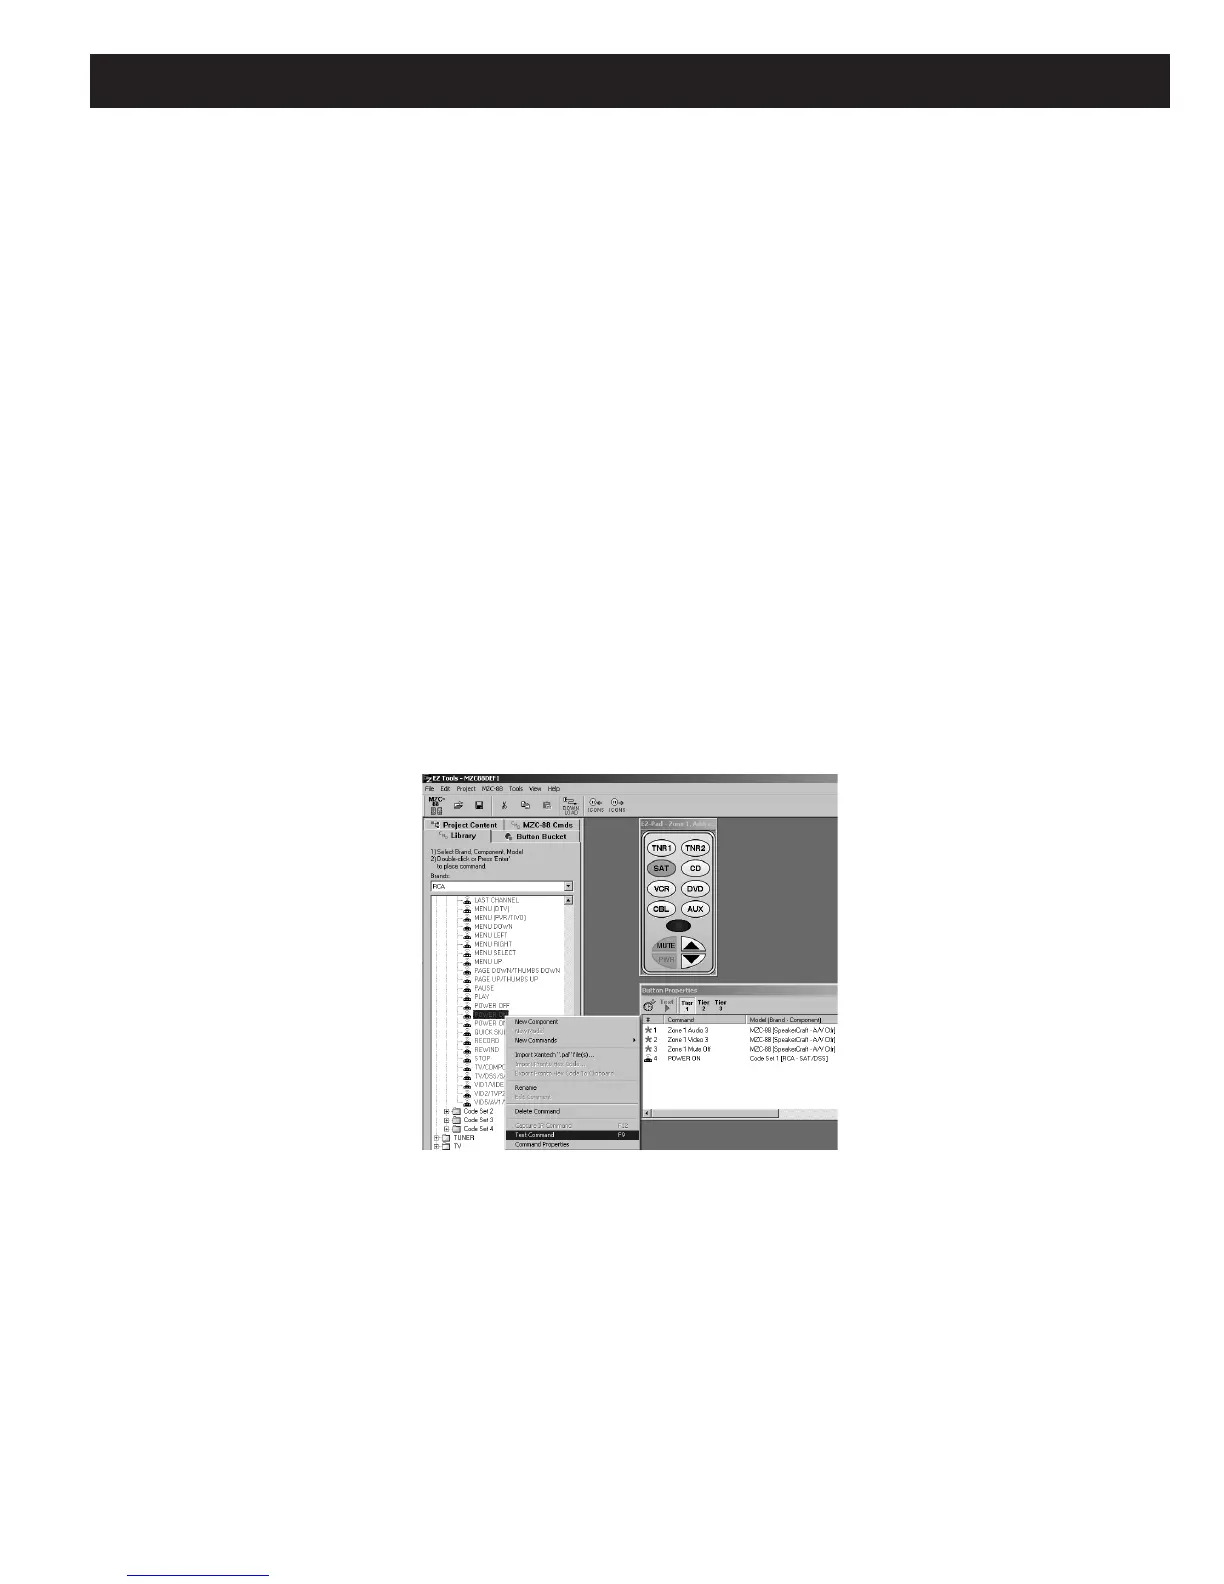
Figure 32
Assigning IR Commands to Button Keys
12. Left click a Source button (i.e. SAT) on the virtual keypad. Then left click and scroll the Brands list for the component
brand being used for SAT (i.e. RCA).
13. Double left click the SAT/DSS folder. A list of Code Sets appears. At this point it may be necessary to test the commands
in more than one code set to find commands that work with a specific component.
14. To
TEST the commands, open a Code Set folder and left click a POWER command to highlight it. Press F9 to test the
command. (When a command is sent by F9, the Source keys on all connected keypads will flash. The power command
will be sent to the selected Source and Zone IR Outputs as well as the Common IR OUT). Once a power command is
found to work, usually all the others for that device will work as well. If not, try other code sets.
NOTE: This test assumes the Transfer Cable is connected between the computer running EZ-Tools and the MZC-88, all
source and system components are connected, all IR emitters are attached and plugged in and all devices are powered
up.

 Loading...