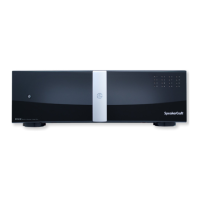
Page 34 MZC-88 Installation Instructions
Keypads should typically be located near a door or entry point to a room. Avoid mounting keypads, IR receivers, volume
controls or any other control devices in areas of high moisture such as sinks, showers, bathtubs etc. Care should be taken to
avoid mounting Keypads and IR receivers in locations subject to direct sunlight. Sunlight can interfere with system operation
and, in time, cause deterioration to the keypad and trim plate materials.
WARNING: Never mount a keypad, IR receiver or volume control in the same j-box as high voltage devices. This can af-
fect system performance and is a violation of electrical codes in some areas. (Be aware of local electrical and building codes.
These codes can affect the type of j-boxes permitted, mandate wire specifications and regulate other aspects of the installa-
tion that may not pass inspection if necessary.)
ZONES
CONNECTIONS - ZONES
KEYPADS
1. Connect each EZ-Pad cable run to the appropriate Zone EZ-PAD. When not using RJ45 connectors, be sure to maintain
consistent color code when making connections . When using RJ45 connectors, be sure the RJA-1.1 adaptor pins are
oriented properly. See Sections: WIRING and EZ-PAD CONFIGURATION for additional information.
2. Install each EZ-Pad into a proper low-voltage J-box and finish with an appropriate trim plate (not included).
SPEAKERS
DIRECT SPEAKER CONNECTION TO MZC-88 OR AMPLIFIER
1. Connect ZONE SPEAKERS L+,L-/R-,R+ OUTPUTS from the MZC-88, or an external amplifier, to the appropriate Zone
Speaker pair.
2. Strip approximately
1
⁄4 inch of each lead and twist the stripped ends so there are no loose strands that can cause shorts.
3. Connect as appropriate to the L+,L-/R-,R+ terminals on each speaker.
4. Visually check for loose ends. Lightly pull the wire to confirm connection.
5. Install speakers into dry-wall cut-outs or SpeakerCraft InstaLLock™ New Construction Brackets (if used) as appropriate.
SPEAKER CONNECTION TO EPR-1.0 EZ-PAD RELAY MUTING MODULE
1. Connect ZONE SPEAKERS L+,L-/R-,R+ OUTPUTS from the MZC-88 or an external amplifier to the EPR-1.0 AMPLIFIER Termi-
nal L+,L-/R-,R+ INPUTS. (Refer to Figure 19)
2. Strip approximately
1
⁄4 inch of each lead and twist the stripped ends so there are no loose strands that can cause shorts.
3. Connect the EPR-1.0 SPEAKERS L+,L-/R-,R+ OUTPUTS to the L+,L-/R-,R+ terminals on each speaker pair as appropriate.
4. Connect the WHITE STRIPE LEAD from the EPR-1.0 to the +RELAY Terminal on the MKP-8.1.
5. Connect the BLACK LEAD from the EPR-1.0 to the -RELAY Terminal on the MKP-8.1
6. Visually check for loose ends. Lightly pull the wire to confirm connection.
7. Install speakers into dry-wall cut-outs or SpeakerCraft InstaLLock™ New Construction Brackets (if used) as appropriate.
NOTE: EPR-1.0 Relay mute will not function without proper configuration in EZ-Tools.
VIDEO
1. Connect each video run to the appropriate Zone TV/Video Display. Terminate at zone end of RG6 as appropriate. The
zone end can be terminated with a male F-type connector and adapted to the RCA composite input or terminated with
a male RCA plug and connected directly to the appropriate input.
OTHER ZONE CONNECTIONS
Given the wide range of possibilities of MZC-88 system configurations, only keypad, speaker and video connections have
been detailed. Make all other zone connections as needed. See Sections: WIRING and CONNECTIONS - HEAD END for ad-
ditional information.

 Loading...