Page 12 MZC-88 Installation Instructions
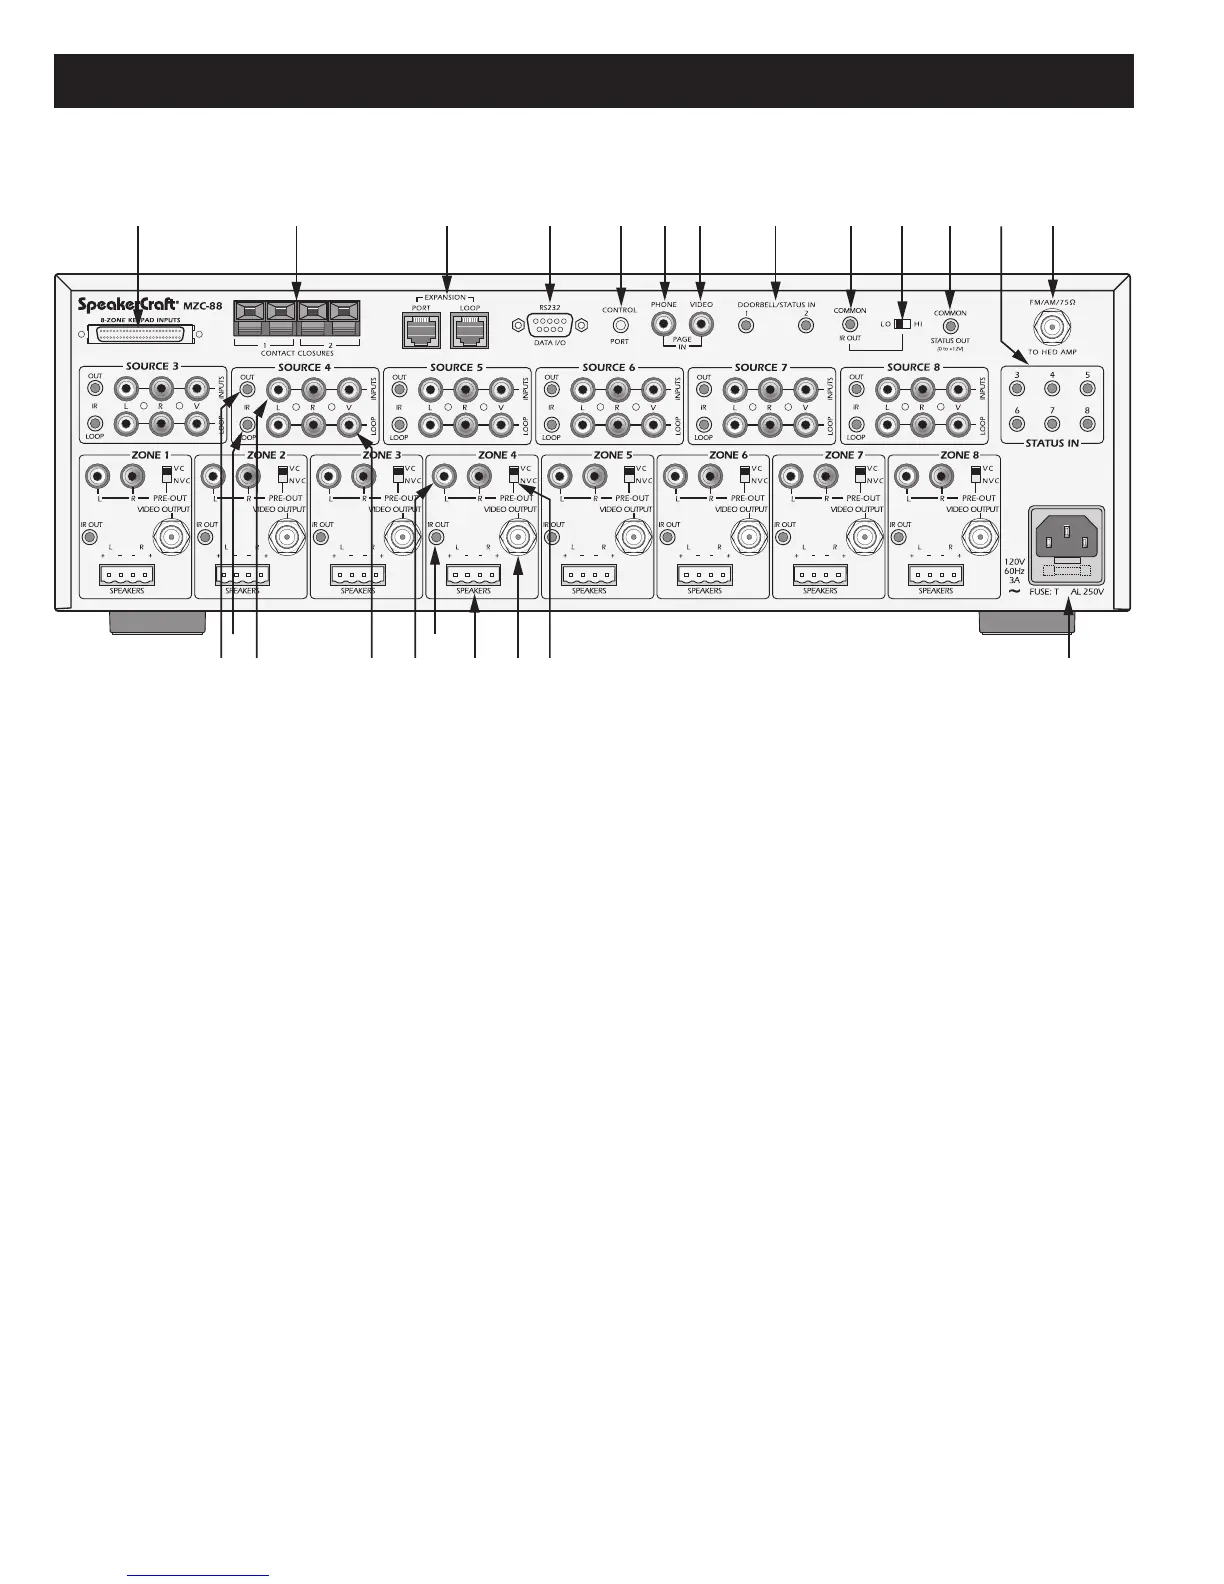
1. 8-ZONE KEYPAD INPUTS — One, SCSI terminal connects to a SpeakerCraft KCM-1.0 EZ-Connect Keypad Module
for connection of zone keypads and IR sensors.
2.
CONTACT CLOSURE — Two, single pole dry relay contacts used to activate any device that can be controlled or trig-
gered by a switch closure. These closures can be programmed within EZ-Tools to be activated by keypad presses, EZ-
Code IR, or within macro commands for Momentary, Toggle and Open/Close Paired operations. Spring loaded terminals
accept wire sizes from 28 to 14 AWG. Internal relay contacts are rated at 2A/30V AC or DC.
3.
EXPANSION PORT/LOOP — Two, RJ45 jacks primarily used for looping system data to multiple MZC-88’s in expanded
systems. These jacks can also be used for connection of specialized RS485 controlled products.
4. RS232 DATA I/O — One, DB9F terminal allows the MZC-88 to control certain RS232 compatible devices such as
source components and lighting systems.
5.
CONTROL PORT — One, 3.5mm 4-circuit mini jack allows several control functions. All Controller and keypad pro-
gramming is accomplished via this port when connected to a PC running EZ-Tools with the optional 3.5MM PLUG
TRANSFER CABLE. It also accommodates factory firmware upgrades in conjunction with the FIRMWARE UPGRADE
OFF/ON SWITCH on the Front Panel of the MZC-88. The Firmware Upgrade Switch should be in the OFF position at all
times, except, as instructed within EZ-Tools, when performing a firmware upgrade. Such upgrades ensure that the MZC-
88 has the latest functionality improvements without having to be shipped back to the factory. Another function of this
port is to control installed system components with bi-directional data via touch panels or computers using RS232 proto-
col.
NOTE: The 3.5mm Plug Transfer Cable would typically be connected to the DB9 COM Port on a PC. For computers
that do not have a DB9 COM Port, use the optional
USB/SERIAL ADAPTER CABLE. When using a USB port, connect
the
USB/Serial Adapter and the 3.5mm Transfer Cable together. Connect one end to a USB port on the PC and the
other end of the assembled cable to the Control Port on the MZC-88.
6. PHONE PAGE IN — One, RCA jack provides input for line level audio source such as telephone systems, door mics
or other audio paging sources. This jack is programmable in EZ-Tools, to turn on as an event, when triggered by the
DOORBELL/STATUS IN Jacks, item 8.
Figure 4
MZC-88 Rear Panel Features
1 2 3 4 5 6 7 8 9 10 11 12 13
14
15
16
17
18
19
20 21 22 23
10
MZC-88 REAR PANEL

 Loading...