Page 66 MZC-88 Installation Instructions
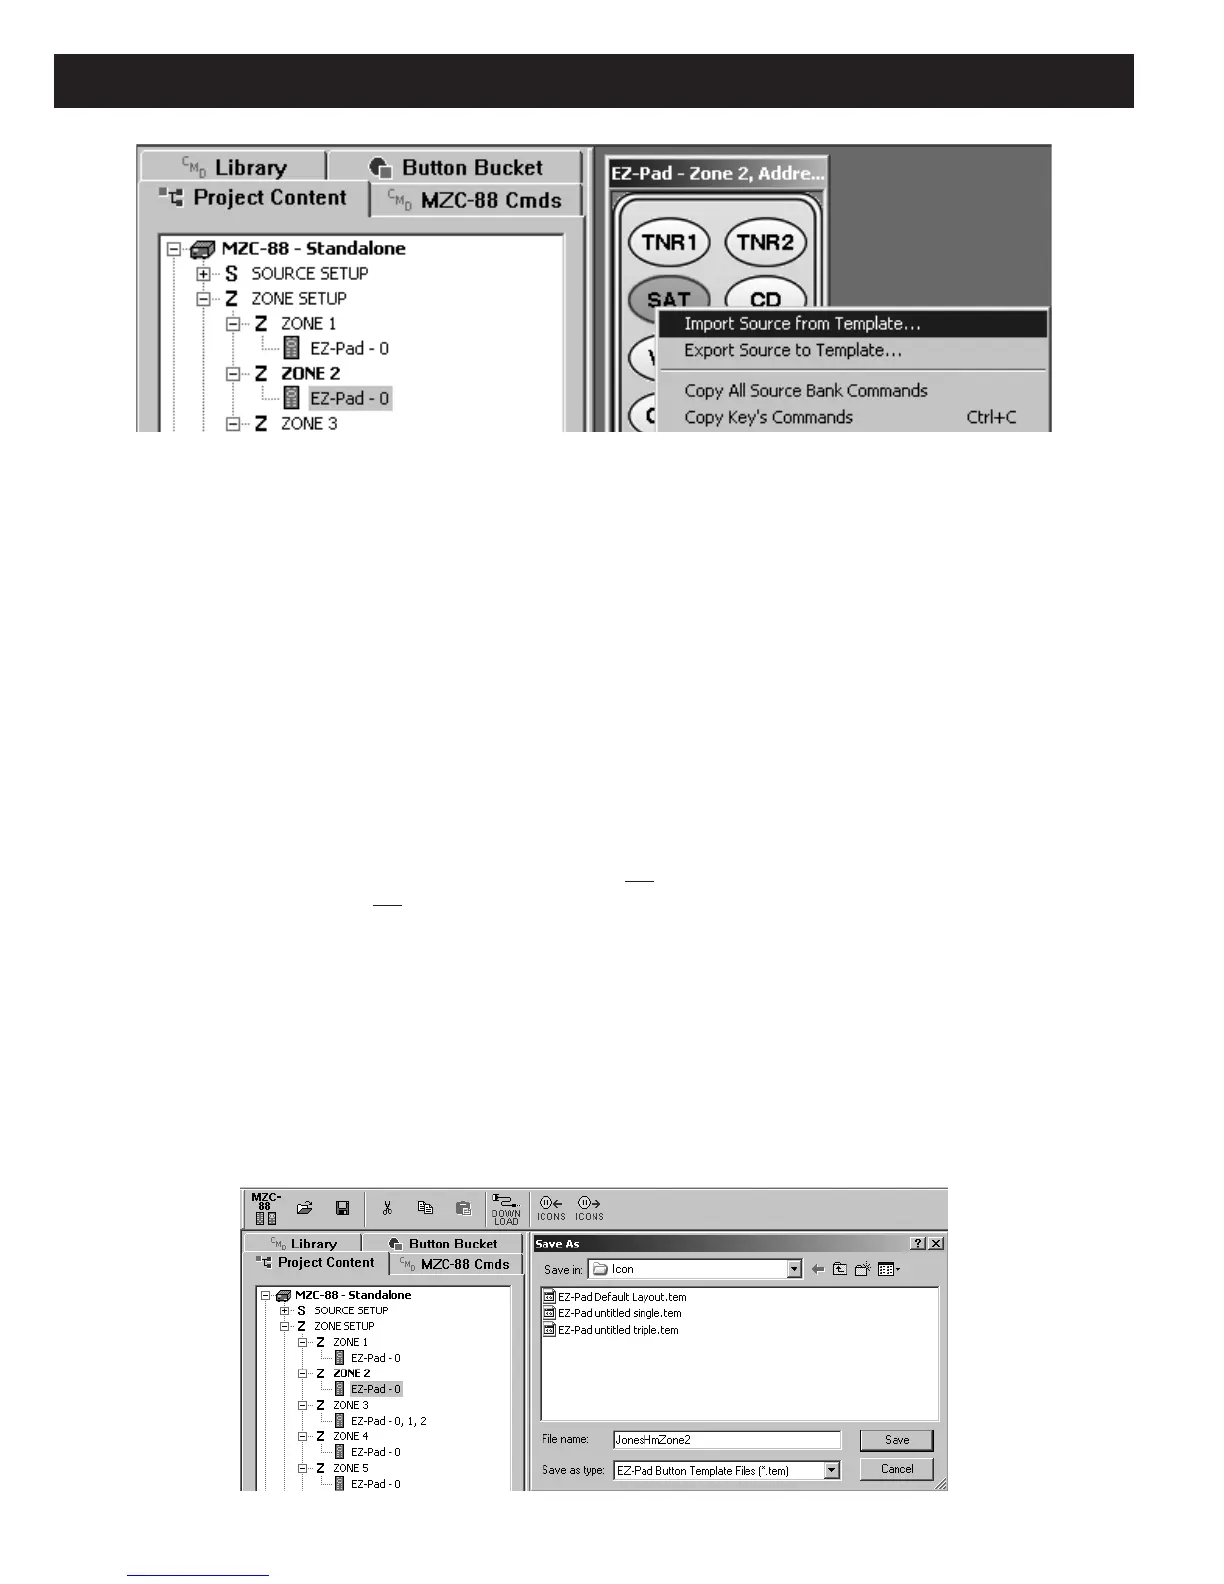
Figure 55
Importing a Source Template
3. Left click on the file to be imported (i.e., SAT Receiver), and then Open. A prompt will appear that notes the import assumes
identical locations for all function buttons as they existed in the previous project from which the template was created, and
that every button under this source will be overwritten (with the template commands). Click Yes.
4. The new Source bank has all the programming loaded with all data that exists in the template file.
5. Repeat this for each Source Bank Template to be imported.
CAUTION: If a new project has different Source assignments for the SOURCE INPUTS and the DOORBELL/STATUS INPUTS,
those changes will need be made manually, to have correct selection and IR control of Sources and correct synchronization
for Power Management if the Doorbell/Status Inputs are used for Power Management.
ICON TEMPLATES
EZ-Pad Icon files can be made into templates. In addition, EZ-Tools comes with an EZ-Pad Default Layout template that
matches the buttons that are factory pre-installed on the actual MKP-8.1 Keypads included with the MZC-88.
NOTE: These Icon Templates import and export Icon sets only, not command sets. Also, icon templates apply to
Function and Numeric buttons only, not to Source buttons.
To save time, these can be used, perhaps with a few changes, to match the keypad button layout both in EZ-Tools and on
the actual EZ-Pads.
EXPORTING ICONS AS TEMPLATE FILES
1. Open the project from which an Icon Template is to be exported. Click on the desired zone (i.e., Zone 2) under Project
Content.
2. Click the “---> ICONS” (Export) symbol in the Toolbar. At this point, type a File name in the Save As pop up by which to
identify that particular Icon Template File (i.e., “JonesHmZone2”) and click Save. (Refer to Figure 56)
Figure 56
Exporting and Saving an Icon Layout Template File

 Loading...